Published March 8, 2021 12:16PM
Doing Your First Triathlon This Year? How to Handle Transitions Like a Pro
Follow these setup tips to make your first multi-sport race go smoothly.
(Photo: Getty Images)
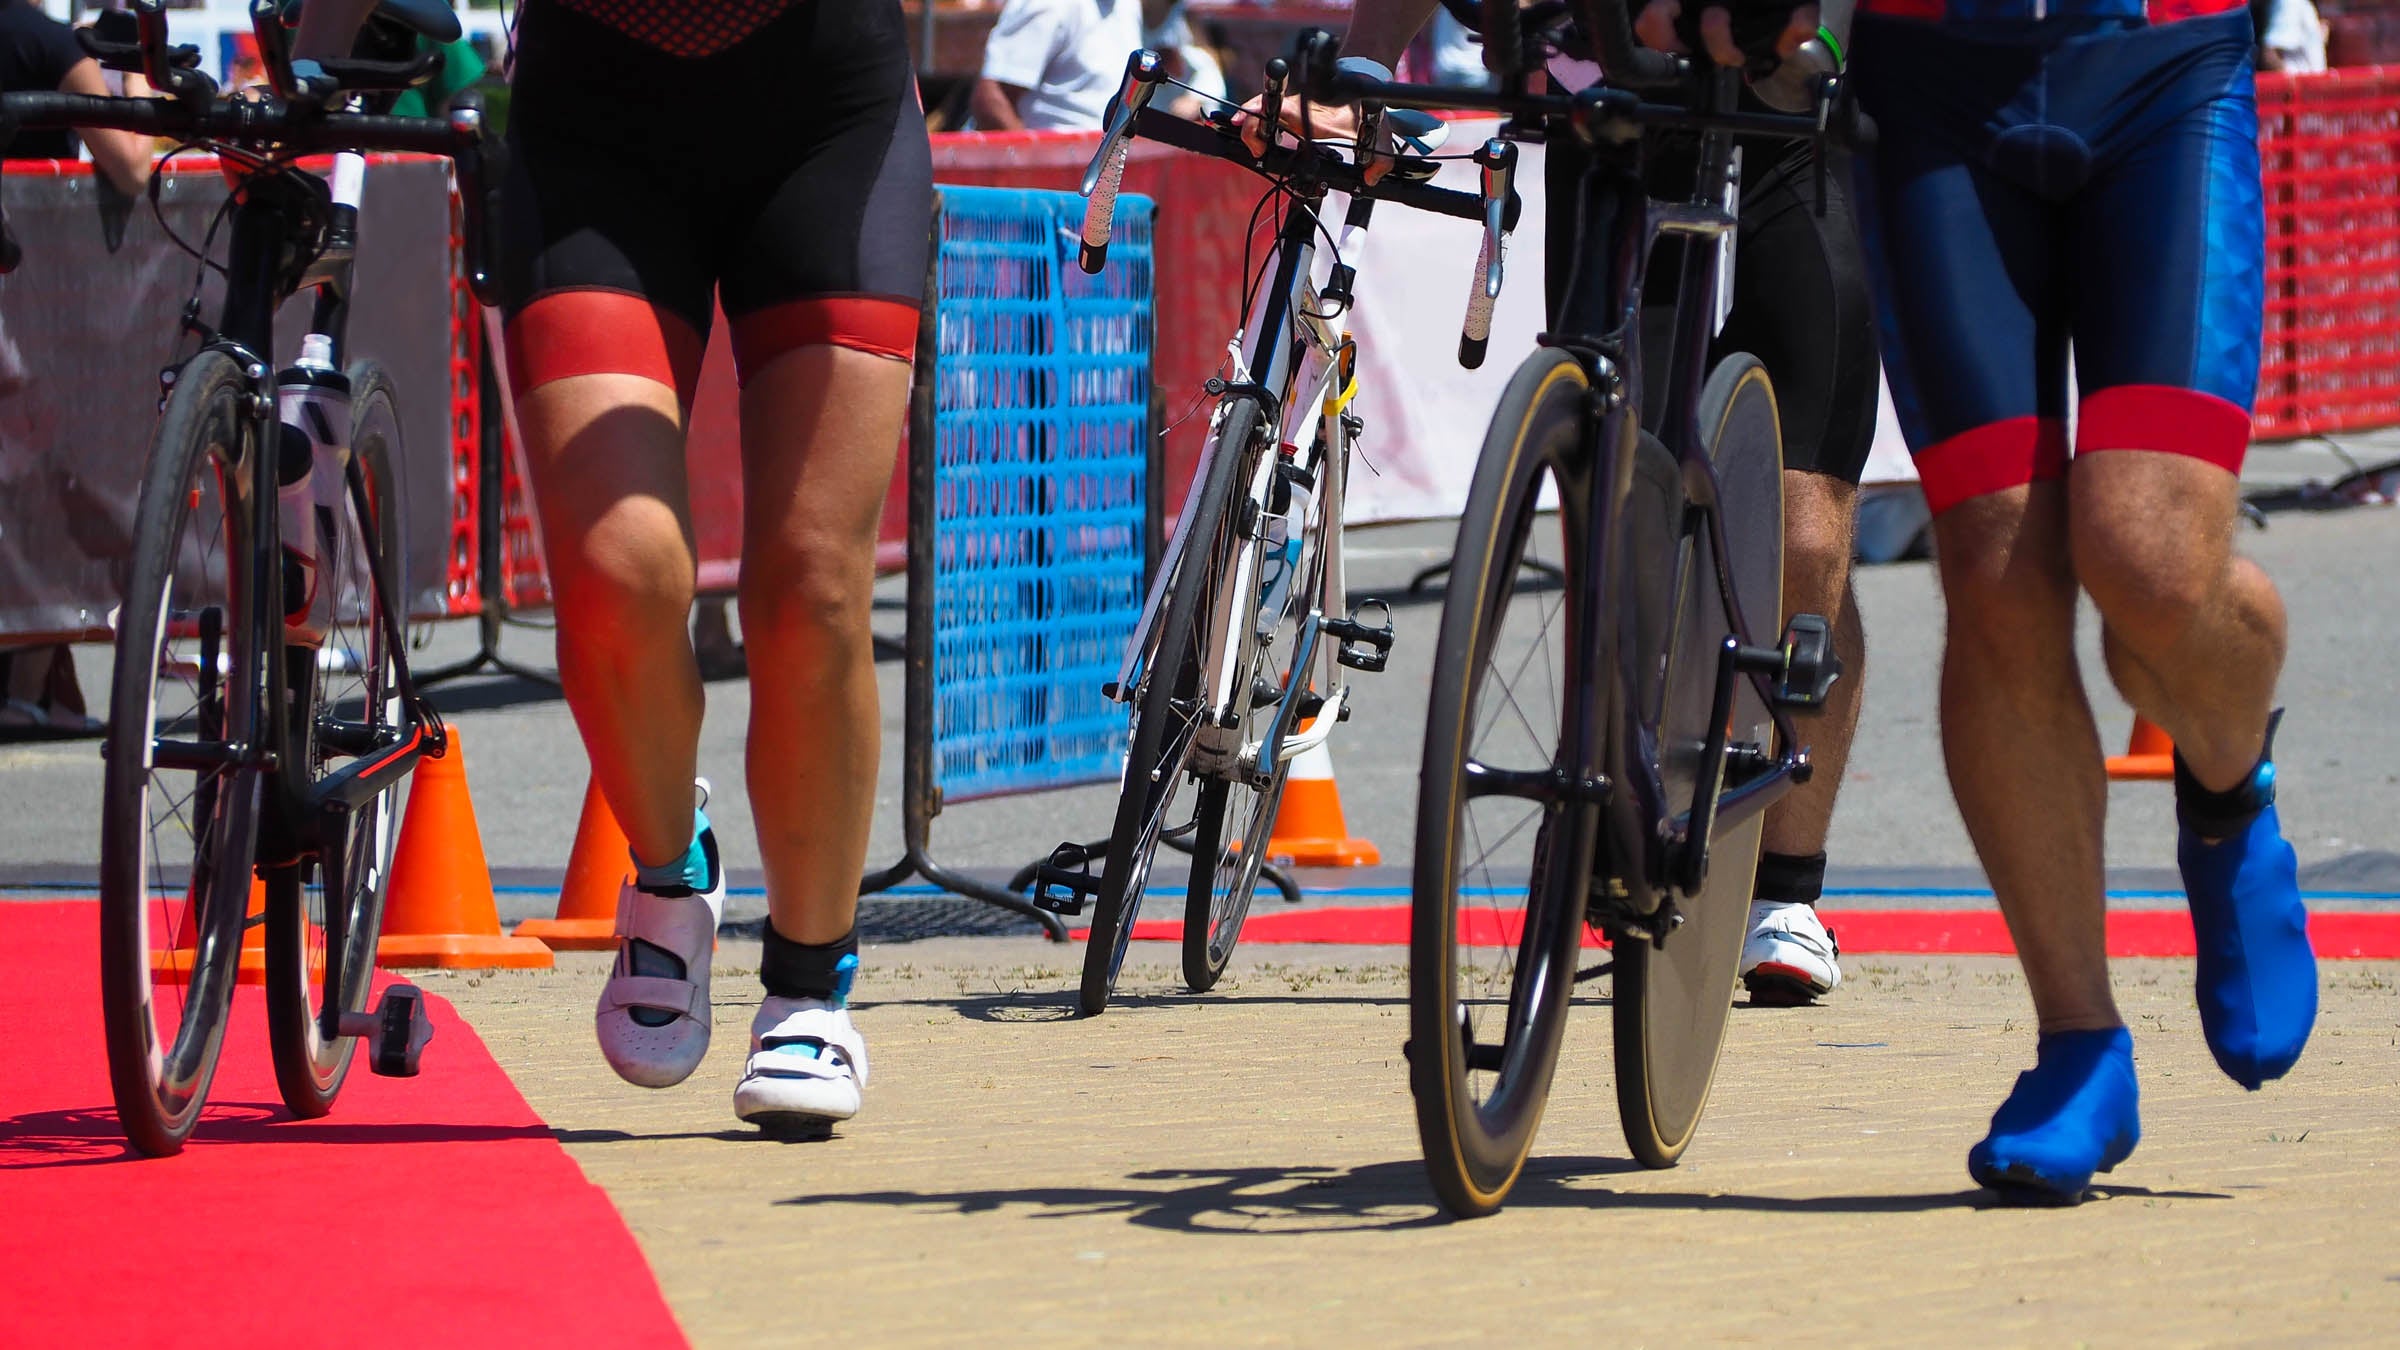
One of the things that makes triathlon such a unique sport is that the outcome is determined, in part, by how fast you can change from one sport to the next. Following the swim you will hustle to the transition area to prepare for the bike portion of the race. This is called “transition #1” or “T1.” After the bike ride you will come back to the transition area again and change equipment to start the run. This is “T2.” Time spent in the transition area changing shoes, putting your helmet on or taking it off, and doing everything else necessary to get out on the course again counts as a part of your total race time. The clock doesn’t stop until you cross the finish line. For your first triathlon, don’t be concerned about your time. But you do want your transitions to be smooth and efficient.
Since you are not allowed to have anyone help you, it’s wise to organize your personal transition space and to rehearse your transitions several times in the final weeks before the race. The best time to rehearse T2 is when you do a combination or “brick” workout. T1 is a bit easier to do than T2.
T1 and T2 are usually in the same area, but in a few races there may be two entirely different transition sites. This is rare for sprint- and Olympic-distance races but could be the case for yours. Be sure to find out well in advance. When the transitions are in different locations, often separated by a few miles, organizing them is more difficult and even more critical. It’s easy to make a setup mistake. If, for example, your running shoes are placed at T1 or your helmet is at T2, you won’t be able to continue and will be listed by the race director as a “DNF”—did not finish.
Your Transition Stall
The race director often designates your personal transition stall. If this is the case, you will set up your transition gear in that small, assigned space. If you are free to set up your stall wherever you want in the transition area, it is usually a good idea to locate it near the T1 exit—the place where you leave transition to head out on the bike course. This is especially important if you will be wearing bike shoes instead of running shoes in the bike segment. In this location you can put your bike shoes on and then walk or run slowly with your bike to the exit where you can mount it, with minimal time spent jogging in clumsy bike shoes.
ADVERTISEMENT
At the end of your bike ride, when you are approaching the transition—about 100 yards or so before you get there—slow down by coasting. If you have clipless pedals, you can save some time if you unfasten your shoes and slip your feet out. Completely remove one first and then the other. Put your feet on the top of the shoes to finish pedaling easily to T2. Stop the bike and step off when instructed to do so. This will be just before the entrance to T2. Then you can run the bike to your stall barefoot with your shoes hanging from the pedals. This can be tricky, so be sure to practice several times before race day. This second run through the transition area with your bike will be longer but easier without clunky bike shoes on your feet. If you bike in running shoes, none of this is necessary, and you can set up your stall wherever it’s convenient.
Transition Setup
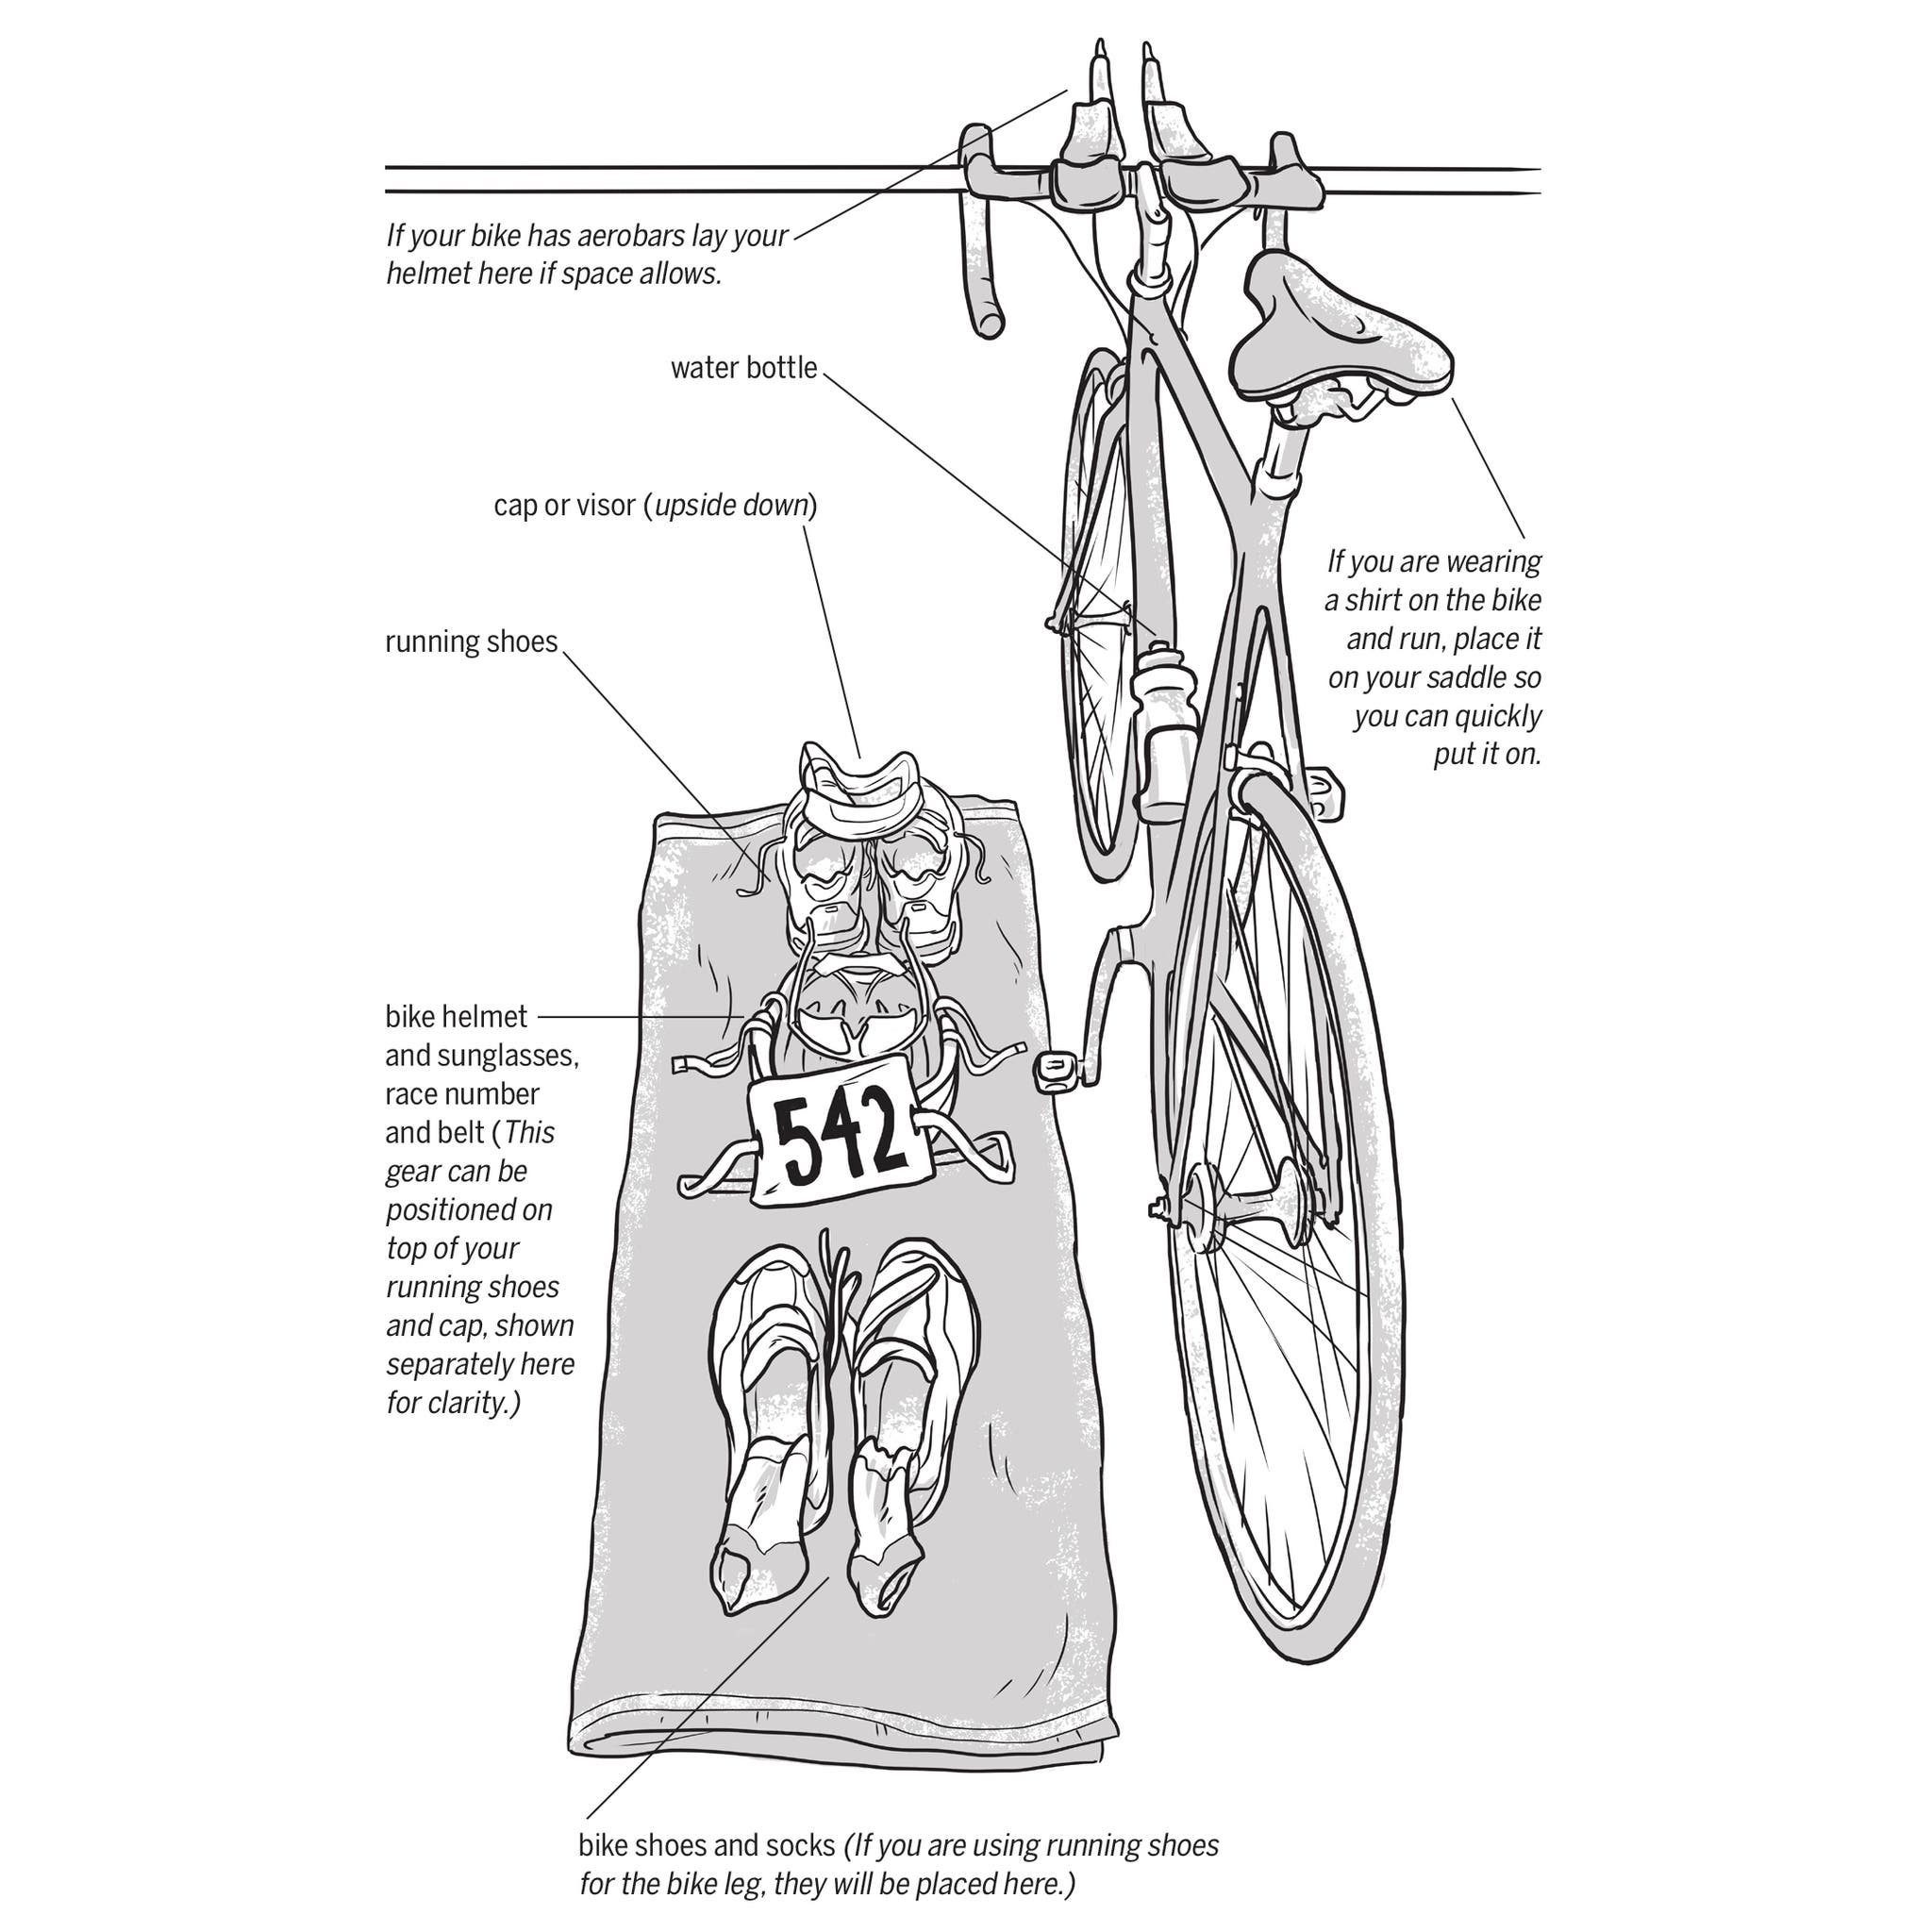
Illustration: Charlie Layton
ADVERTISEMENT
Now let’s take a look at how to organize your equipment at your personal transition stall. The transition area will generally have a simple bike rack made from pipes that looks like a big sawhorse or barricade. There are two ways you can put your bike on it. You can place the brake levers over the top of the rack so that it hangs from the handlebars with the front wheel off the ground, or you can place the nose of the saddle over the top of the rack so that the rear wheel is suspended. Either way is common, but the second may be necessary if you have some types of aerobars, or if you’re riding a mountain bike or other bike with flat or straight handlebars. The race director may even specify how it is to be racked. If so, this will be in the instructions in your race packet or may be described at the pre-race meeting. Look around to see how others are racking their bikes.
Mount your water bottle—filled with the sports drink of your choice and ready to go—on your bike on race morning. You’ll only need one such bottle on the bike for a sprint- or Olympic-distance race. On the run there will be aid stations, so you won’t need to carry any bottles then.
Once your bike is racked, set up your transition stall. Start by spreading a bath towel on the ground on the opposite side of the bike from the chain. On this towel place your bike shoes (if you will be using these). Put them on the end of the towel farthest from the rack with the straps unfastened and as open as you can get them. If using running shoes instead, place them in the same manner.
ADVERTISEMENT
On top of your shoes place your socks (if you will be using them). Most triathletes don’t because it is difficult to put socks on wet feet. During your practices, try biking and running a few times without socks to see how you do. If you get hotspots or blisters on your feet, it’s best to take a few seconds to put on socks in the transition. In this case find the socks that go on the easiest with damp feet. Try this a few times before race day.
Next, place your running shoes (if you don’t ride in them) on the opposite end of the towel with the toes pointing away from you so you can easily slip into them. The laces should be loose and the tongue open wide for quick entry. This is where elastic laces or “lace locks” come in handy, as tying shoes in transition can be clumsy. These lacing systems are inexpensive and can be purchased in most running and triathlon stores. They are worth the small cost. Trying to tie laces while breathing hard and in a hurry usually means the laces will soon come untied.
Place your running cap upside down on top of your running shoes so you can quickly slap it on before putting on your shoes.
ADVERTISEMENT
If you are using aerobars, lay your helmet upside down on the handlebars with the chin strap unclasped and the straps spread wide. The front of the helmet should point toward your saddle. If you are not using aerobars, lay your helmet upside down on top of your hat and running shoes. In either case, place your sunglasses inside your helmet opened up, with the lenses down.
Lay the shirt you will wear on the bike and the run on your saddle in such a way that you can slip it on. Make sure you find one that goes on easily when you are wet. Practice this several times in the last couple of weeks before the race.
It’s not necessary, and may prove to be somewhat of a distraction, but if you’re used to biking and running while watching your heart rate, you may want to wear your heart rate monitor in the triathlon; most triathletes do. If you want to, open the chest strap clasp and lay it on top of your shirt.
ADVERTISEMENT
Most races require you to have a race number both on your bike and on your body throughout the bike and the run. If there is a number to be placed on your bike, the race instructions will explain where it is to be mounted. If the race gives you two identical numbers to be worn on your body throughout the bike and run portions, you can pin these to your shirt’s front and back the night before. If they give you only one number, which is common, get a cheap elastic race belt with an easy-to-use clasp and use a safety pin to secure the number to the middle portion of it that would normally be on your backside when the belt is worn. Start the bike leg of the race with the belt slid around so that the number is on your back where race officials can easily see it. Then when you start the run, you can simply slide the belt around your waist so that the buckle is on the back and the number is on the front, where race officials can once again easily see it as you’re approaching the finish line. Again, be sure to try this belt several times when rehearsing T1 and T2.
If you wear a race number belt during the race, lay it on top of your sunglasses and helmet with the buckle unclasped. The setup I’ve described here may sound overly structured, but I can tell you from experience that if you do it this way your race will be much smoother, as you’ll know where everything is and there will be no fumbling. There is more panic and chaos during transition than at any other time in a triathlon. Most of this comes from those who are sloppy and unprepared. A bit of structure and some rehearsal will make the day much more fun for you.
Adapted from Your First Triathlon, 2nd edition, by Joe Friel with permission of VeloPress.