Published March 8, 2018 06:00AM
How You Complete Your Swim Stroke Is Key
There are a few key technique points that will create a successful recovery and enable an efficient underwater pull.
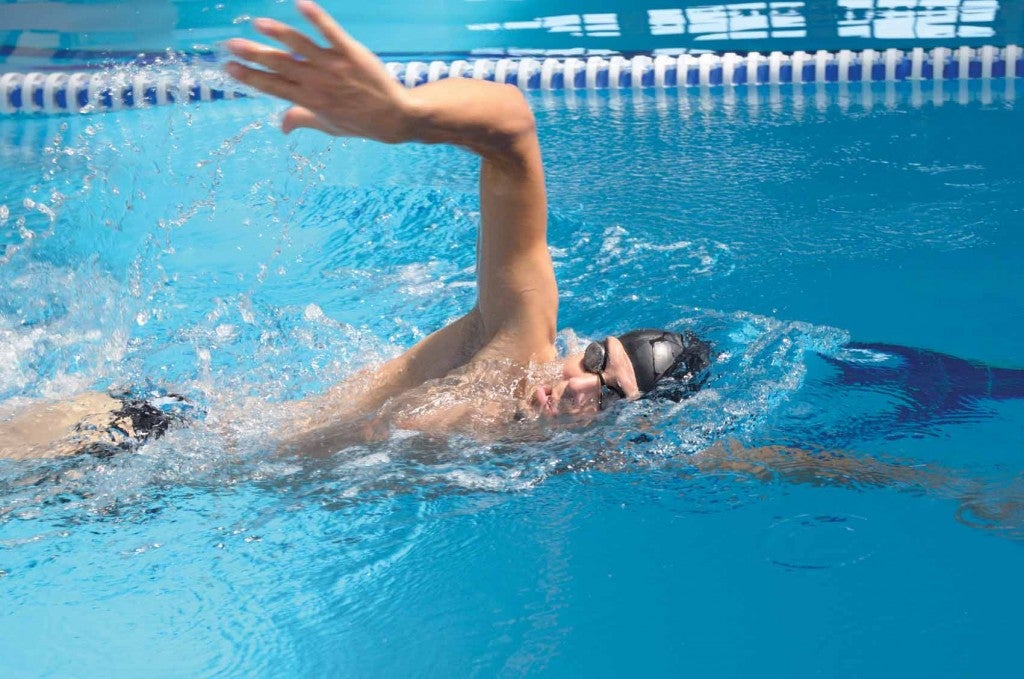
Photo: iStock
How you complete your stroke above the surface can help (or hinder!) your power underwater.
While no two athletes’ recovery will be identical, there are a few key technique points that will create a successful recovery and enable an efficient underwater pull.
Yes, the recovery has a direct effect on the underwater pull. Do a simple test to understand this concept: Rub your stomach and pat your head at the same time. It is difficult to do two different motions with your arms at once. Therefore, what you do with your arm out of the water (recovery phase) will affect your arm under the water (pull phase). For example, a straight-arm recovery will lead to a straight-arm pull, while a slow and controlled recovery will lead to the same type of pull.
ADVERTISEMENT
The recovery phase should be just that: a recovery. It should be effortless and quick, using as few muscles as possible to bring the arm and hand to the top of the stroke. A common mistake is to slowly muscle the hand forward, causing the upper body to be tense and waste energy. Instead, think about a quick swinging motion that moves the hand from the finish of one stroke to the start of the next stroke. The best drill to learn this concept is fingertip drag. Keep your fingertips in contact with the surface of the water during the entire recovery.
Fingertip drag is often incorrectly interchanged with zipper drill (where the swimmer drags his thumb up the side of the body during recovery). This puts the shoulder and elbow in a very tight and unnatural recovery position that can create impingements and overuse injuries. It also lifts the arm high out of the water, putting weight directly over the upper body, causing the swimmer to bounce through the water. Instead, try fingertip drag with a wide recovery by swinging your hand in a semi-circle away from your body while keeping your elbow high and maintaining fingertip contact with the water.
Another important part of the recovery is how the hand and arm reenter the water and get into position for the next stroke. Describing this motion is difficult, but the key is to continue swinging the hand in a semi-circle and chop it into the water. Chopping means allowing the hand and arm to enter the water at a high speed and with very little control. You can see a splash and hear a plunking noise with every stroke.
ADVERTISEMENT
A common mistake in this part of the recovery is a controlled entry by gently placing the hand in the water next to the head and sliding the arm forward into position for the next stroke. This applies force on the water in the opposite direction. After chopping into the water, let your arm drop 3–4 inches below the surface of the water as your torso rotates to start the next stroke. Check this position by noting where your shoulder is in relation to your head. It should be relaxed and down by your chin under the water, not tense and up by your ear.
RELATED – Swim Tip: Recover Right
6 keys for recovering right
– Relax shoulder, arm and wrist
– Make a quick “swinging” motion from the torso
– Keep hand away from the body
– Make the elbow the highest point
– Chop arm into the water and make a splash
– Enter fingertips into the water first
Watch Sara demonstrate the best recovery techniques below.