Published September 10, 2021 05:38PM
If you buy through our links, we may earn an affiliate commission. This supports our mission to get more people active and outside.Learn about Outside Online's affiliate link policy
Ask a Gear Guru: What Do I Need for a DIY Excursion Tri?
For a big DIY tri adventure, there are a few pieces of important gear you’ll need. We take a look at what works, what doesn’t, and why you might or might not need it.
(Photo: Karli Foster)
The Gear
With the race season coming to a close, and some races still facing limited fields—or being outright canceled—triathletes still need to get creative. The good news is that you can swim, bike, and/or run almost everywhere, and with the help of programs like our Hawaii From Home challenge, you can still make the most of your fitness, test yourself, and maybe even have a tale-worthy adventure in the meantime.
Are your (remote) coworkers’ eyes glazing over during your “You’ll never guess how much normalized power I put out on my bike leg” stories? Well, beef up that multisport anecdote with a little adventure and try a DIY excursion tri. In the spirit of our Hawaii From Home challenge, a pair of former pro triathletes—myself and Ben Collins—trained and then traveled to nearby Catalina Island last year to do our own DIY tri.
While we had all of the necessary swim, bike, and run skills to tackle the seemingly modest 2K open-water swim, 17-mile gravel ride, and 9-mile trail run, we didn’t have the DIY triathlon gear we’d need to do the whole thing unsupported—including a weekend of primitive camping on Catalina Island. Since the “triathlon bikepacking trail running excursion” market is super niche, we had to turn to a few different places to find the perfect gear. Below we share the fruits of our gear research labors and quickly break down how everything held up.
ADVERTISEMENT
RELATED: DIY Tri: Get Inspired to Put On Your Own Triathlon Adventure Video
Coros Vertix
$600, rei.com
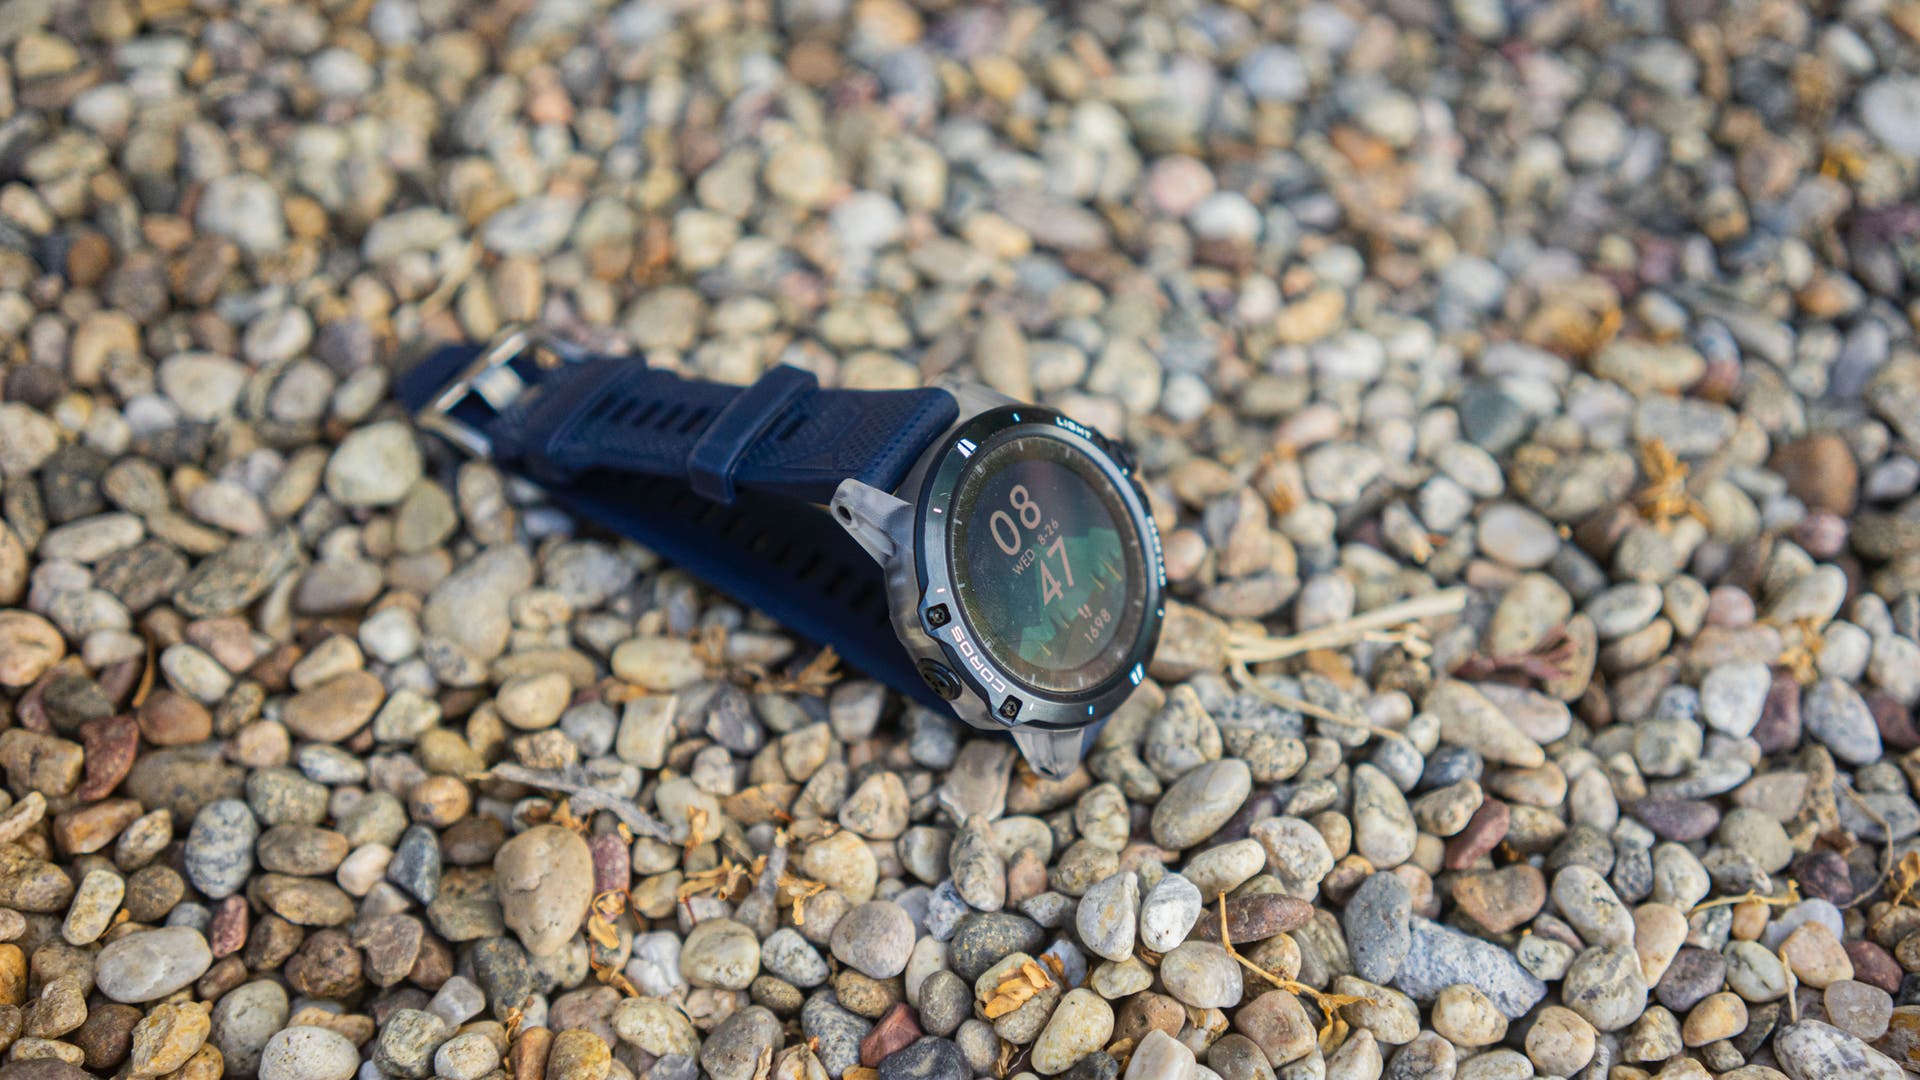
While there is a lot to love about this watch, for triathletes—especially ones attempting adventurous challenges—the biggest selling point is the staggering battery life: 60 hours in full GPS and 45 days of regular use. After having used a few similarly priced watches in the past, the Vertix stood out because it took weeks to even put a dent in the battery percentage, even with working out pretty much every day with GPS. Though you’d expect a ton of bells and whistles on a watch this pricey, it’s actually the boring stuff, like battery life or rock-solid Bluetooth hookups that seamlessly connect and disconnect (and reconnect) when you go in and out of range of your phone. It never misses a smartphone notification, it has a wonderful touchscreen for navigation, and a deceptively useful scrolling dial for times when a touchscreen would be useless (like in the open water). It’s incredibly tough (but surprisingly lightweight) and withstands insane temperatures/depths that a triathlete would probably never test, but it’s also exactly the kind of smartwatch you want when you’re tri-ing off the grid, far from home and power.
ADVERTISEMENT
Update: Coros has recently released the Vertix 2 that boasts 140 hours of GPS and 60 days of regular use. It also features a bigger, 1.4-inch screen, built-in onboard maps, and a faster processor. The Vertix 2 is also quite a bit bigger and heavier than its predecessor, but that’s no surprise. We’re putting the new version through the paces right now, so check back soon for our full review (so far so good!).
Osprey Stratos 24
$140, rei.com
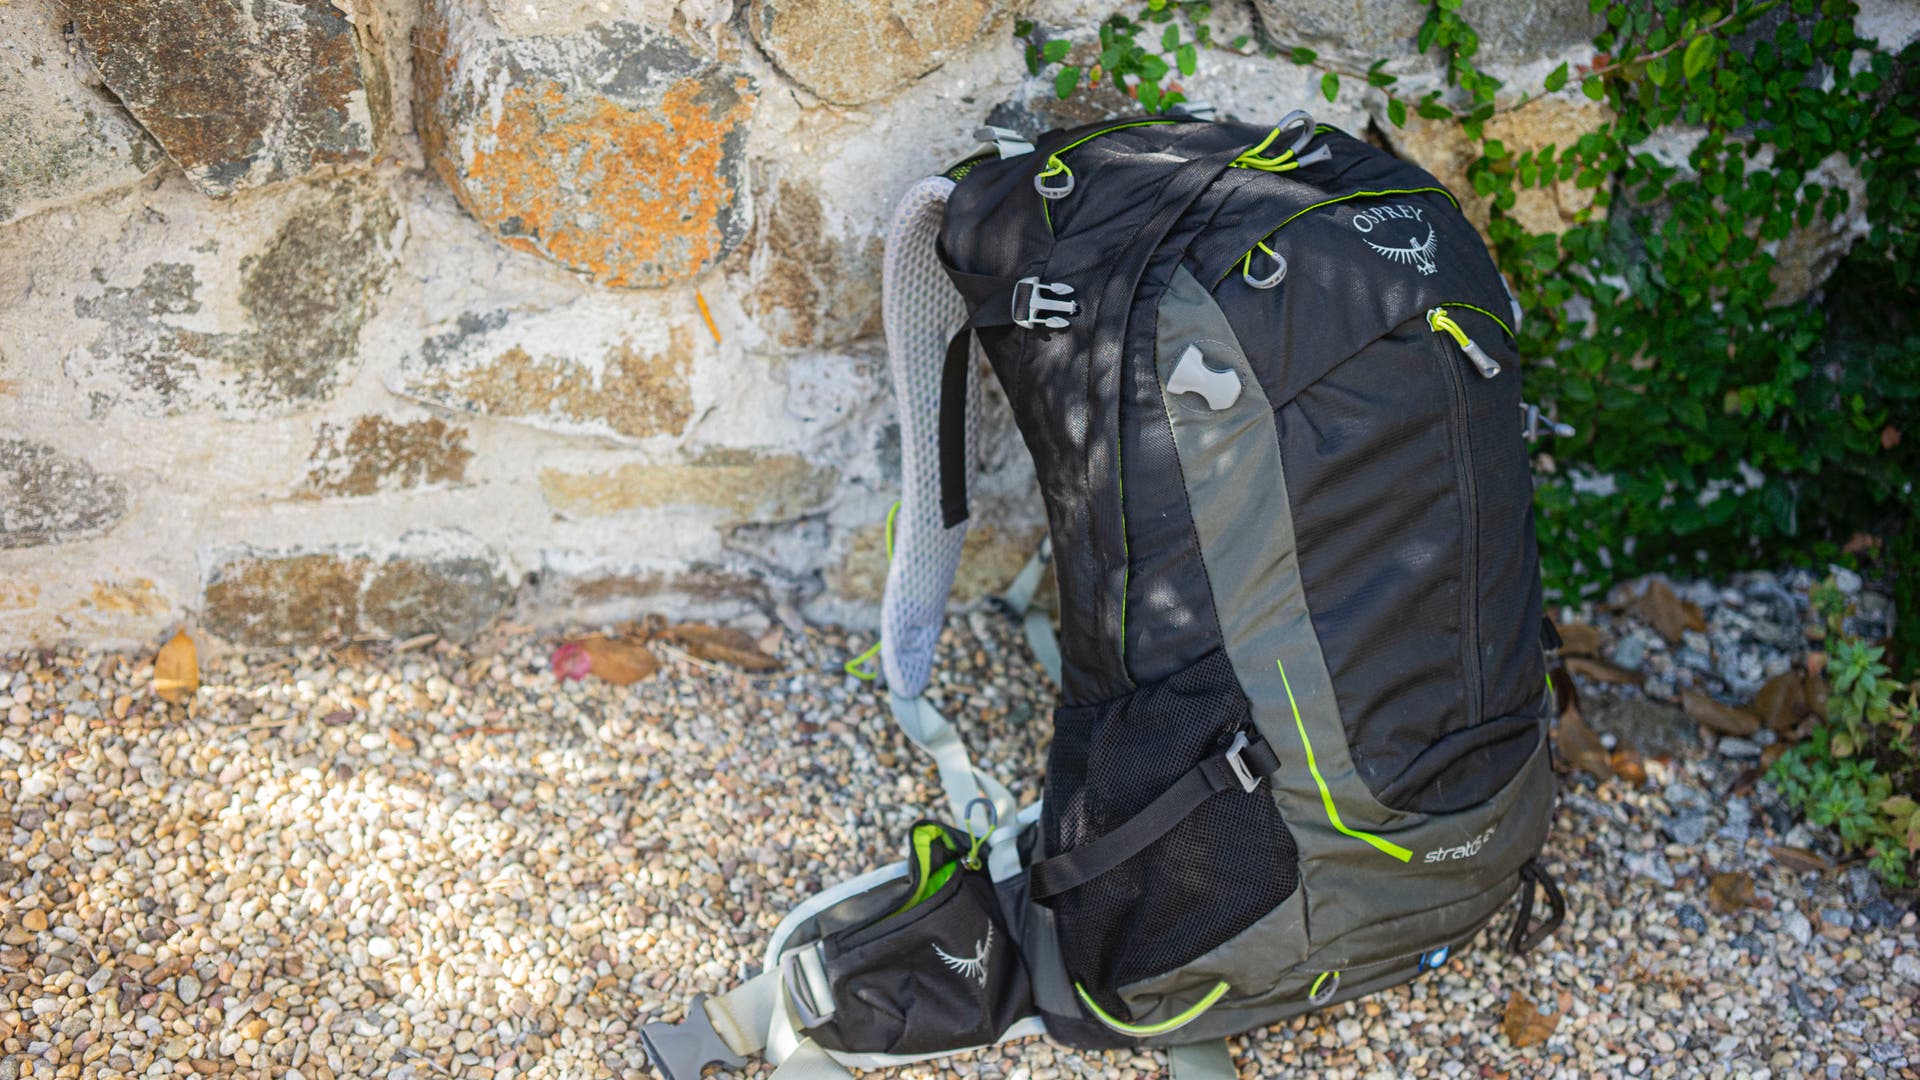
Deciding which pack to use for our adventure was tough. As someone who has done overnight run trips with a 15-liter run pack, I knew I’d need way more space, but I also figured I’d want to both bike and possibly run or hike with it. The Stratos was the perfect choice because it has just enough space for two nights of gear (when supplemented with the bike packs below), but it gets small enough, via some excellent compression, to be practical on the bike and run. While it’s not billed as a running backpack, it’s actually a sleeper choice due to the excellent mesh suspension system that helps prevent heated buildup on your back (which usually creates a torrent of sweat). Though the suspension frame won’t flex like a running backpack will, if you position it just right, it shouldn’t affect your gait too badly. Pro tip: When running or biking with the pack, set it to the smallest torso setting to keep it high on your back and off your hips; when hiking, set it to the proper size for your torso.
ADVERTISEMENT
Update: Since our DIY adventure, Osprey has updated their Talon 22 backpack, and though it has a bit less space than the Stratos 24, we actually prefer the more flexible frame and lighter weight of the Talon 22 for running and cycling. Better yet, for a few extra bucks, you can get the Talon Pro 20 with even lighter weight and more durable/versatile fabric.
Rapha Waterproof Bar Pack
$115, rapha.cc
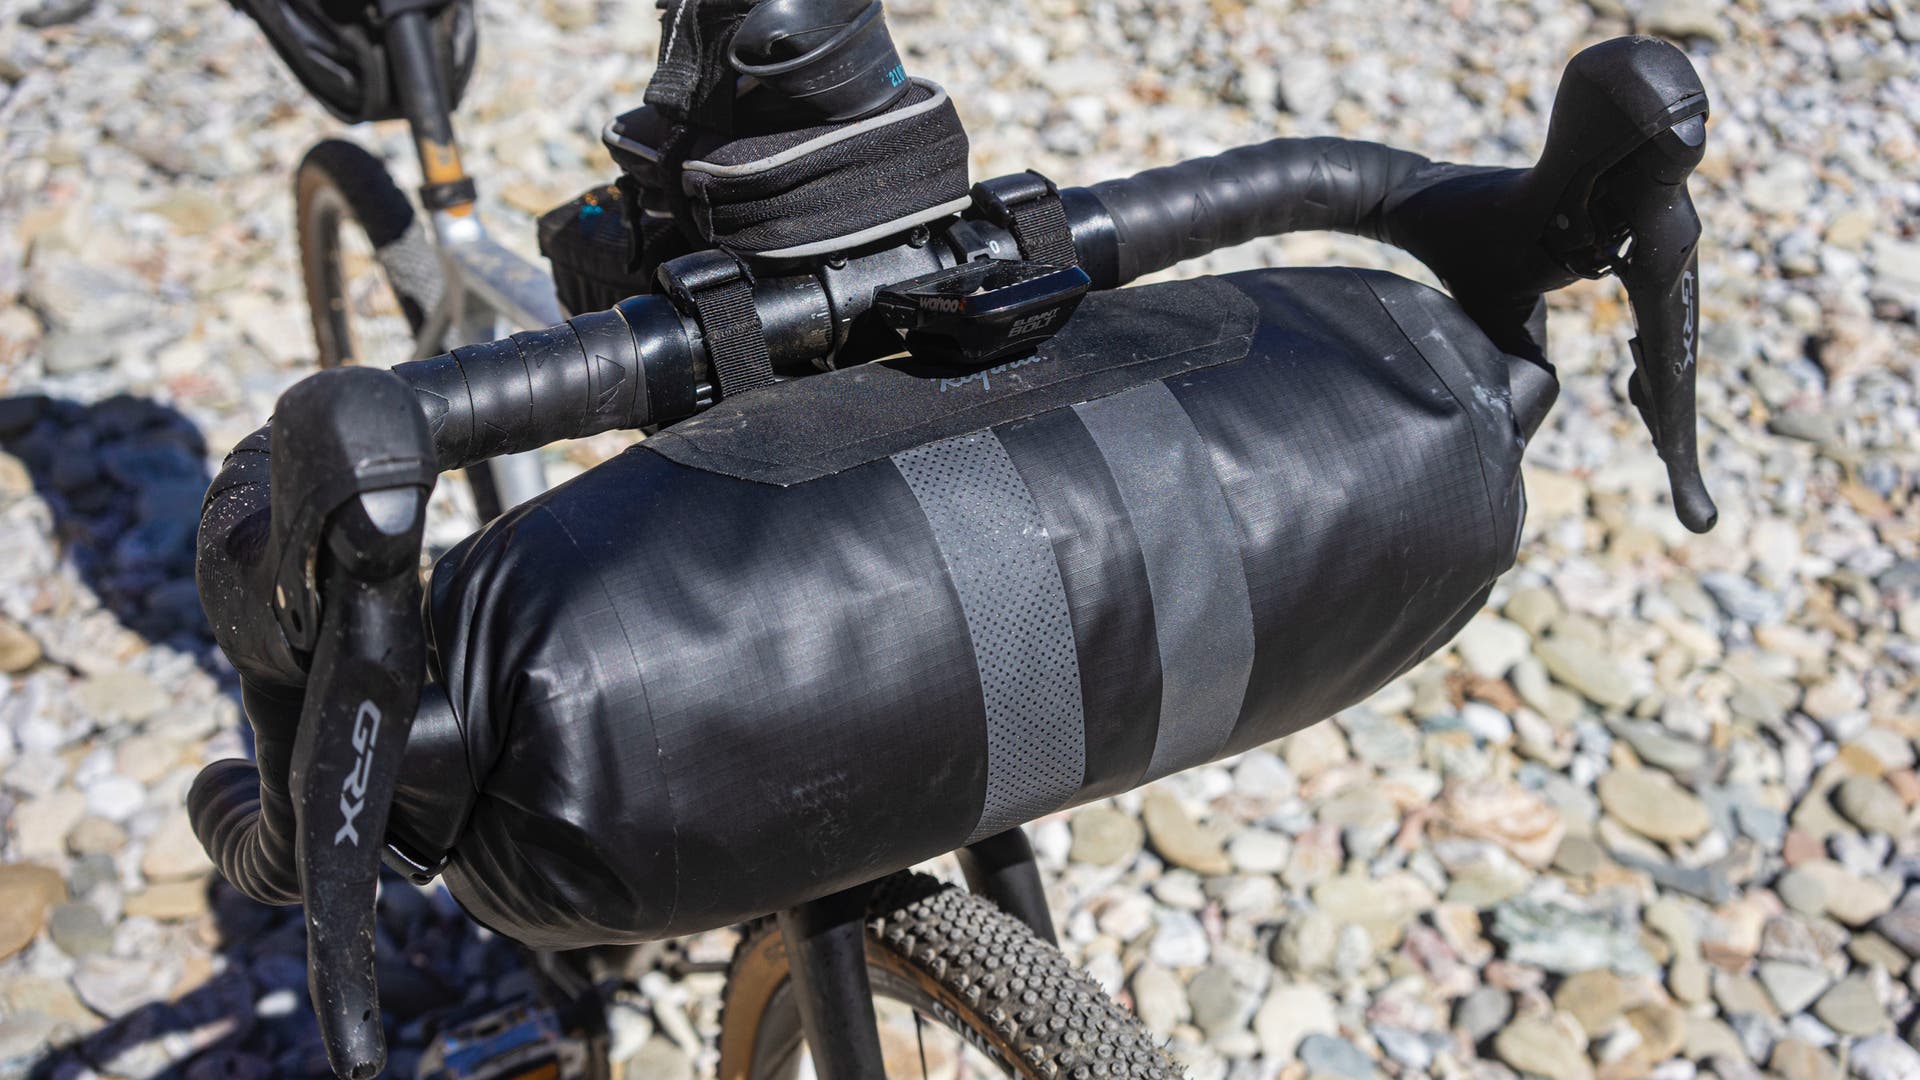
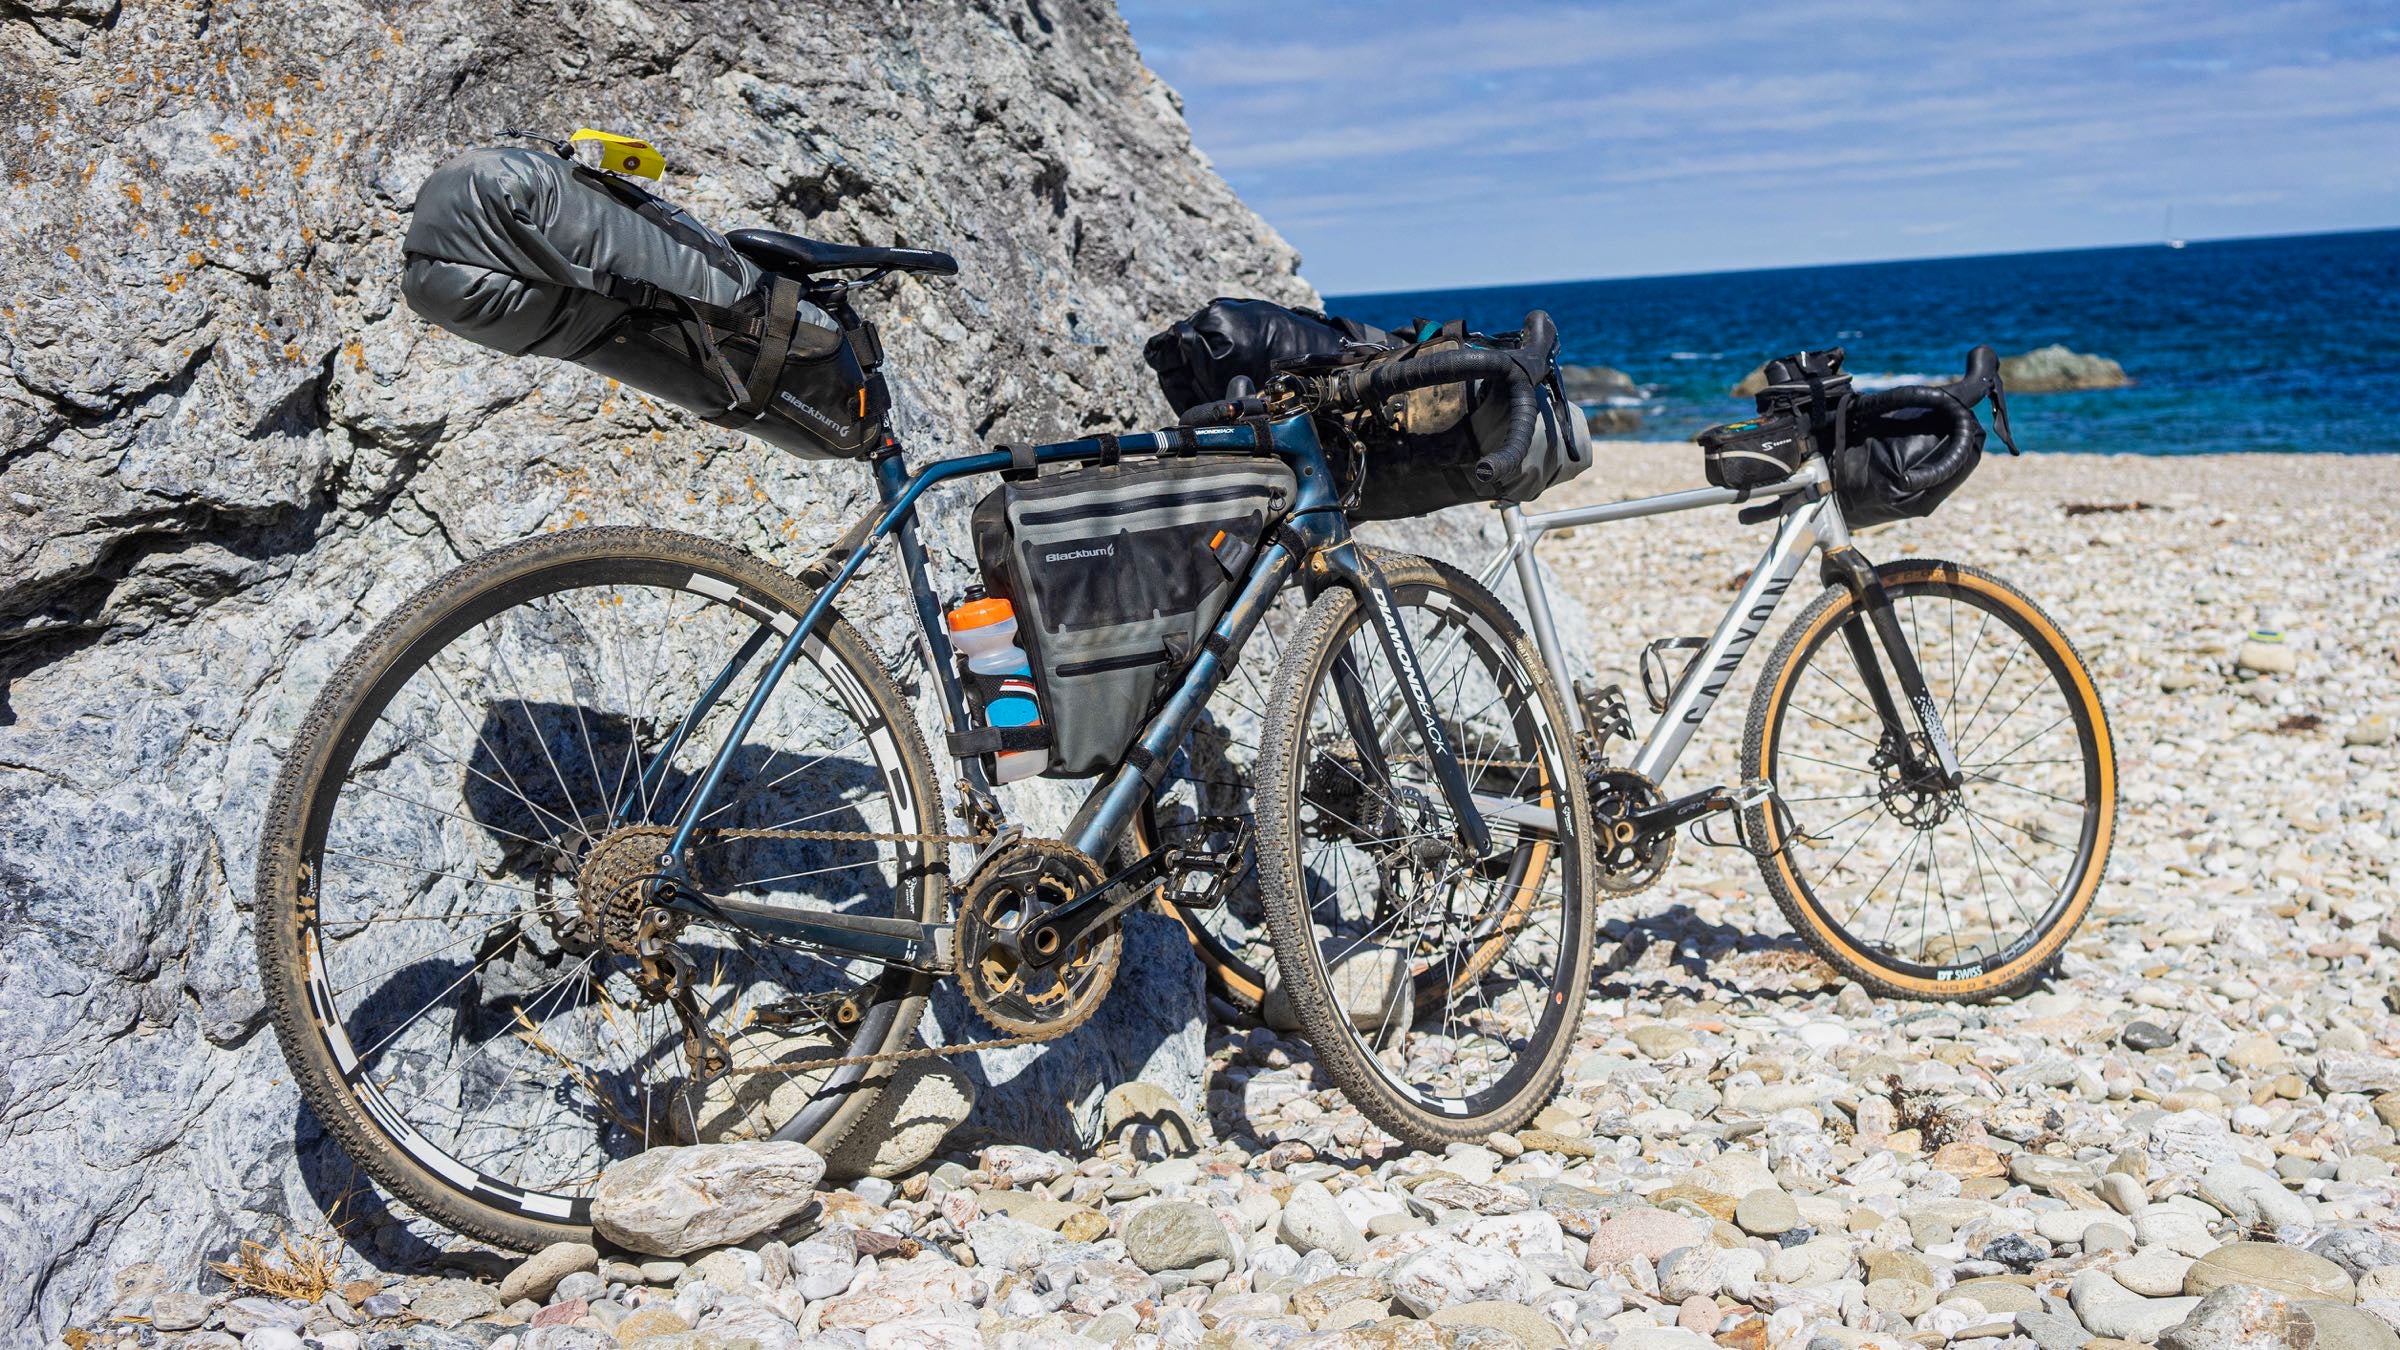
While the price is a little high for what you get, the simplicity of this 16-liter waterproof roll bag is actually a huge feature. As opposed to other more beefy front bike bags, the Rapha version is a very simple dry bag with two roll-up sides, some reflectivity, and three very basic straps to attach it to your bars and stem or steerer tube. The good news about this simplicity is that it fits on a greater amount of bikes with less fiddling, and it’s very very easy to take on and off when compared to a system with a bracket. That said, this is probably more of a casual take-it-to-work or two-night max front pack—if you’re doing more than a few days with full gear on super super rough terrain, you might want something more like the Blackburn bag below. For our Catalina DIY tri adventure, however, it was absolutely perfect.
Rapha Waterproof Rear Pack
$130, rapha.cc
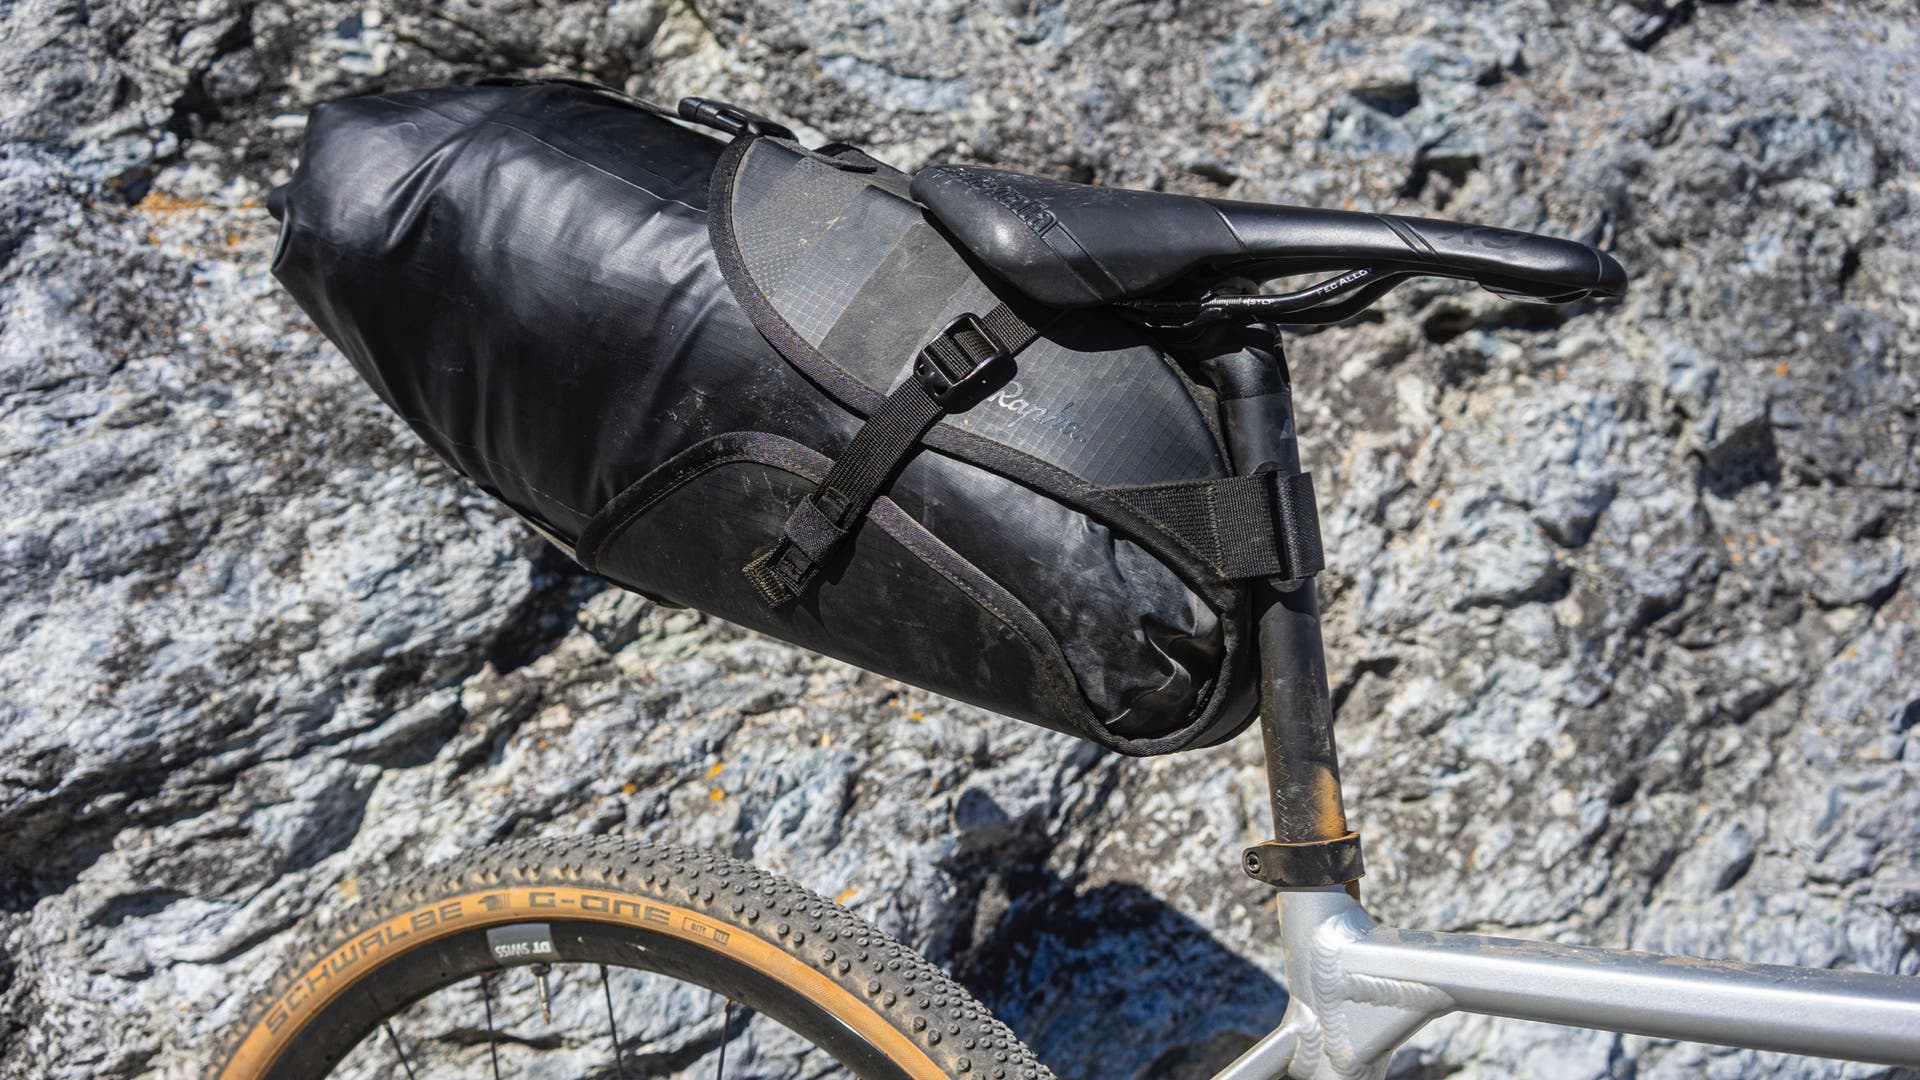
Much like the waterproof roll bag above, the big advantage of this not-cheap piece of bikepacking luggage is definitely its simplicity. Easy to attach and detach, this 15-liter pack is a better choice for commuters or a night or two on gravel roads. If you’re going for a week on brutal east coast rock gardens, you’ll likely feel this pack moving quite a bit behind you. That said, even on some pretty hair-raising descents, it didn’t come loose or cause problems, but it wasn’t as secure as others. Also, when packing the waterproof bag itself (which is a one-sided dry roll bag with an air purge valve), you need to be sure you pack in an unusual “cone” shape otherwise it won’t quite fit flush within it’s little holster. All in all, the perfect, simple choice for a trip that needed a lot of on and off, but not tons and tons of tough miles.
Canyon AL Grail 7.0
$2,000, canyon.com

While there are pricier, more feature-filled gravel bikes out there, especially now, the Grail AL 7.0 was a great budget-conscious choice for our tri. Super-wide tire clearance meant that despite an aluminum frame, you can run big tires low enough to absorb tons of offroad roughness. An exactly mid-level component package that includes, crucially, excellent hydraulic disc brakes, complements the utilitarian vibes and ensures nothing is fragile enough to require delicate treatment. On that same note, there’s something to be said for riding (and wrecking and dropping and strapping tons of stuff to) an aluminum frame when you’re miles away from the nearest structure—let alone a bike shop. For an adventure that didn’t require hundreds of miles of gravel, but a big dose of reliability, we didn’t miss having something fancier.
Rudy Project Venger
$200, rudyproject.com
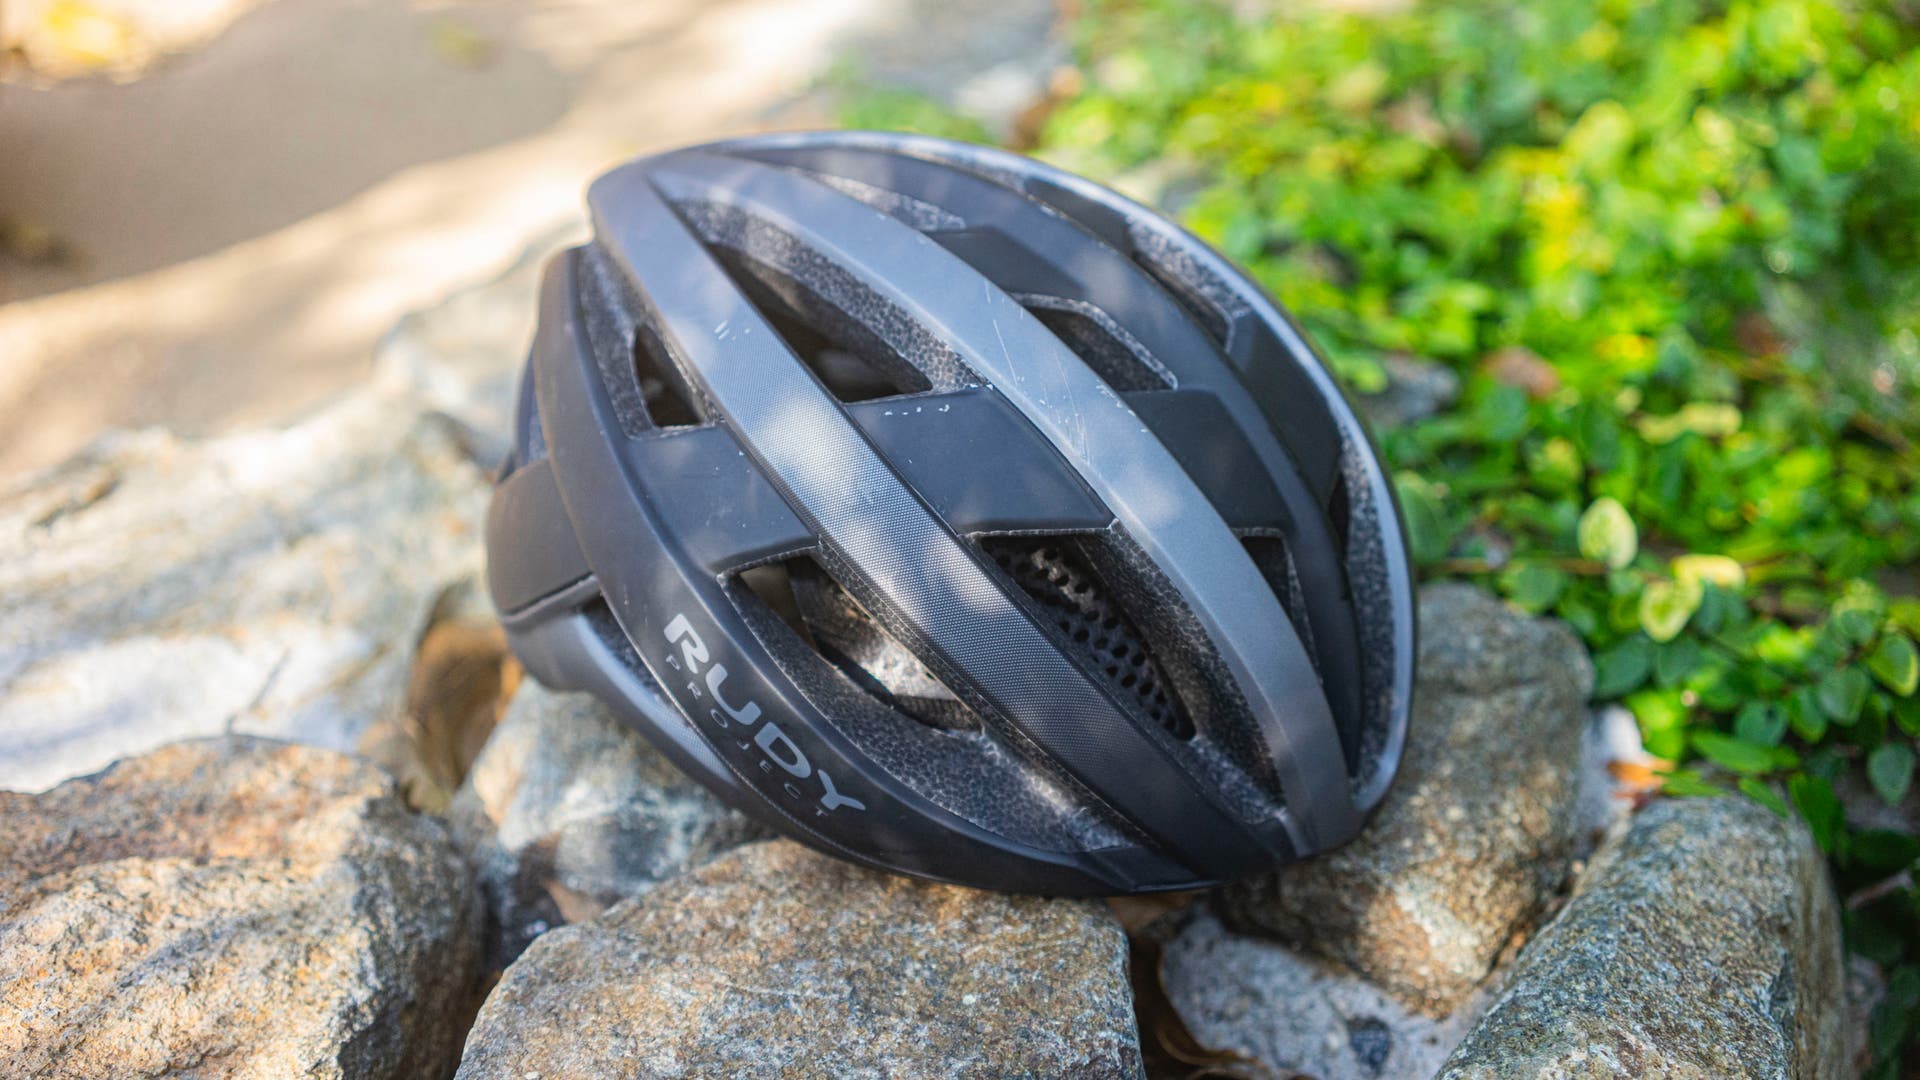
Though some people may chafe at the concept of a “gravel-specific” helmet, the Venger is about as close as you can get (don’t worry it works for road too). We chose this helmet because of the bug stop netting, but we ended up loving how ventilated, cool, and lightweight the Venger was on the sweltering and unshaded Catalina trails. It would be great if this helmet had MIPS or some other type of concussion abatement—especially given the price—but this felt like a superlight race helmet with offroad-leaning looks and features. The 22 vents made a big difference while we were riding to the campsite and while we were pushing the pace late in the day. For those with a more oval than round head, this is a good fit.
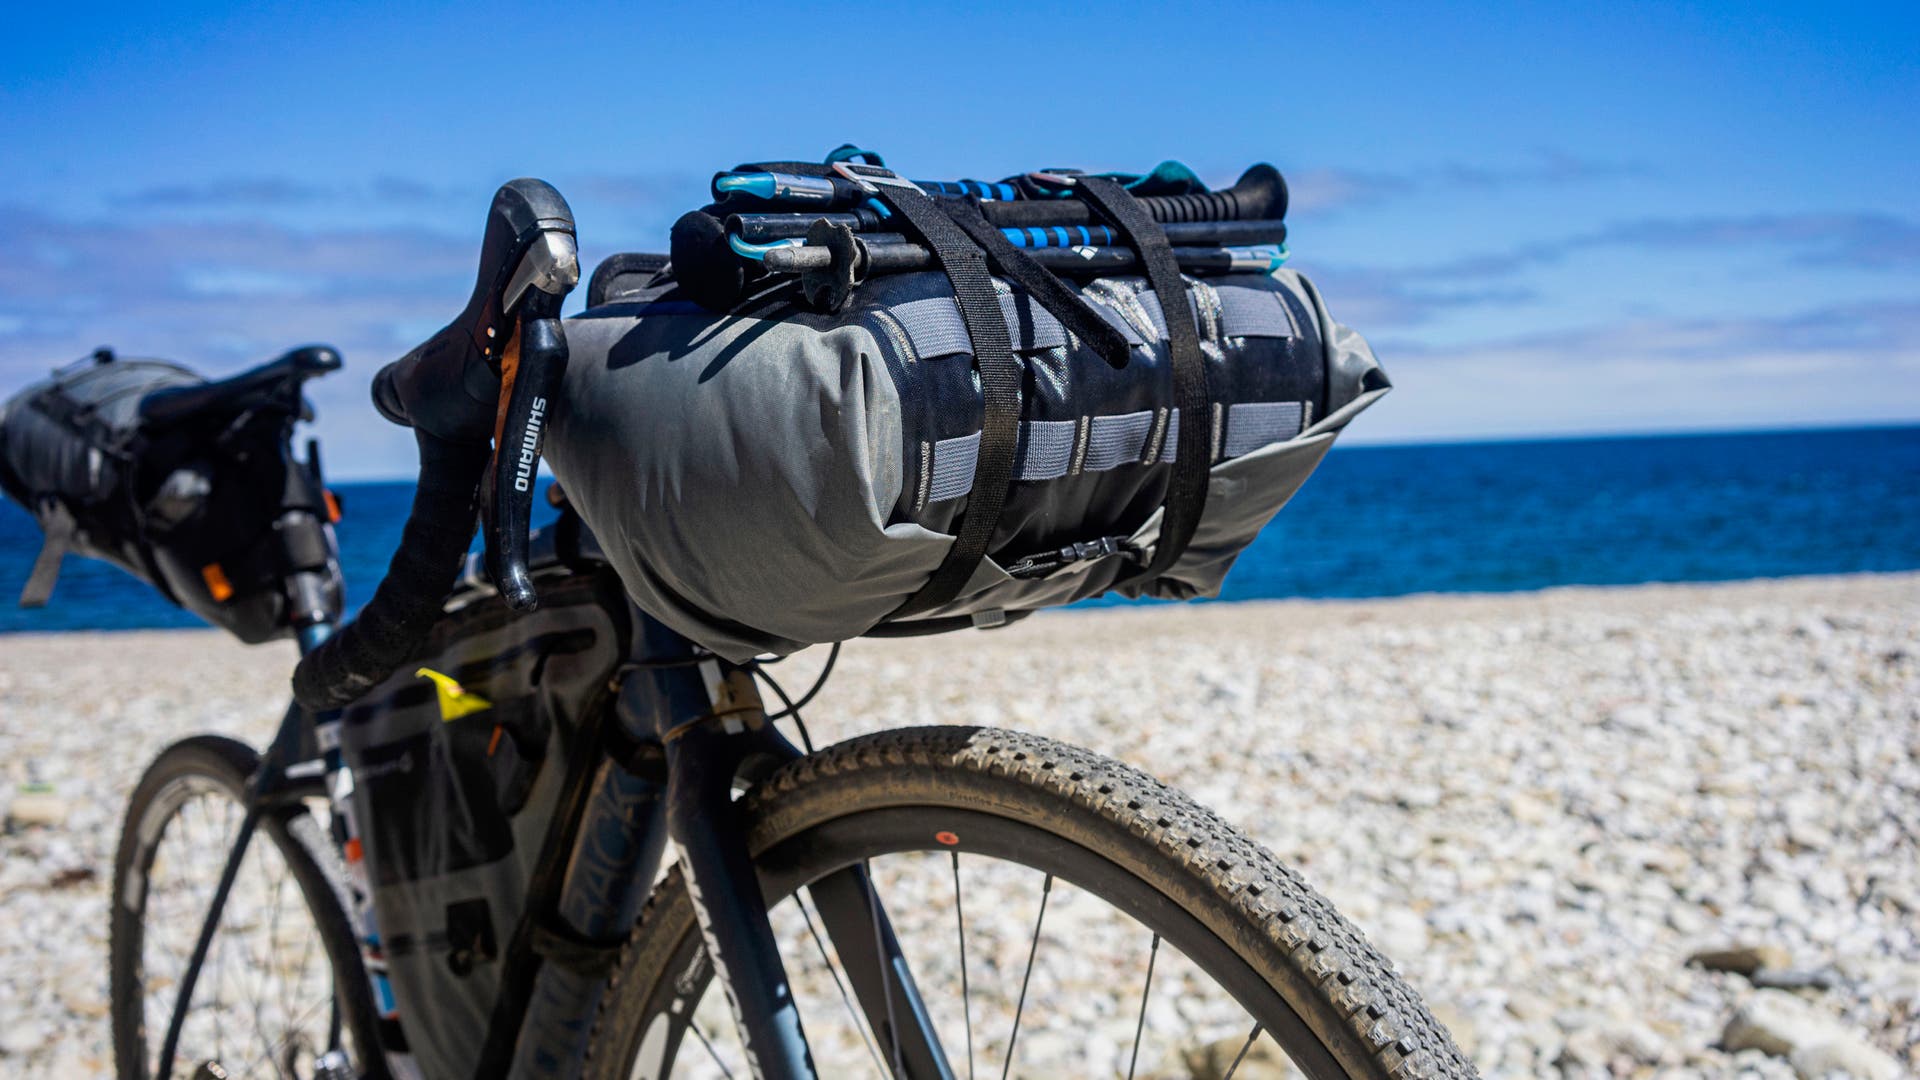
Black Diamond Distance Tent and Distance Carbon Z Trekking Poles
$200 (tent w/out poles) – rei.com, $170 (poles) – rei.com
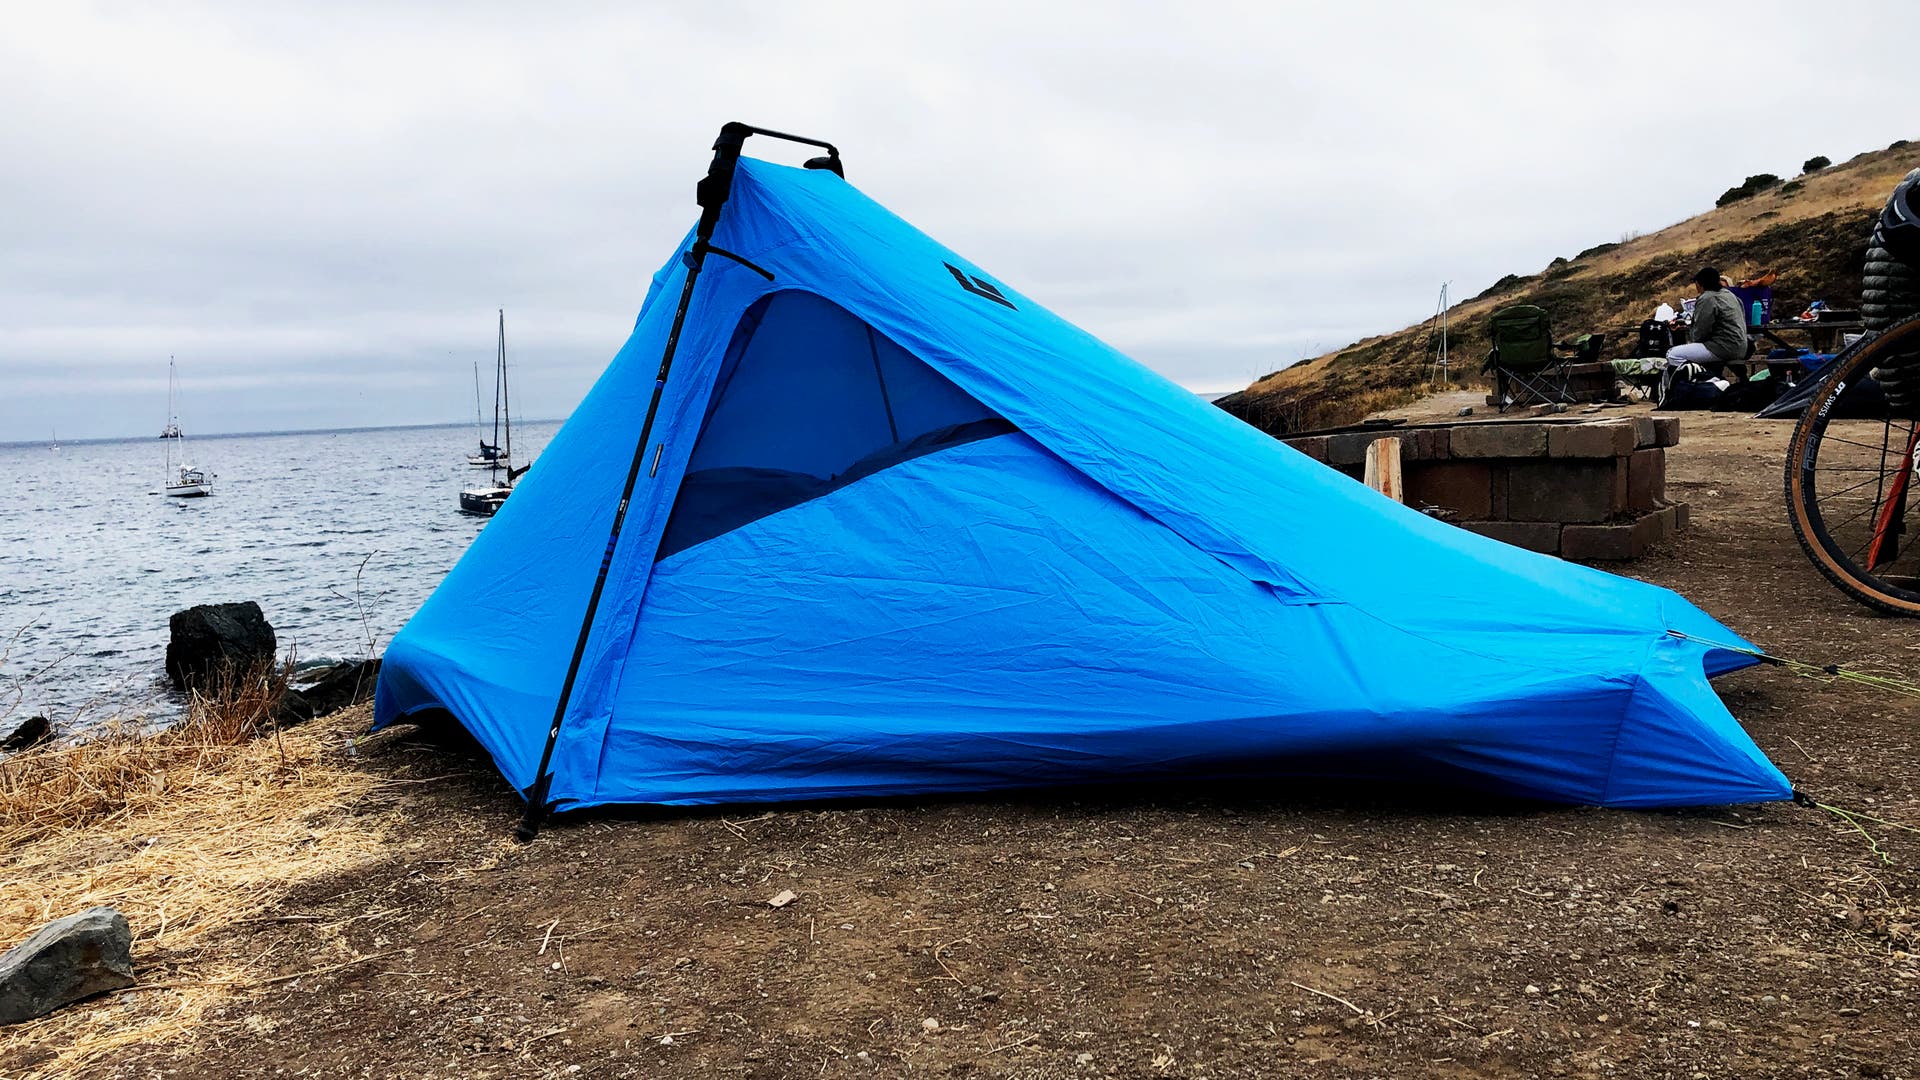
To save on weight/space and squeeze every ounce of usefulness out of our gear, we opted to go with the Black Diamond Distance Tent that sets up with BD’s Distance Carbon Z Trekking/Running poles via included adapters (the system also comes as a package with specific poles that do not require an adapter). The ultralight, single walled, two-person tent uses trekking poles as the supports and folds up into the size of two nalgene bottles. It fit inside a 10L bikepacking burrito along with a sleeping bag and pad, with the poles strapped to the outside, and the whole thing fits between brake levers without getting in the way of shifting.
ADVERTISEMENT
The downside to the tent is common to single wall ultralight tents: The circulation is limited. Even with the window open and the tent positioned into an ocean breeze, we awoke with condensation dripping from the ceiling. I have fit two people in the tent, but it’s quite cozy and makes the condensation a real problem—by morning there is water dripping onto our sleeping bags.
The Distance Tent is great for single-person use, and we prefer it to a bivvy because of the extra room to store gear. But the circulation is a real problem in warmer weather.
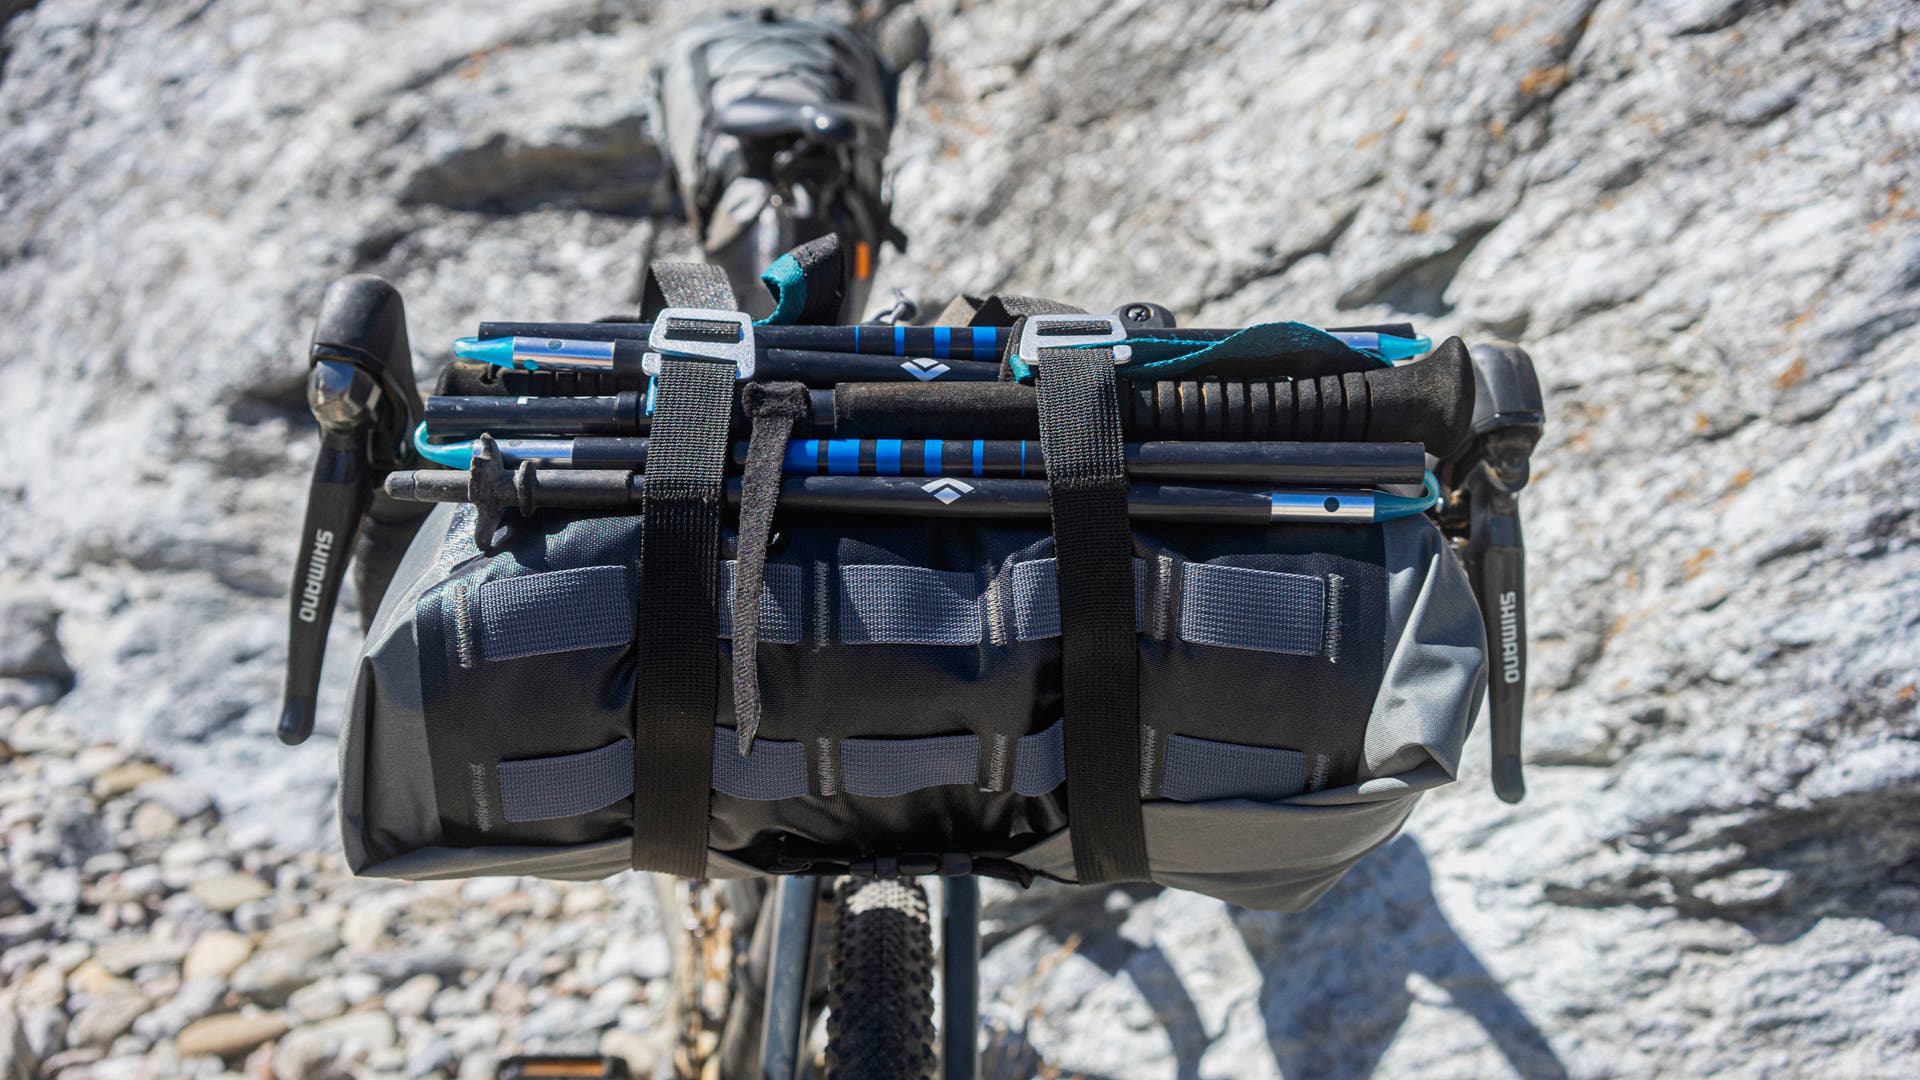
Until recently, we thought trekking poles were only for hikers and backpackers—not trail runners and endurance athletes. Then we tried a pair of light weight Distance Z Carbon Trekking poles on a technical trail run and two things happened: we ran farther and faster than previous times on the same loop, and we had way more stability.
ADVERTISEMENT
Trekking poles for trail running take some getting used to, but the benefits are clear – by expanding your “base”—the width of area supporting you while you walk or run—you can reduce the stress on your joints substantially, leaving you less tired after a technical trail run. On a trail run, the poles are most useful on steep and technical sections, and the Distance Z Trekking Poles are great because they’re so lightweight that you can carry them in one arm when you’re on flat ground without it throwing off your gate. When you want to store them, they break down much smaller than other poles we’ve tried and easily fit in a carry-on size suitcase for travel.
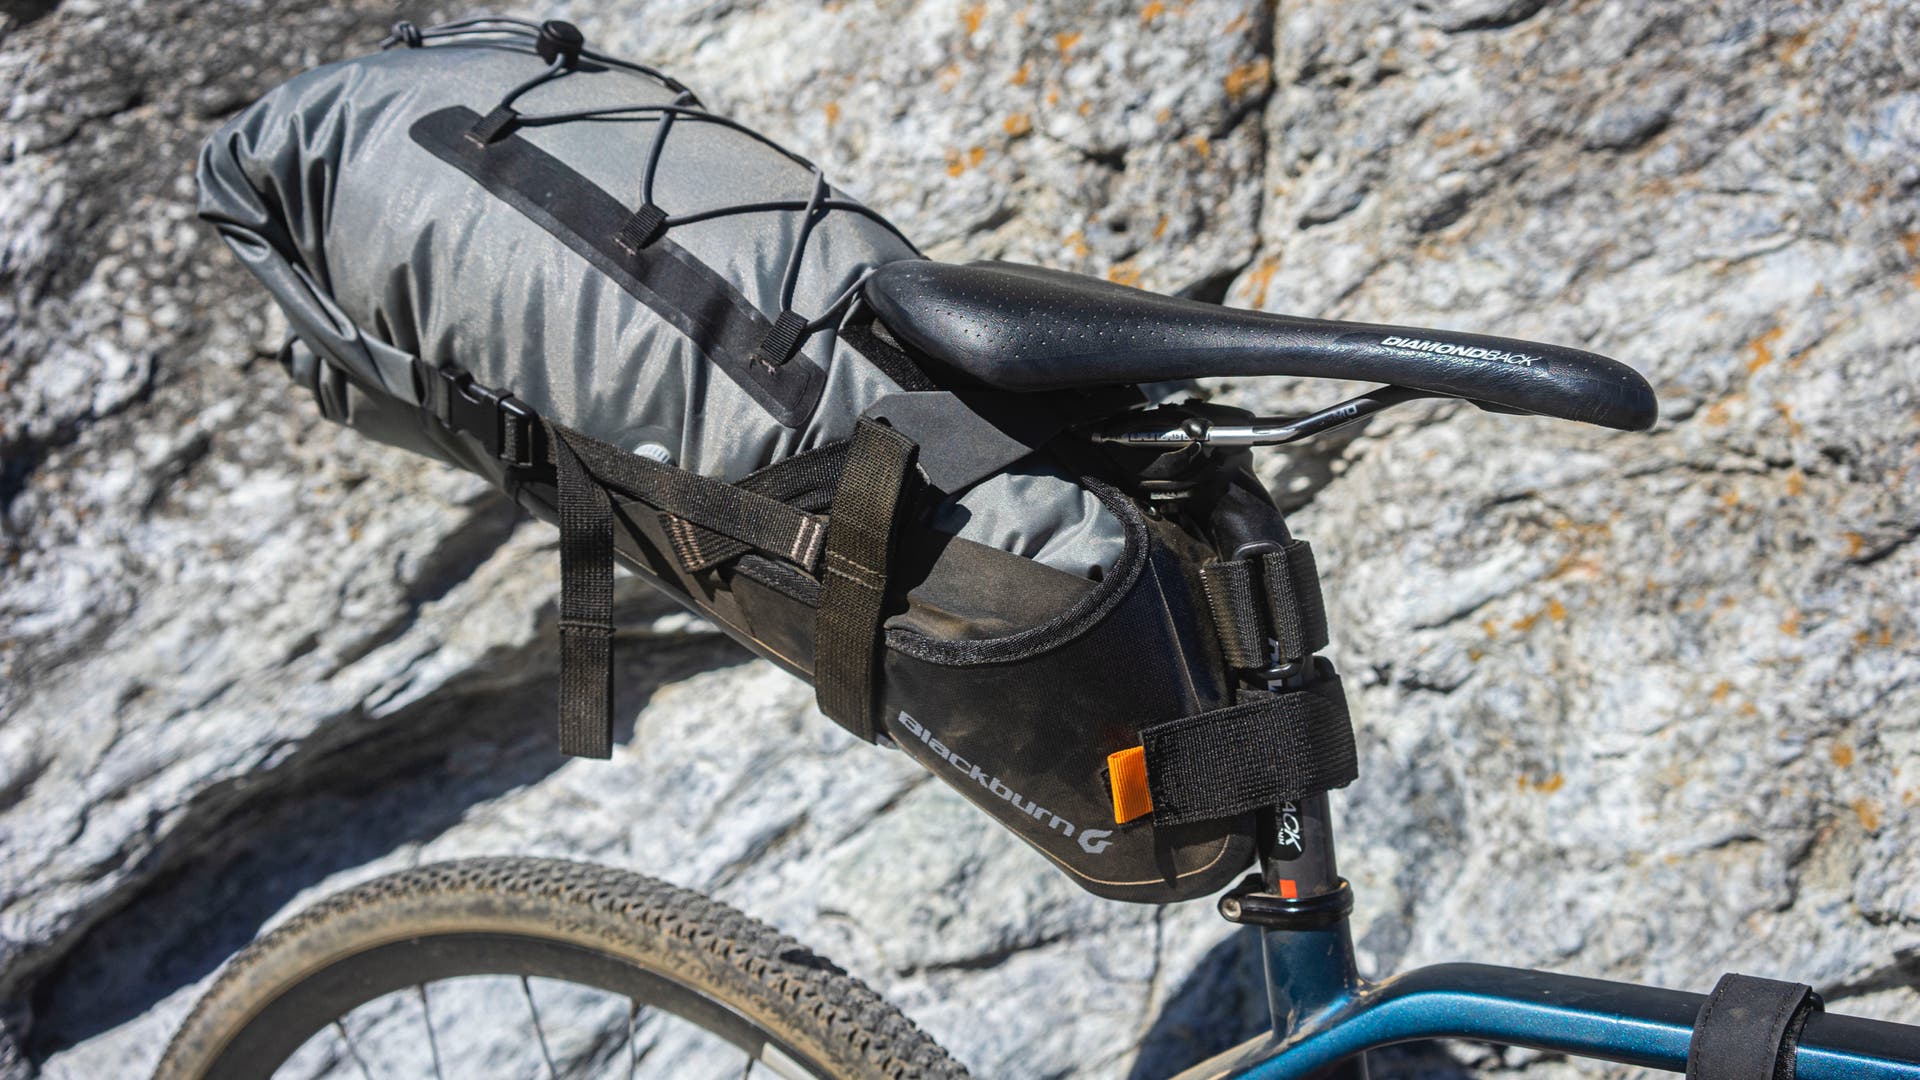
Blackburn Bikepacking Bags
Starting at $120 (Blackburn Outpost Elite Frame Bag) – backcountry.com, $180 (Outpost Elite Universal Seat Pack and Dry Bag) – backcountry.com, $175 (Outpost Elite Handlebar Roll and Dry Bag) – amazon.com
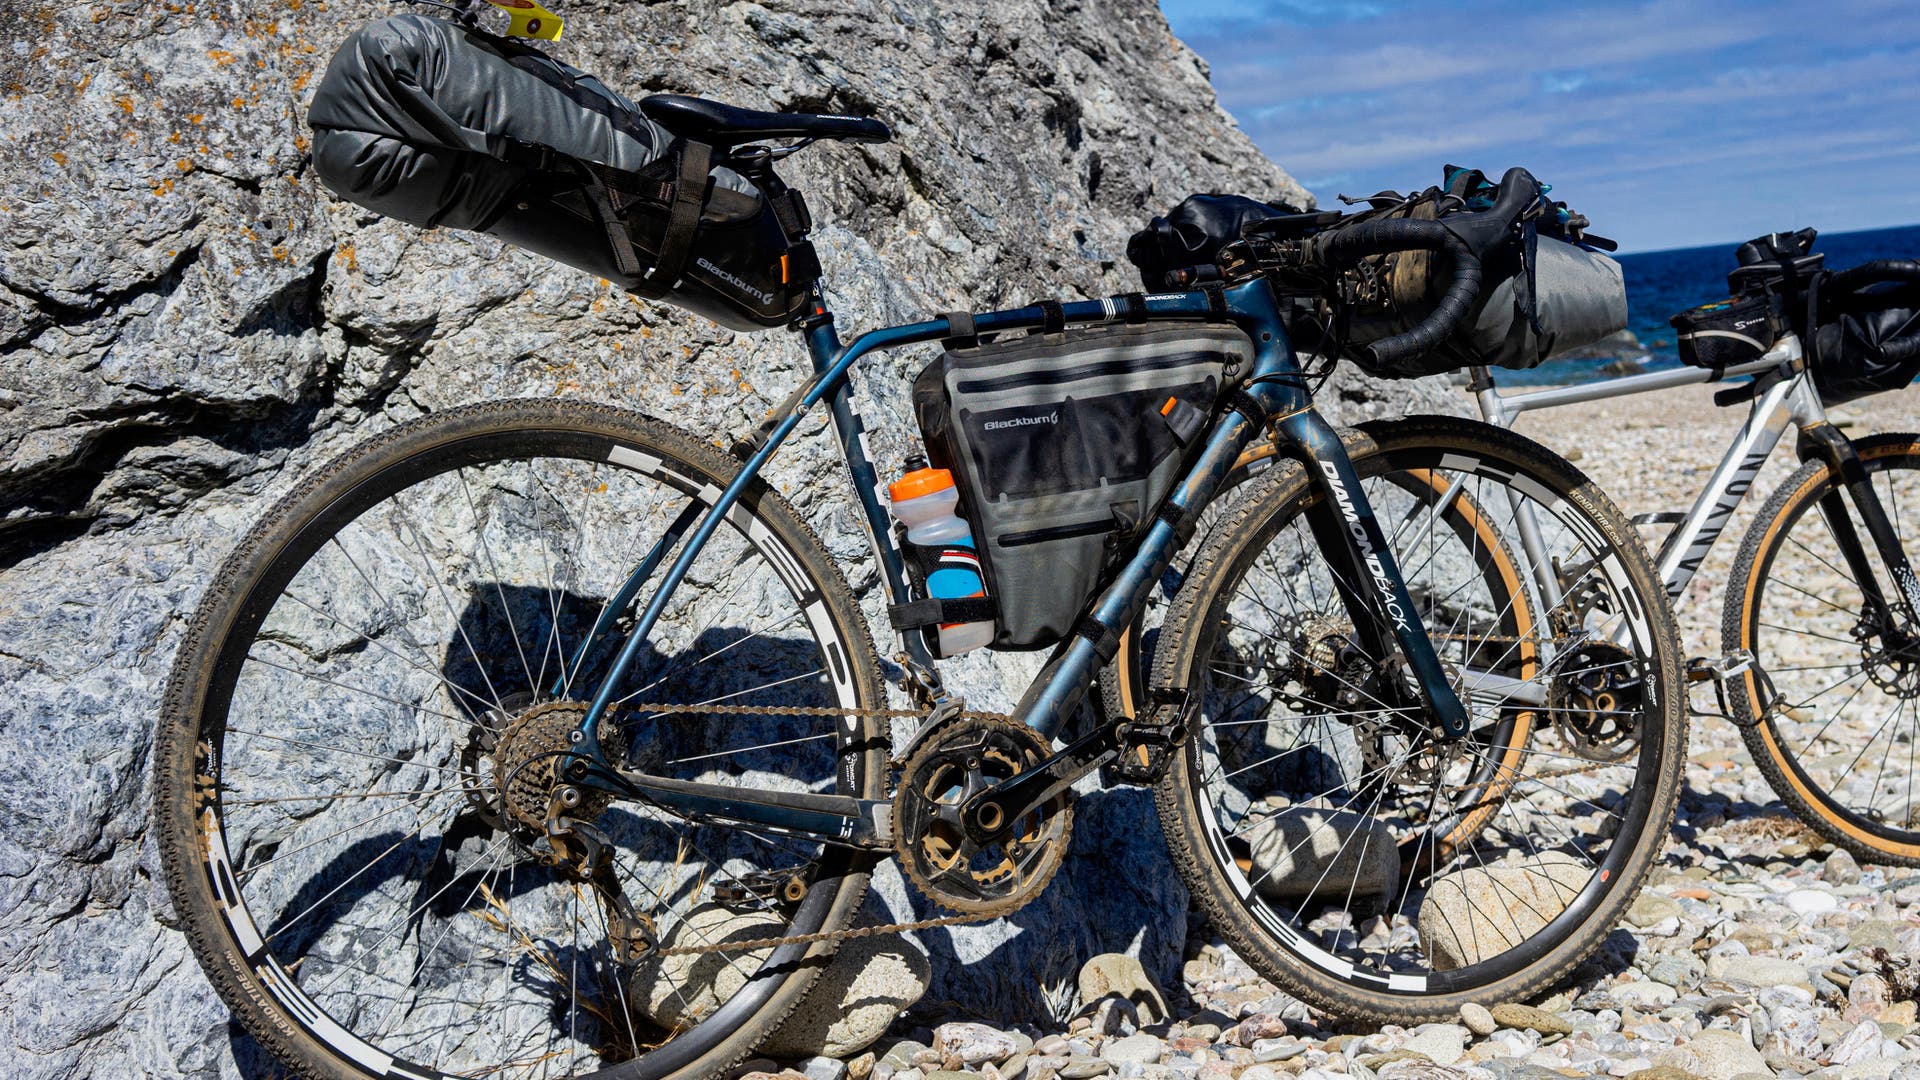
The bags worked extremely well for carrying my DIY triathlon gear. In the 14-liter “burrito” you can fit an entire sleeping setup, with a sleeping bag, pad, and Black Diamond Distance Tent or a full hammock setup with top quilt and underquilt. In the nearly 7-liter seat bag, you can put all of your clothing and a kitchen setup, and the 6-liter frame bag fits tools and food.
For a weekend bikepacking trip this is all you’d need, for a four-day trip you could add a running vest with extra space for more food and water.
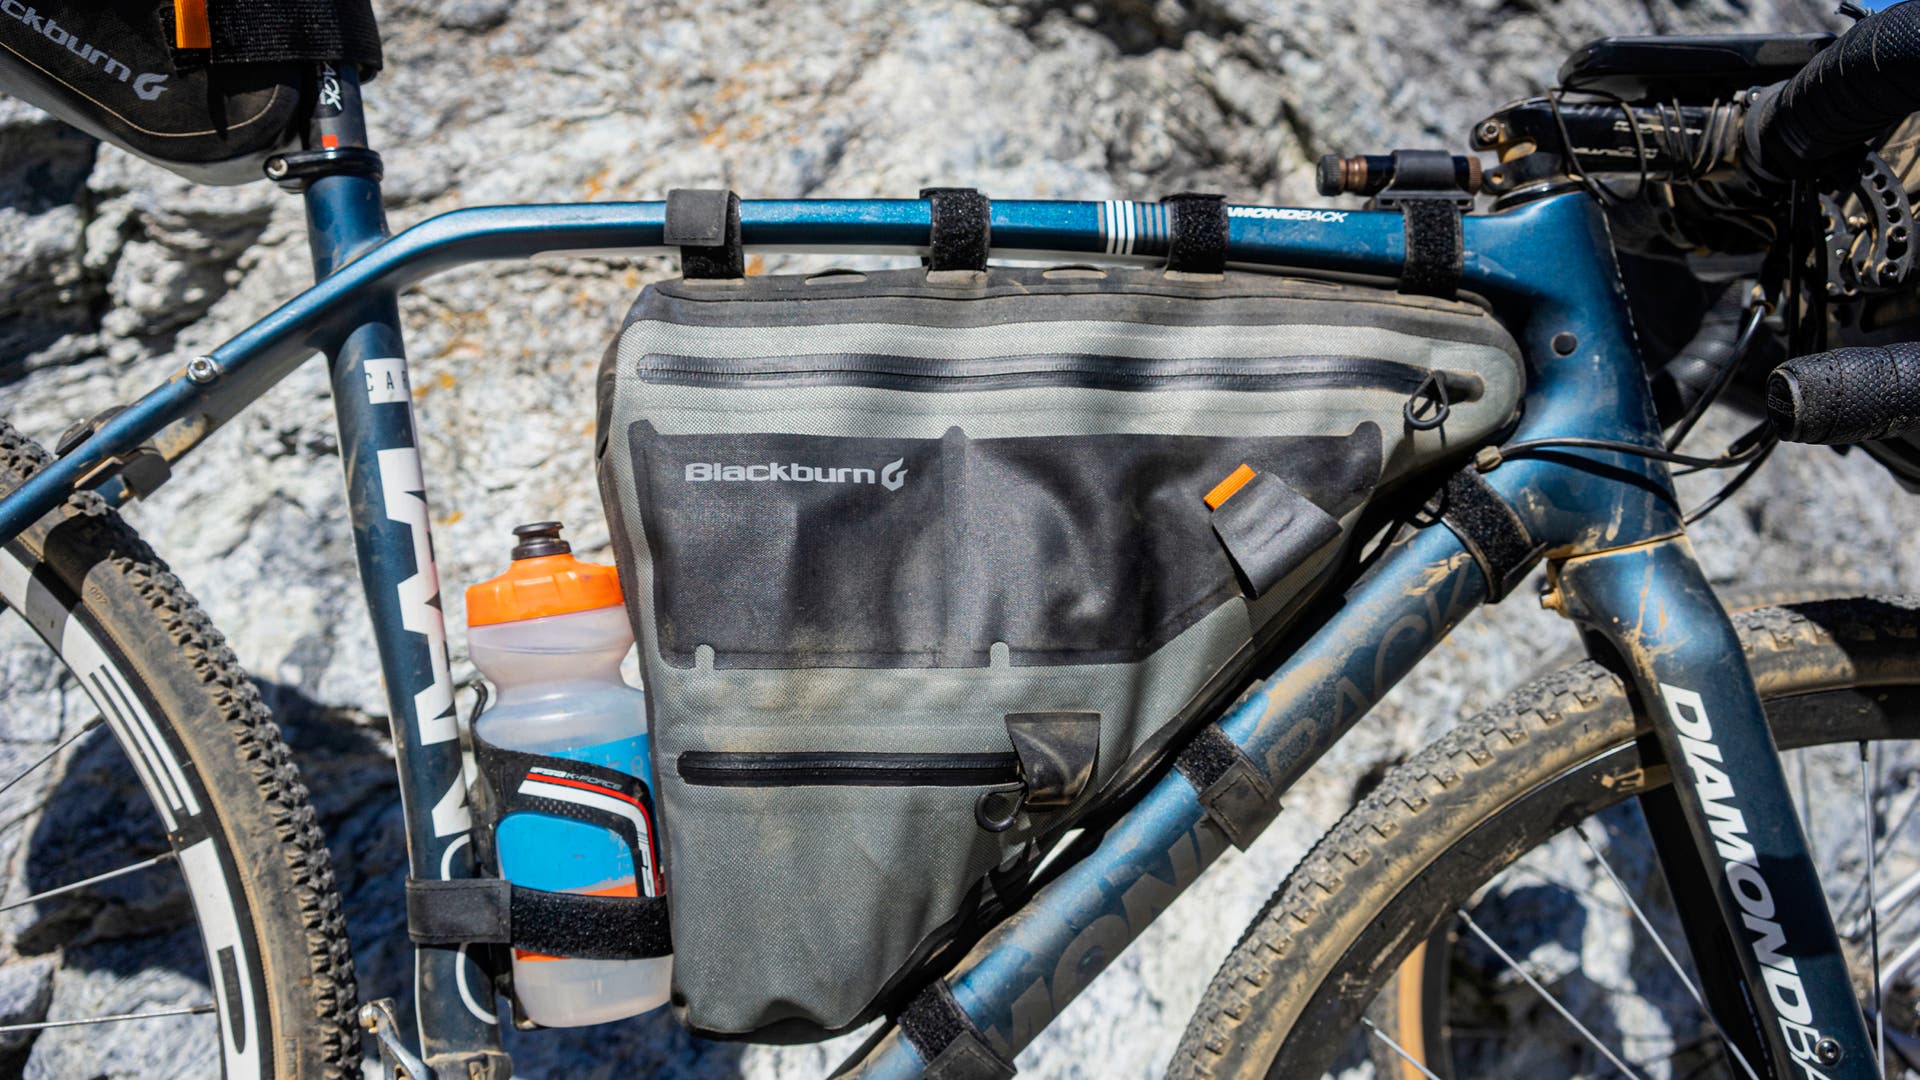
The bags stay put and feel in control of the load at all times. This is accomplished via brackets that mount firmly to the bike and hold the load steady. The downside is that the brackets are a bit bulky and they need wrenches to take on and off—but of course you can just ride with the brackets. It does mean that every time you go from regular riding to bikepacking or commuting, you need to remove the brackets, and it can be a process to get it set up.