Published July 19, 2021 04:14PM
5 Sciatica Stretches to Relieve That Burning Pain
Try some simple yoga poses and stretches to help relieve sciatica pain and reduce potential sciatica swim-, bike-, and run-related issues.
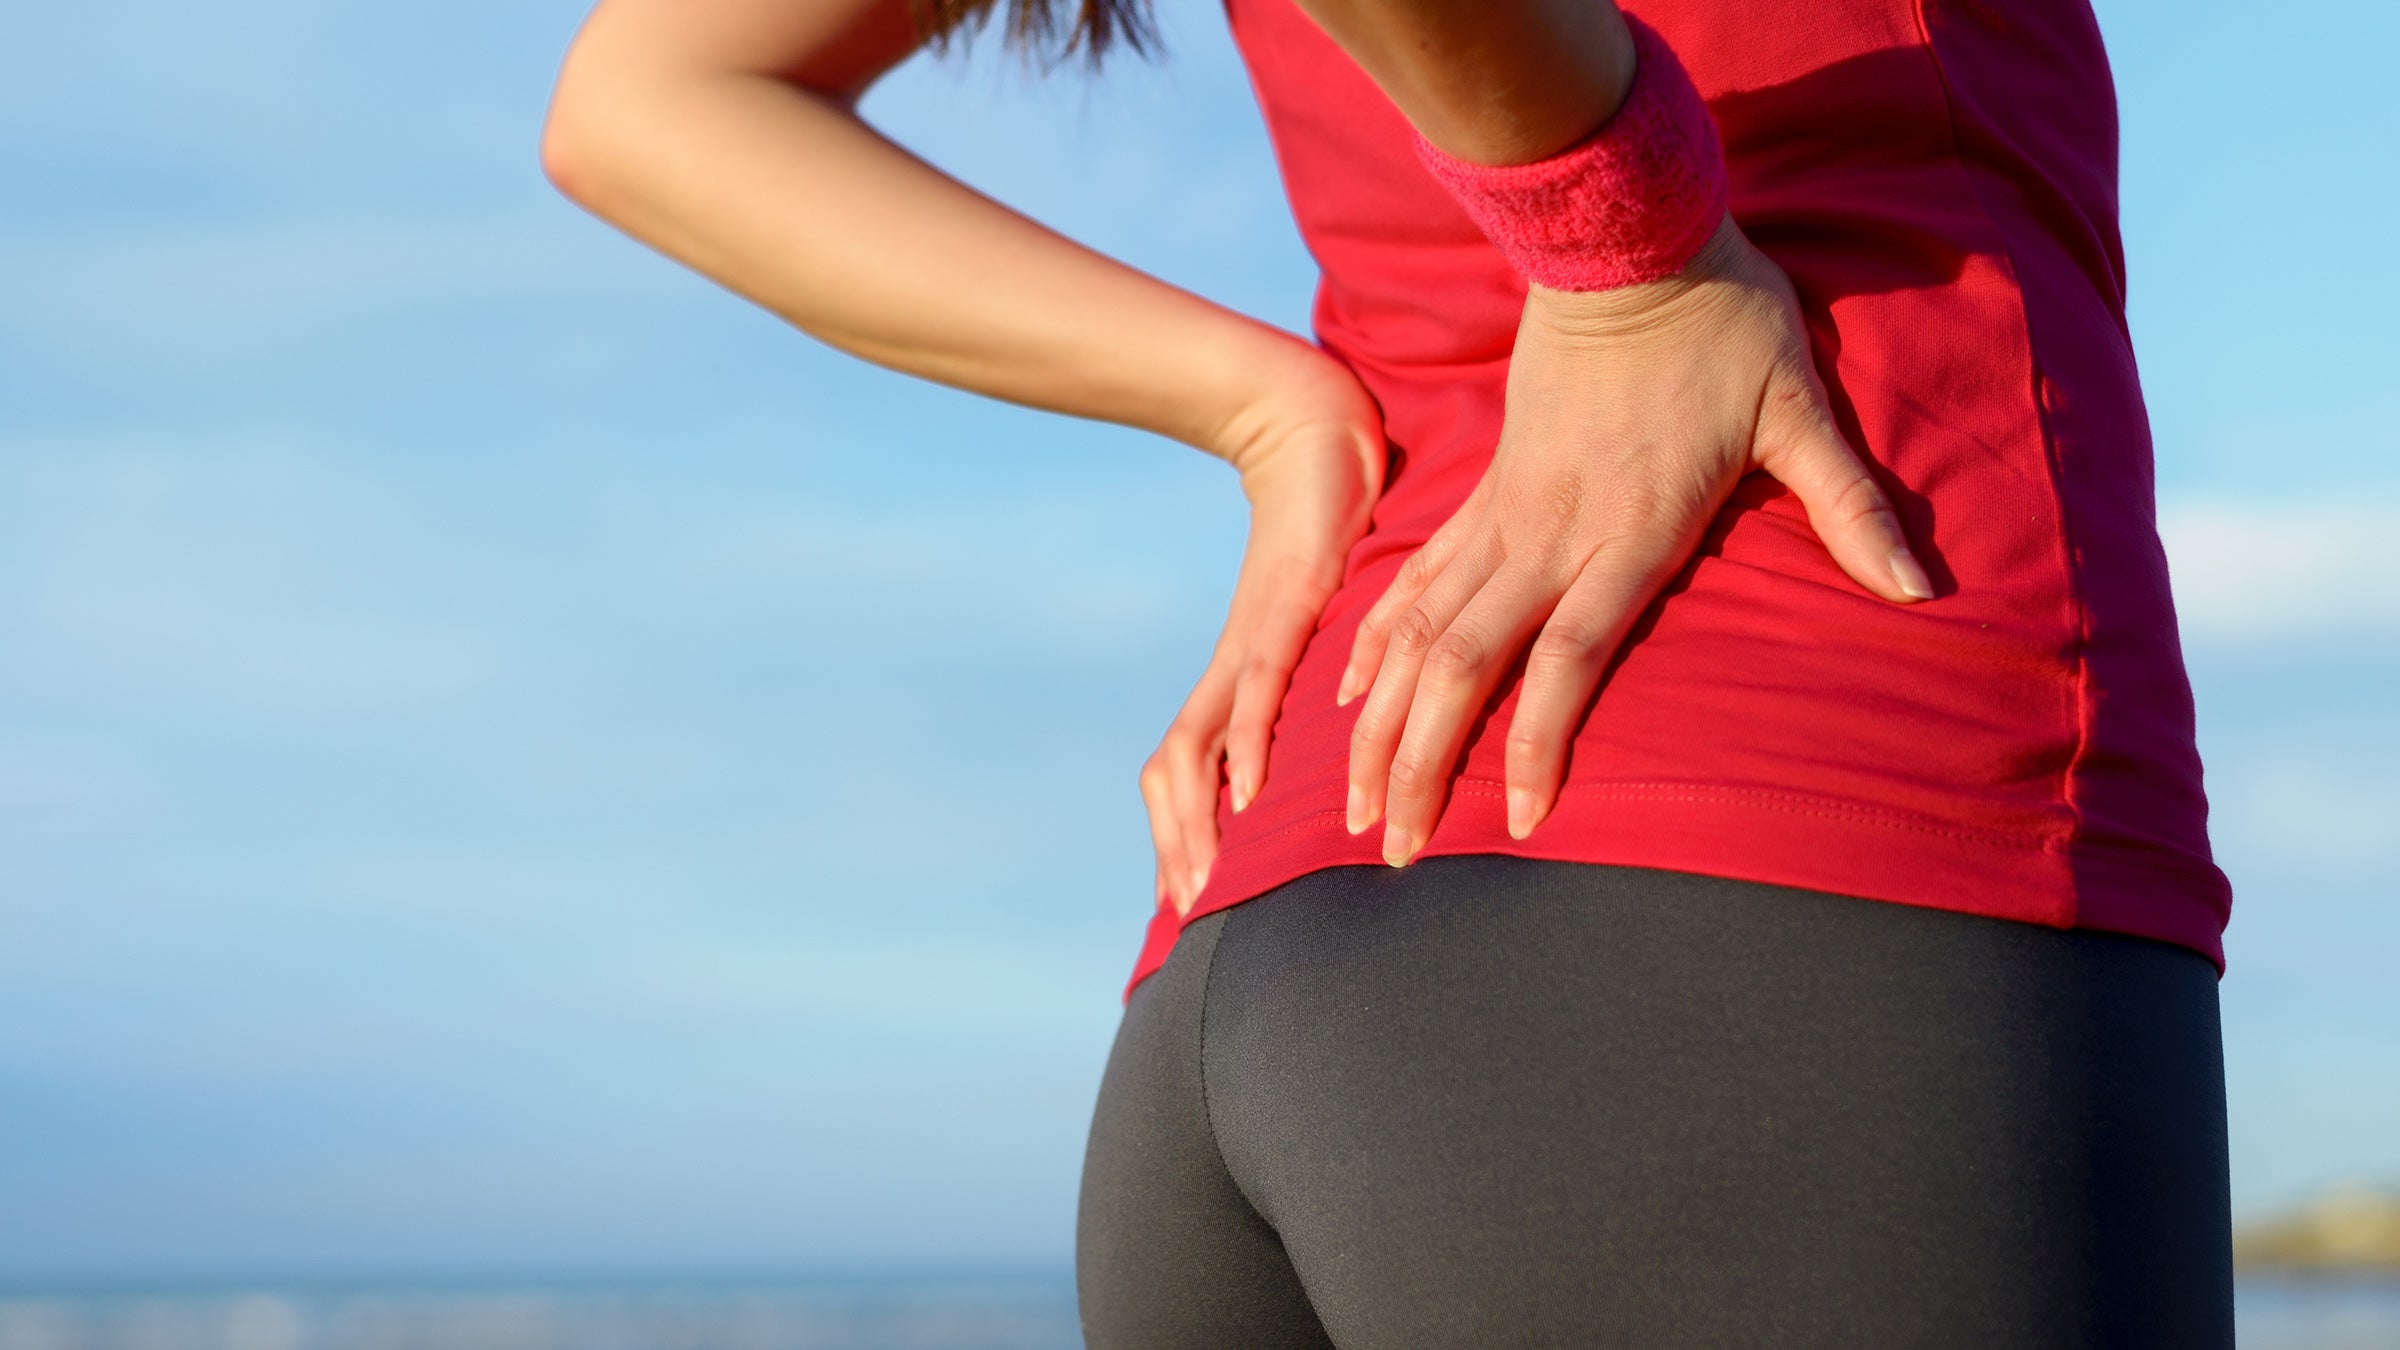
If you’ve ever experienced sciatica, you know it can be painful to the point of being unbearable, and affect everything from the way you move to your quality of sleep and how you exercise. But while sciatica is uncomfortable, it is also curable. The prescription? Sciatica stretches that can provide both temporary relief from your symptoms and help ease discomfort in the long term. Specifically yoga can be helpful in both relieving your symptoms and improving your mental outlook when you’re faced with sciatic pain.
What exactly is sciatica?
Sciatica itself isn’t a physical condition—it simply refers to any pain felt in your sciatic nerve, which extends from your lower back, down through the pelvis, and the backs of the thighs. Sciatic pain can present in a variety of ways, but often it’s described as a constant burning sensation. Sciatic pain can also feel sharp or throbbing, and you could experience tingling or numbness. It could be worse when you’re sitting, bending forward, twisting, or trying to stand up. A key symptom of sciatica is pain that is experienced on only one side of the body.
What causes sciatica?
Sciatica is a common ailment, with as many as 40 percent of people experiencing it throughout their lifetime. Your age and occupation are some of the highest risk factors for sciatica. Both sedentary jobs and jobs that require heavy lifting can spur it, and it’s most common in people between the ages of 30 and 50. Most often, sciatica is caused by a bulging or herniated disc, but it can also be caused by bone spurs, trauma to the lumbar spine, or other spinal disorders.
How do you know if you have sciatica?
The FAIR test—or flexion, adduction, and internal rotation—is used to determine the cause of sciatic nerve pain in the body. In this test, a physical therapist or other qualified medical professional asks the patient to lie on their side, with the affected hip on top. The therapist will move the leg in various positions, including flexion, adduction, and internal rotation, to examine the hip’s stability and compress the sciatic nerve. Pain in the gluteal area or radiating down the leg during this movement is indicative of sciatica.
The test can also help differentiate between sciatica and piriformis syndrome, a condition in which the piriformis muscle spasms and causes pain in the buttocks.
ADVERTISEMENT
5 stretches to relieve sciatica pain
These yoga poses can help soothe sciatic nerve pain and release tension in your lower back and hips, so you can be on your way to healing.
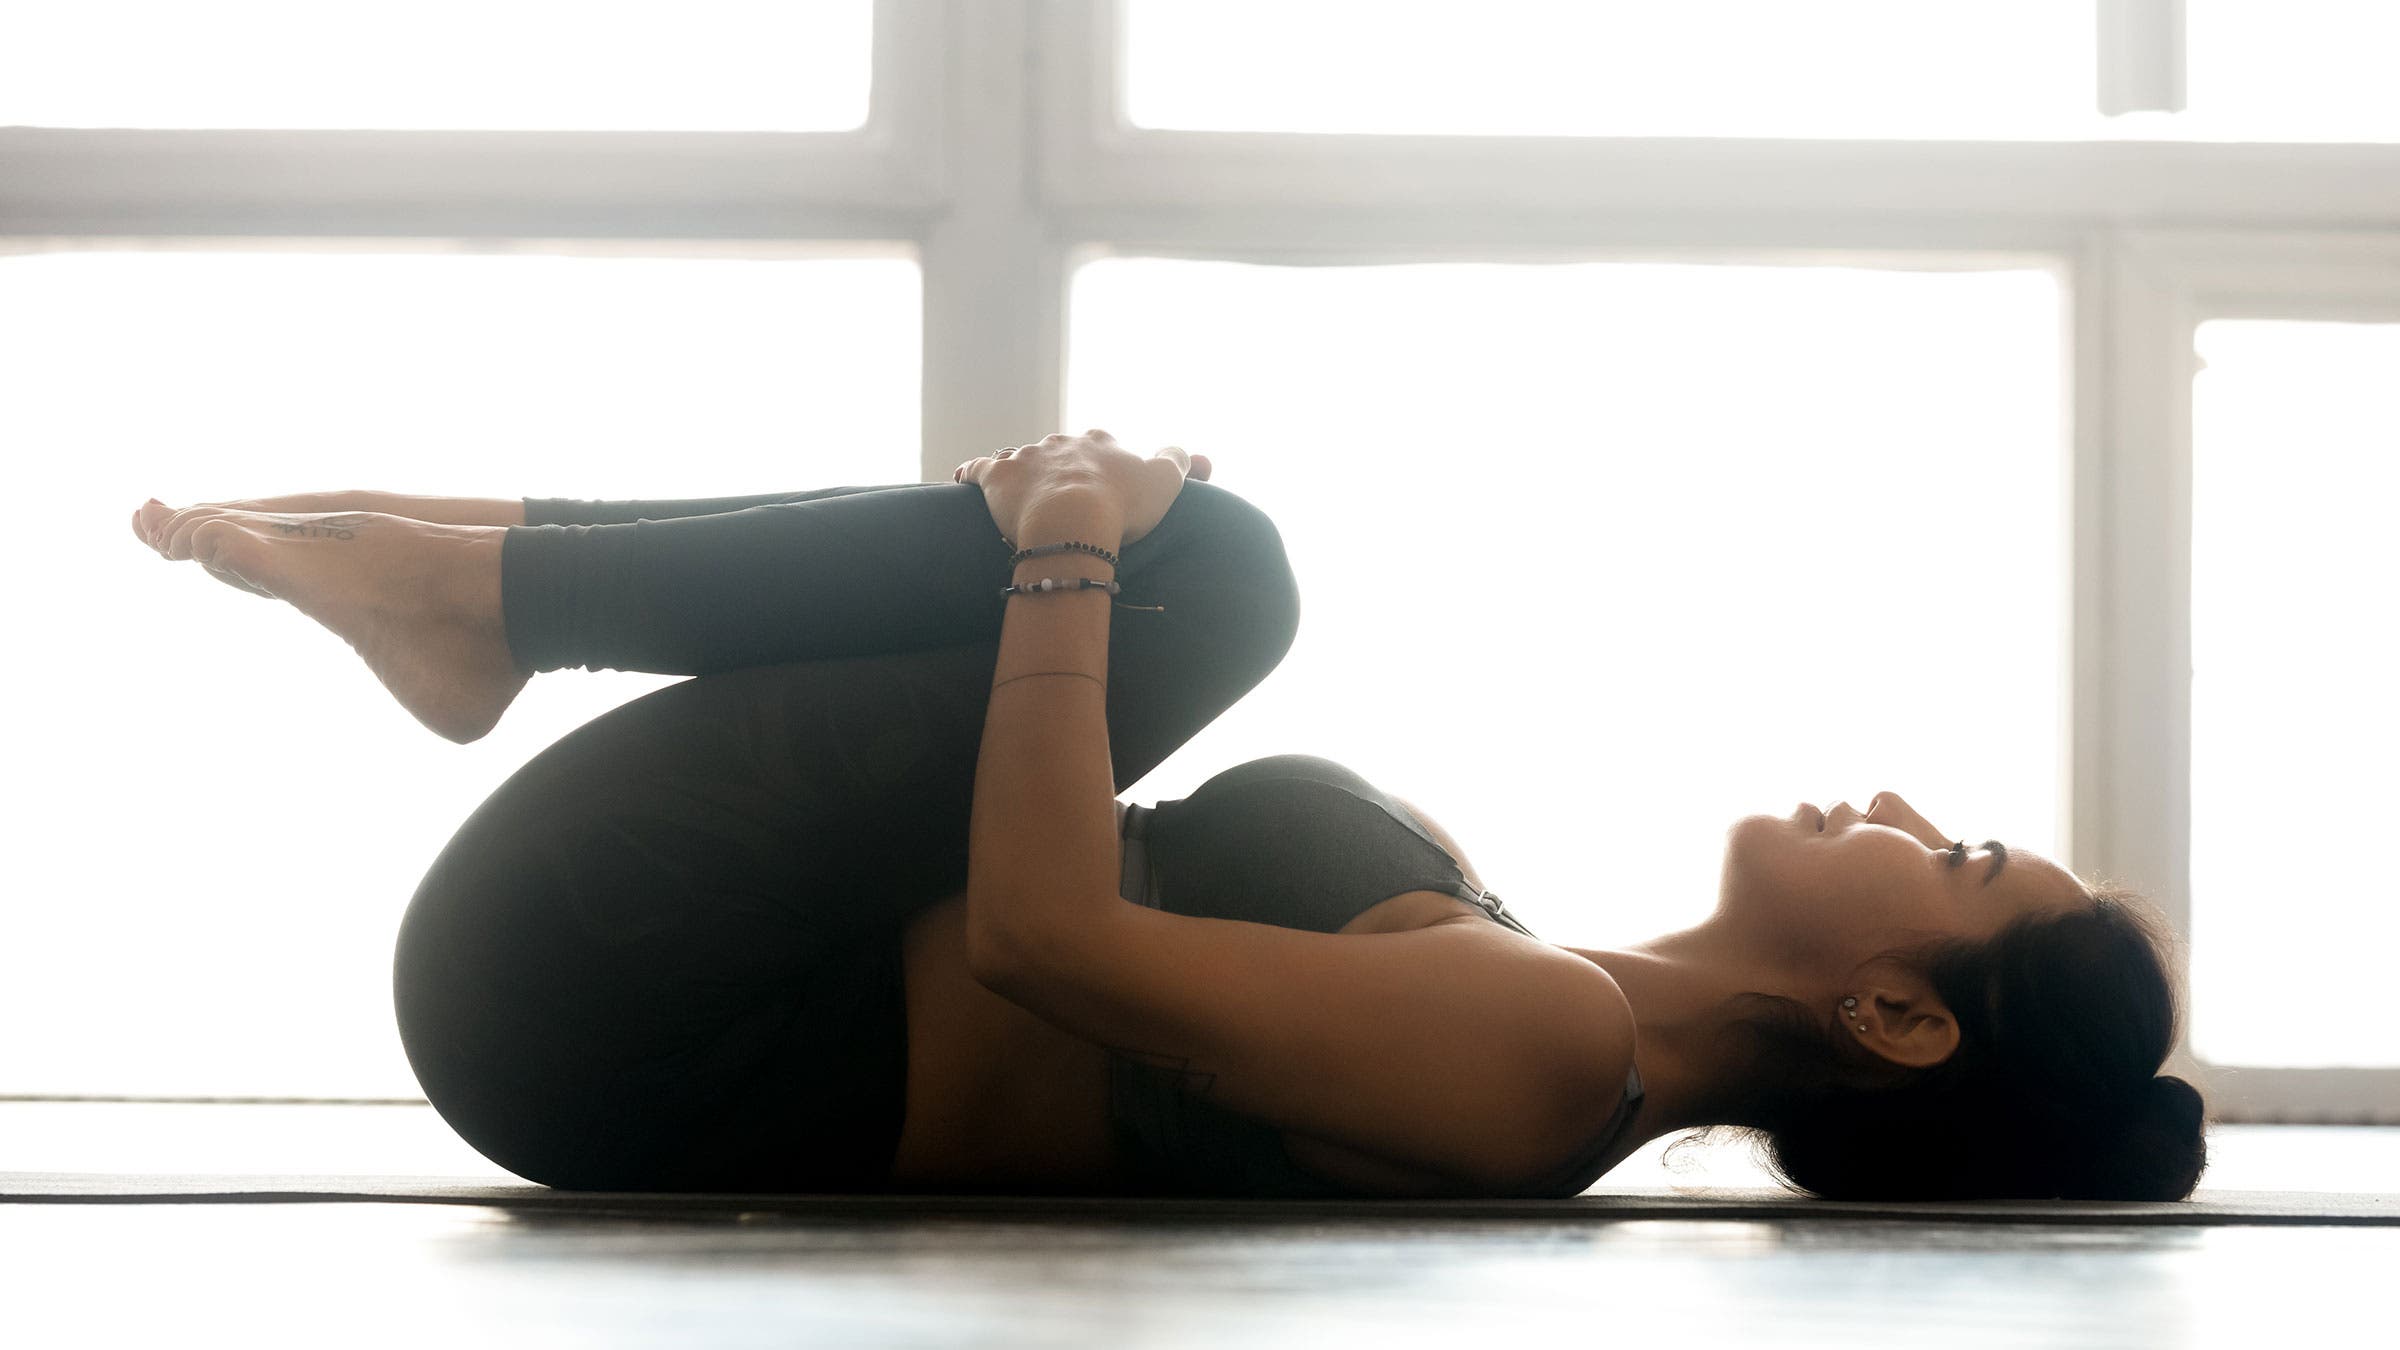
Apanasana (Knees-to-Chest Pose)
This pose relieves tension in your low back and glutes and is an excellent stretch to relieve sciatic pain. Sciatica is a result of the sciatic nerve being pinched or compressed, so taking pressure off your lumbar spine and pelvis may provide temporary relief.
ADVERTISEMENT
To enter the pose:
- Begin by lying on your back with your knees bent out in front of you and your arms by your sides.
- On an inhalation, raise your knees up so your knees and thighs are over your belly.
- Wrap your arms around your knees and interlace your fingers.
- On an exhalation, squeeze your knees into your chest and lightly splay your legs apart so your knees are in line with your armpits.
- Hold for 30 seconds to one minute, and then release on an inhalation.

Viparita Karina (Legs-up-the-Wall Pose)
Legs-up-the-Wall Pose is a classic restorative yoga posture that stretches the hamstrings and glutes, relaxes the hips, improves circulation to the heart, and releases tension in the low back. Sciatica is expressed as pain from the low back through the glutes and down the hamstrings, so stretching these areas while settling your body and mind may provide relief.
To practice:
- Start about 5 to 6 inches away from the wall. Sit sideways with your right side against the wall. Exhale and, with one smooth movement, swing your legs up onto the wall and your shoulders and head lightly down onto the floor.
- Your sitting bones don’t need to be right against the wall, but they should be “dripping” down into the space between the support and the wall. Check that the front of your torso gently arches from the pubis to the top of the shoulders. Bend your knees, press your feet into the wall and lift your pelvis up a few inches if you need to readjust.
- Lift and release the base of your skull away from the back of your neck and soften your throat. Don’t push your chin against your sternum; instead let your sternum lift toward the chin. Take a small roll (made from a towel for example) under your neck if the cervical spine feels flat. Open your shoulder blades away from the spine and release your hands and arms out to your sides, palms up.
- Keep your legs relatively firm, just enough to hold them vertically in place. Release the heads of the thigh bones and the weight of your belly deeply into your torso, toward the back of the pelvis. Soften your eyes and turn them down to look into your heart.
- Stay in this pose for as long as feels comfortable; 5 to 15 minutes.

ADVERTISEMENT
Gomukhasana, Variation (Cow Face Pose)
This pose offers a passive stretch for the hips, allowing gravity to slowly lower your legs and widen your hips. It also stretches the piriformis, a muscle located deep in the glutes that often causes sciatic nerve pain. Loosening it may help ease compression on the sciatic nerve.
To begin:
- Sit in Dandasana (Staff Pose), then bend your knees and put your feet on the floor. Slide your left foot under the right knee to the outside of the right hip. Then, cross your right leg over the left, stacking the right knee on top of the left knee. Bring the right foot to the outside of the left hip. Try to bring the heels equidistant from the hips: with the right leg on top you’ll have to tug the right heel in closer to the left hip. Sit evenly on the sitting bones.
- Inhale and stretch both arms straight out by your sides. Use your fingertips for support, adjusting the amount of weight that your hands are bearing depending on how intense the stretch in your hips is for you.
- Stay in this pose about 1 minute. Uncross the legs and repeat on the other side.

Supta Matsyendrasana (Supine Spinal Twist)
This pose gently adducts and internally rotates the thigh while allowing gravity to pull your knee down, providing a passive stretch for your hips.
Try it:
- Begin by lying on your back with your legs out in front of you, knees slightly bent.
- Grab the back of your right thigh and draw it toward your chest. Then, straighten your left leg. Your left leg can rest as if it were in Savasana.
- Roll onto your left side, bringing your right thigh across your body as you do.
- Gently swap your hands, placing your left hand on top of your right knee while your right arm extends out to your right side.
- Slowly turn your head to the right so you’re facing your right hand.
- Hold for 1 minute, then repeat on the other side.

ADVERTISEMENT
Supta Kapotasana (Reclining Pigeon Pose)
This posture also stretches the hips while releasing pressure in the low back and potentially relieving sciatica pain. By lying down instead of doing a traditional Pigeon Pose, there’s less weight on the hips and the low back isn’t as compressed.
Try it:
- Begin by lying down with your legs out in front of you, knees bent at a 90-degree angle.
- Raise your right foot and place the outside portion of the ankle on the back side of the left knee, in the divet where the thigh meets the knee.
- Thread your right arm through the opening between your legs and bring your left hand around your left leg. Clasp your hands behind your left thigh.
- Draw the left knee toward your chest as you gently push your right knee out, keeping your right shin and right knee in line with each other.
- Hold for one minute, then repeat on the other side.
ADVERTISEMENT
Related: 8 Yoga-Based Stretches to Relieve Tight Tri Hips
From Yoga Journal