Published July 17, 2020 09:40AM
If you buy through our links, we may earn an affiliate commission. This supports our mission to get more people active and outside.Learn about Outside Online's affiliate link policy
Ask A Gear Guru: What Are Tubeless Tires Good For?
What the heck are tubeless tires anyway? We break down tubeless for triathletes A to Z and give a few of our tire and accessory picks.
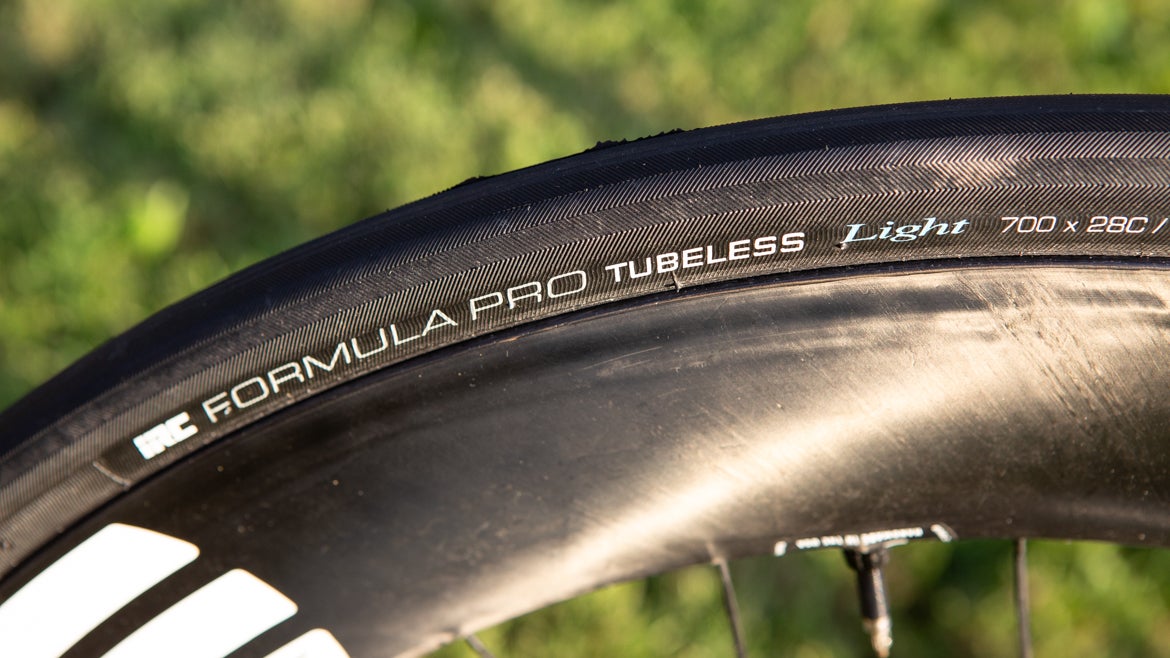
Heather Jackson rode IRC Formula Pro Tubeless Light tires at last year's Ironman World Championship. (Photo: Brad Kaminski)
Remember the good old days where all you had to decide was tubular or clincher? Of course you still had to clear the mental hurdles of “Wait, what is a clincher clinching, and does a tubular tire need a tube or have one?”—but generally the tri world saved tubulars for race day and never used them for training. Of course, the tide slowly turned in the last 15 years from “always tubular on race day (if you’re serious)” to “sometimes tubular, but now probably more like clincher.” Either way, you had a tubular tire that was pretty tough to change/mount and impossible to fix on the road if you didn’t bring a whole new tire or sealant, or a clincher tire that was relatively easy to change/mount but might have be a little heavier with maybe more rolling resistance. A clincher wheel only took clincher tires + tube; a tubular wheel only took tubular tires. But in the last 10 years, another technology in tires has wandered into the fray—just when we were starting to think that clinchers were getting the upper hand: tubeless. Below we’ll break down what tubeless tires are, if you have no clue, and we’ll get into when and if triathletes should use them. It’s not as simple as you might think.
What Are Tubeless Tires?
They’re tires without tubes in them. Duh.
No, there’s more to it than that: Tubeless tech uses a very specific type of rim bead (the thing that keeps both clincher and tubeless tires on the wheel) that seals up with the tire bead hook on tubeless tires. Clincher tires also have a tire bead hook, but it’s not intended to form a seal—rather it just keeps the tire from rolling off in corners and the tube from popping out. Tubular tires don’t need a hook because they’re simply glued to the rim itself.
ADVERTISEMENT
Tubeless tires have a very tight seal from bead to hook—hence why they can be hard to get on/off—and to help that connection riders use sealant pumped into the cavity between the tire and the rim (where the tube would be). The rim also has to be sealed—either with tape or via rim construction—so that air/sealant doesn’t leak out the spoke holes. Finally, a tubeless tire uses a special separate valve stem that seals up the junction between the valve stem and the inside of the rim to keep everything air tight.
Where Did Tubeless Tires Come From?
Simply put—the trails. Mavic is credited with inventing the tubeless tire way back in the late ‘90s. Slowly over the years, fat-tire mountain bikers began to adopt the technology for two reasons: 1. Tubeless tires are less likely to get flats from small punctures, due to the use of sealant; and 2. Riders can run lower pressures—for better traction—without the risk of pinch flats. Since both of those reasons are A Big Deal for off-road riding and the only real downsides are higher weight and difficulty when mounting/changing, even moderately serious mountain bikers began to adopt the technology over the last 10-15 years. (Plus neither weight nor difficulty, in general, have ever been a hurdle for MTBers.)
How Do You Set Up Tubeless Tires?
This is one of the biggest barriers to entry for people looking to get into tubeless tires. I put this before the “good v. bad” section because it’s important to understand what you’re getting into before you even weigh the pros and cons. If the setup seems insurmountable (and having a mechanic do it each time is impractical), then maybe stick to clinchers. While this isn’t a guide to setting up tubeless tires, here are the basic steps:
- Be sure your wheel is tubeless ready (meaning: set up for tubeless right out of the box, rim sealed and valve stem included) or tubeless compatible (meaning: you might need to plug the spoke holes with either caps or a special tape that’ll likely be included).
- Mount the tire (it must be a tubeless-compatible/ready tire) on the rim. It might be VERY difficult to get both sides into the rim—this is a function not a bug.
- Some people like to put a tube in the tire, inflate it, and let it sit outside to help seat a bead, remove any kinks, and flatten the tape (if there is any). Then unseat one bead, remove the tube, and proceed below.
- You’ll need to put both beads on the rim (don’t forget to put in the valve stem and secure it first!), remove the valve stem core with a core wrench, fill the tire with the recommended amount of sealant, roll the wheel around to coat the tire, and IDEALLY use an air compressor to fire a fast burst of air into the tire, seating the beads and forming a tight connection.
- If you don’t have a compressor, there are pumps that help with a blast of air, but otherwise this can be trial and messy error if the tire won’t seat properly.
- Inflate to the desired pressure once seated.
No, it’s not easy, and yes, it can be frustrating—even more so if you’re using a disc wheel because then you’re dealing with a right-angle adapter when trying to get that blast of air in.
ADVERTISEMENT
How Do You Repair Flats On The Road?
This is also high up in the guide because it can be another hurdle people aren’t comfortable with. Since triathletes generally train on roads, probably 75% of punctures we get are very small, and the sealant inside a tubeless setup will automagically plug them. (That’s one of the big upsides to tubeless tires.) If you get a bigger puncture and you see sealant oozing out, you’ll either need to fill the hole with a plug you’re carrying with you, a patch, or even a tube. Yes, you can definitely use a tube in a tubeless setup—though it sounds counterintuitive—but just know it will be hard to install on the tight beaded tire, and you need to be sure the offending piece of whatever caused the flat in the first place has been removed. Remember, though, this can be a little tough and messy to do inside a slimy tubeless tire.
Why Would I Want A Tubeless Setup?
Ok, you made it this far, so you’re adventurous. But is a tubeless setup for you? It depends. First, it’s important to note that while tubeless technology has improved, the tubeless tire + sealant setup can be heavier than a clincher + tube setup (because: no sealant). That said, triathletes shouldn’t really be counting grams. On the other hand, rolling resistance—the amount of friction between the tire and the ground—is definitely less on a tubeless setup for reasons we won’t get into here. This is something triathletes should be paying attention to—you’ll be rolling faster.
On the medium-important scale for triathletes, tubeless tires can be run at a much lower tire pressure—increasing both comfort and handling. The increased level of handling due to a lower pressure is helpful especially on a technical and rainy course, but only if you’re someone who really pushes the limits of cornering. Of course the “less flats” thing is also a pretty big deal when you’re in the middle of a race, but probably less so for training.
However, there is one big place where tubeless tires make A TON of sense, but it’s not where you’d expect: On disc wheels. Right now disc wheels should be making a huge resurgence. Why? First, many triathletes can benefit from the aerodynamics of a disc wheel given you’re averaging around 20mph or faster on a flat to rolling course. Second, disc wheels with disc brakes remove the “horrible breaking” issue that most carbon rim-braking disc wheels suffer from. Finally, using a tubeless tire means that you can decrease the pressure to a point where a disc wheel becomes just as comfortable as almost any carbon wheel with very little penalty (to a point, of course). The abuse a disc wheel can dish out (at a higher pressure)—particularly in long-course racing—is one of the biggest reasons many triathletes should not be using disc wheels. They just beat you up too much over the course of a long ride. The decrease in pressure allowed by a tubeless tire can mitigate this some. Bear in mind, though, installing a tubeless tire setup on a disc wheel is mildly horrifying, but it’s not something you’ll likely have to do more than once, in fact one of our favorite discs can be ordered with a tubeless tire and sealant pre-installed.
ADVERTISEMENT
Should Triathletes Use Tubeless Tires?
This is the question you’ve probably come here to answer. The good news about tubeless technology is that it’s a “phantom feature”: It’s something that’s likely on 95% of new wheels being made, but you can use tubeless tires or just use clinchers with tubes, and it doesn’t matter. The even better news is that tire brands and wheel brands seem firmly committed to the tech, and both are getting better and better every year. There’s a good chance tubeless tech is here to stay for a while. In other words, you can invest in a tubeless tire for your already tubeless-ready or tubeless-compatible wheel, and if you don’t like it, you can just wait around a bit until the tech evolves to the point where you will. It’s already changed so much in the last five years. But to break it down even more simply, here’s an easy reference:
Tubeless Tires for Triathletes: Pros and Cons (In order of tri-importance)
Pros:
- Better rolling resistance
- Less punctures
- Ability to run at lower pressure for comfort (disc wheels, in particular)
- Ability to run at lower pressure for cornering (wet conditions, in particular)
Cons:
- Difficult to install
- Difficult to repair if actually punctured beyond the help of sealant (messy)
- Generally heavier system
- A little more upkeep, making sure the sealant doesn’t dry up
- Fewer choices for tire options
Ok, ready to make the leap? Check out our picks for tubeless tires and accessories:
ADVERTISEMENT
Continental Grand Prix 5000 TL
$50, Competitivecyclist.com
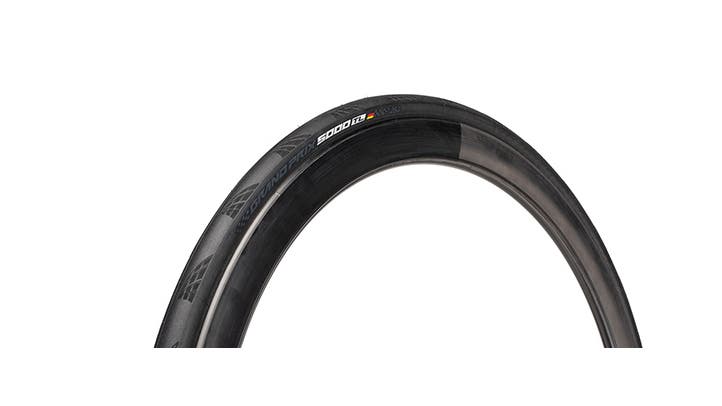
Continental was one of the few tire brands that held off on releasing a tubeless tire up until last year. We’re glad they finally joined the party: Their GPx000 series tires are the gold standard for all-around training/racing/wet/dry riding, and you’ll find GP5000s on tons of bikes in the transition area at Kona. With good reason—these tires have decent rolling resistance numbers, excellent puncture protection, midpack weight, and fantastic grippiness. I personally ran GP4000s on all of my wheels when I was racing, and the tubeless version of the 5000 is even better.
Stan’s Race Sealant
$40 for 1 quart, Competitivecyclist.com

Stan’s was basically the original tubeless conversion kit way back when, so they’ve had a ton of experience in that space. This version of their famous sealant virtually eliminates flats of any size, so you don’t even have to worry about bringing a spare tube or plug on race day. Obviously this works as a daily sealant as well, but be warned that you cannot inject this into a valve, use a smaller bottle, or any kind of injector, as the “sealing crystals” will clog pretty much anything instantly.
Muc-Off Puncture Plug Repair Kit
$15, Rei.com
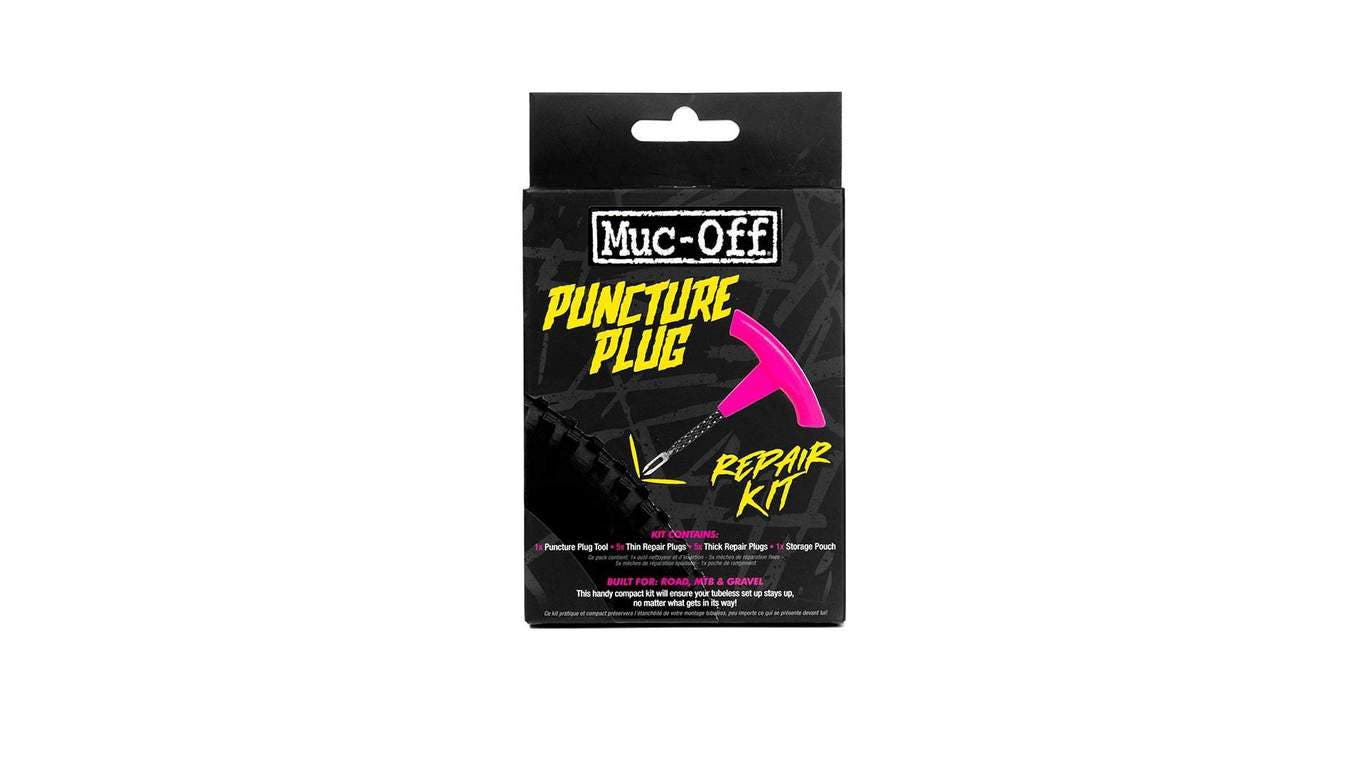
This plug kit is the perfect backup for the Type A triathlete who likes to take no risks when out riding (sound like anyone you know?). The kit contains a reamer and plugger with five small plugs and five large plugs—enough for pretty much anything short of a hugely slashed tire. It’s small enough to fit in a seat bag and comes with a handy little pouch to keep it separate from the rest of your repair stuff.
ADVERTISEMENT
Blackburn Chamber Tubeless Floor Pump
$165, Competitivecyclist.com
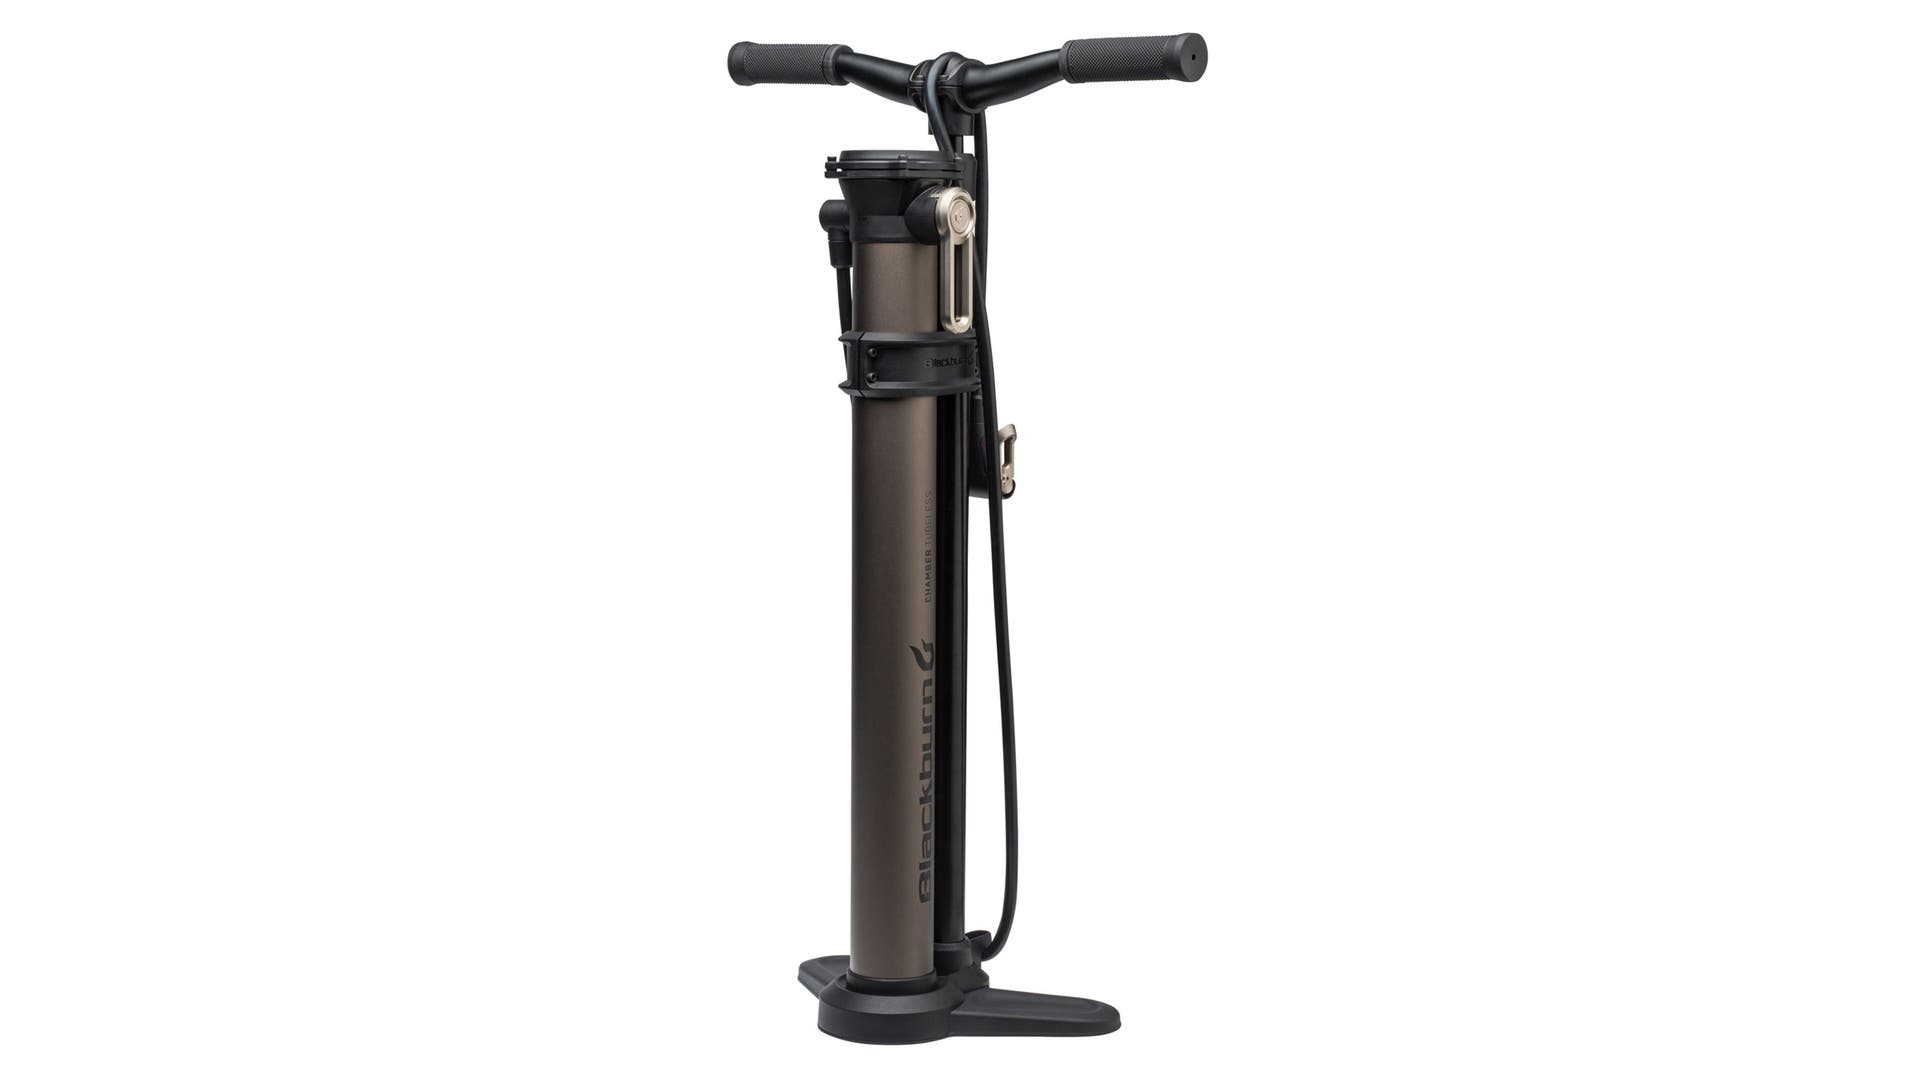
Not only is this pump super-intense looking and very very heavy duty, it also features a “supercharging” chamber that allows you to prime the pump to hold and deliver a big blast of air to help seat your tubeless tire. If you don’t want to invest in a noisy and unsightly air compressor, this is hands-down the next best option. Trust us.