New perk! Get after it with local recommendations just for you. Discover nearby events, routes out your door, and hidden gems when you sign up for the Local Running Drop.
The EVOC Road Bike Bag Pro offers the security of a hard-shell box with the lightweight of a soft case, all wrapped up in the convenience of a minimal-deconstruction travel case. The bike case arrived in a very compact box (compared to the actual size of the case). We did an unboxing review here. The important takeaway from the unboxing is that, when not in use, the bag folds down nicely for storage—unlike a comparable hard case, or even many soft travel bags.
I had the opportunity to do a follow up “road test” of the EVOC Road Bike Bag Pro and here’s what I found.
RELATED: Unboxed: EVOC Road Bike Bag Pro
EVOC Road Bike Bag Pro: Initial Assembly
The case arrived shortly after my first race of the 2021 season. (Real life racing! Hooray!) My next race wasn’t for several weeks, but like a kid on Christmas morning, I wanted to take it out and play with it a bit.
I am very glad I did, as the EVOC Road Bike Bag Pro comes with “some assembly required” – mainly, a series of stabilizer sticks that need to be inserted into stitched pockets throughout the bag to give it structure. While the directions clearly state which stick goes in what pocket, I found it much more fun to dive in and try to figure it out on my own. (Pro tip: don’t do that.)
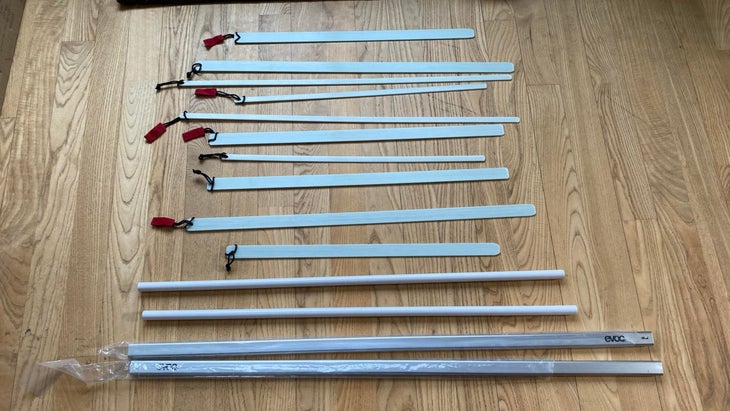
I found that the pockets were extremely tight and that to get the stabilizer sticks all the way inserted, I needed an extra set of hands to help coerce them into place. It took some strength, persistence, and dare I say, brute force to get them inserted properly, but in the end I’m still left with one I still can’t get all the way in. I can assume that over time the fabric of the bag will give some, and these will become easier to insert and remove.
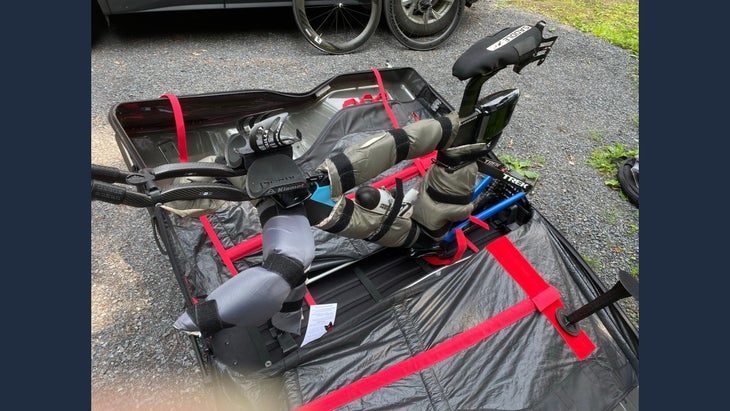
Once the bag was outfitted with the stabilizer sticks, I set about assembling the road bike stand which ultimately sits at the base of the bag. This step was extremely easy and obvious—even for me and I count myself a part of the mechanically challenged.
The bag comes with two QR 5mm front axle adaptors and twu thru axle 12 mm adaptors. It also comes with three rear axle options; 5 x 130mm, 12 x 135mm, and 12 x 142mm.
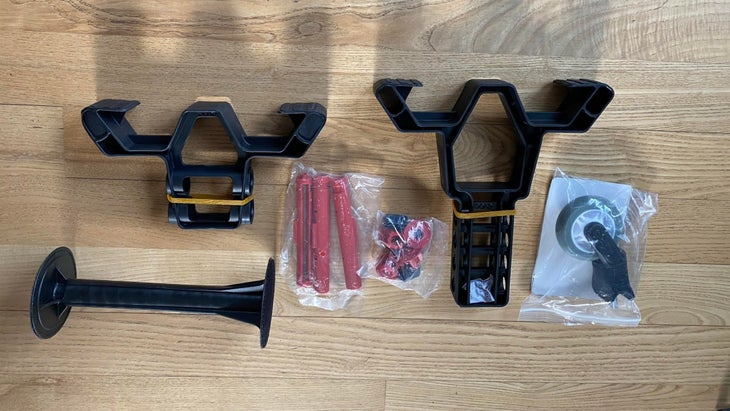
The stand has a front hub that slides onto two base rods and “clicks” into place. The front hub has two different height options for mounting the front fork, depending on the size of your frame.
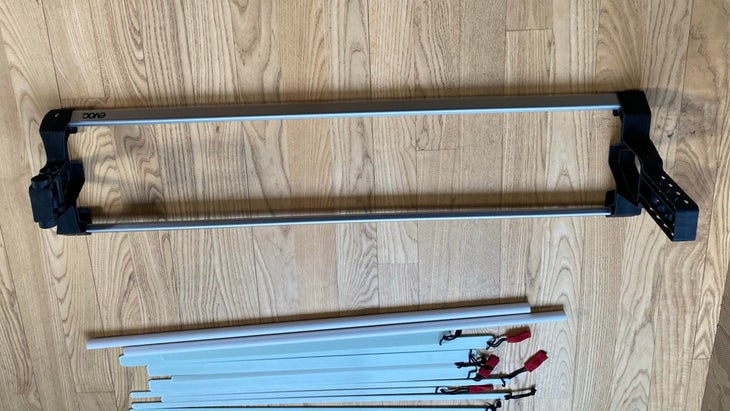
The rear hub slides on and can be adjusted according to the size of the frame with four height options. These height options—as well as the maneuverability of the rear hub—offers great flexibility for bikes of all sizes, particularly time trial bikes with different pole extension heights at the front end. I am not mechanical in the slightest and even I had no problem figuring this part out.

EVOC Road Bike Bag Pro: Packing The Bike
When it comes to getting the bike in the bag, there are two options:
- Pull the stand out of the bag, secure the bike to it, and (with help) slide it back into the bag with stabilizing rods affixed (the bag in an upright and “rigid position”).
- Remove the stabilizing rods (yes, the ones that were so hard to get into place initially, but after the pockets “stretch”, this was a much easier process) and allow the sides of the bag to flop to the floor. Pack the bike, then reinsert the rods—giving the bag its structure—and zip the bag up.
If you’re packing the bike by yourself, I highly recommend option number two!
A bit about my setup: I ride a Trek Speed Concept; size medium. My cockpit has D2Z extension poles and Kismet elbow cups. I have a BTA bottle cage as well. To get it packed, I removed the pedals and wheels. I set the rear hub option to the highest setting to accommodate the size of my chain rings. The front fork clamps in easily, and I was set!
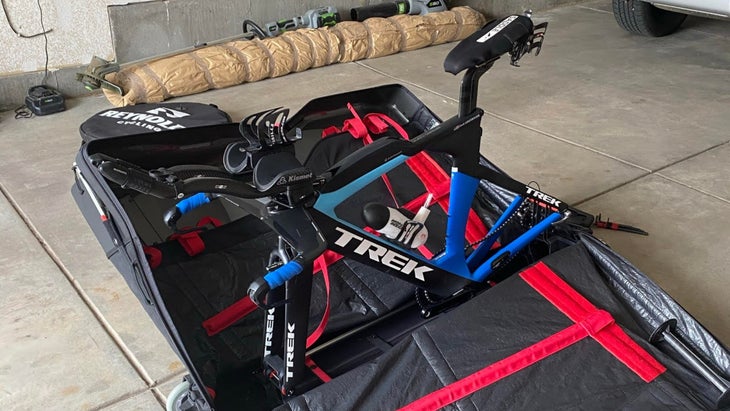
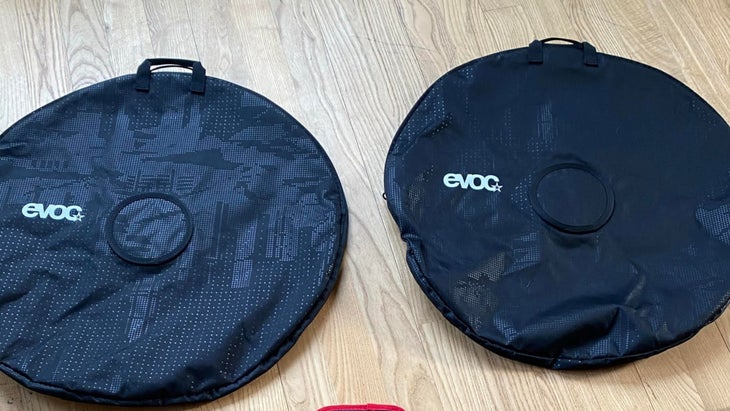
I did not have to adjust my bars at all, and my BTA bottle cage fit the height of the bag, but I did have to lower my saddle by 10mm or so. The bag also comes with 2 wheel bags as well as a cockpit cover. The wheels simply slide into the sides of the bag. Bear in mind they are not secured to the bag at all—which was somewhat unnerving—but they didn’t appear to budge during travel.
RELATED: How to Travel with Your Bike (Without Losing Your Mind)
There is also a Velcro strap that secures the bag’s sides to the seatpost once the bike is secured in the frame base. Then there is a side impact absorber that Velcros to each side of the bag to protect the bike from compressed pressure of a side impact. This piece stayed firmly in place with industrial-strength Velcro. I was impressed, and the piece offered some piece of mind when turning my precious bike over to the TSA animals!
Because I am (very) anal, I took care to pad my bike with AlboPads. They’re one of the greatest inventions in the universe of traveling with your bike, but – sadly – they’re no longer available.
I also fit a small gear bag with tools and my shoes into the front, as there was ample space in front of the fork once the bag was packed. I also fit my wetsuit bag in that space. I could have probably fit my helmet as well, but as a first-timer, I didn’t want to press my luck on the first trip.
EVOC Road Bike Bag Pro: Travel Time
At the airport, the case tipped the scales at 58 pounds, which was within allowable parameters for a bicycle. That said, the additional gear bag was quite heavy and without it, the bike would have been well below the standard luggage limit of 50 pounds.
The bag has two wheels on the front and a removable rear wheel. The rear wheel pops off easily once you’ve checked in and fits conveniently into an exterior pocket of the bag. Note: The bag wheels along rear end first! That took a few minutes of airport confusion to figure out. The bag corners well, but is not unruly.
I was impressed with the number of handles on the exterior of the bag, which made it VERY easy to lift into the back of a car; much easier than other brands I’ve used. The behind-the-scenes side effect of this is probably that baggage handlers are more likely to grab it properly (and safely) without getting frustrated and flinging it or letting it fall.
To be clear: This baby is NOT petite. That said, we rented a mid-sized SUV and had no problems sliding the case in, on its side, to the back of our Chevy Equinox along with two massive duffel bags, a separate wheel box, and three carry-on bags also in the rear of the vehicle and were not remotely stressed making it all fit. If you travel in a smaller vehicle, you could be in trouble.
I timed myself packing the bike (once the bag was assembled). Total time? 16 minutes. That included all the extra padding I put on. To unpack the bike? 12 minutes, including pumping tires.
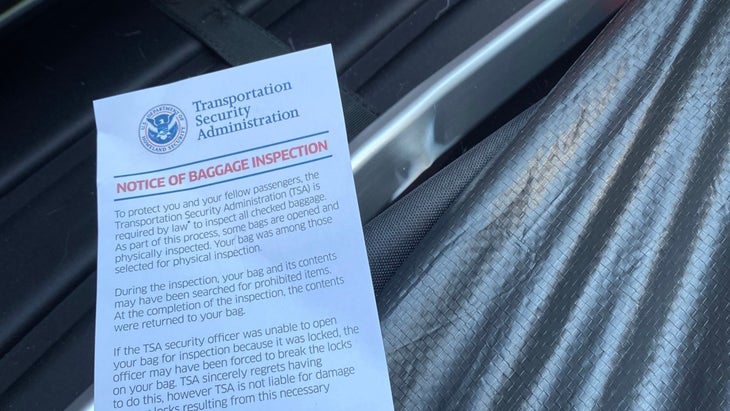
As I completed my bike assembly at my destination, I found a little treat that the TSA left…..no not just their friendly calling card, but also a love tap to the case you can see to the right of their little note.
EVOC Road Bike Bag Pro: Conclusions
The case took quite a whack in travel, and yet my bike was entirely unscathed. The interior frame stood up to the blow remarkably well, despite the abuse, and I found myself incredibly grateful for the durability and protection of this case. Other “convenience” bike bags haven’t fared as well. In my experience, the bike comes dislodged from the frame under such abuse, and then floats freely with little protection.
In conclusion, other than the size of this case? I was super impressed with this bag. Yes, there was a learning curve, but with only one use, I feel like a seasoned pro already. It provides the convenience like other competitors, in terms of minimal fuss at packing and unpacking the bike, but it also provides the protection and durability of a hard case.
RELATED: 5 Steps to Ensure Your Bike is Race-Ready after Travel