
New perk! Get after it with local recommendations just for you. Discover nearby events, routes out your door, and hidden gems when you sign up for the Local Running Drop.
Hip mobility refers to the total range of motion available at the hip joint, as well as the ability to control that range of motion. Mobility is determined by multiple factors, including muscle length or flexibility, joint structure, soft tissue mobility, and nervous system input. The hip can move into flexion and extension (forward and back), abduction and adduction (out to the side and in across the body), and internal and external rotation (rotating in and out-think twisting your leg). All of this motion is crucial for triathletes who swim, bike, and run.
Triathletes may struggle with hip mobility for several reasons: Some limitations can be due to anatomical bony structure, which cannot be changed; arthritic changes within the joint and tightness in the joint capsule can also limit mobility; and the labrum can develop tears that may restrict motion, particularly into flexion, adduction, and internal rotation.
Limitations in hip mobility can also be due to more “fixable” causes. Triathletes who spend lots of time sitting or hunched forward on a bike may experience shortening of their hip flexors or hamstrings. Weakness and overuse can also cause issues-when muscles can’t handle the loads placed upon them, they may develop spasms and trigger points (small, hyperirritable bands of tight tissue) within the muscle or adhesions between muscle fibers, leading to mobility impairments that can lead to a host of other issues.
Triathletes, thankfully, do not need the hip mobility of a gymnast in order to swim, bike, and run, but they still do need smooth, controlled hip movements. Running requires adequate hip extension at the end of the stride, and riding in the aerobars requires high degrees of hip flexion and adequate hamstring flexibility. Mobility deficits force the body to find other ways to move, leading to potentially harmful compensations, particularly in the lower back, pelvis, or further down the leg. Additionally, trigger points or adhesions that prevent the muscle fibers from contracting and moving smoothly can lead to poorly distributed loads, biomechanical issues, nerve impingement (especially in the deep gluteal muscles), compromised performance, and pain and dysfunction.
Section dividerHow can you evaluate your own hip mobility?
Many different tests to measure hip mobility exist. Triathletes should pay particular attention to the mobility in the front of their hips and hamstrings, and they should also have an idea of how much rotation they have at their hip joints to better understand their movement patterns. The tests below are a good way to start looking at these areas!
The Thomas Test
The Thomas test evaluates flexibility of the hip flexor muscles on the front of the hip and gives an idea of hip flexion range of motion.
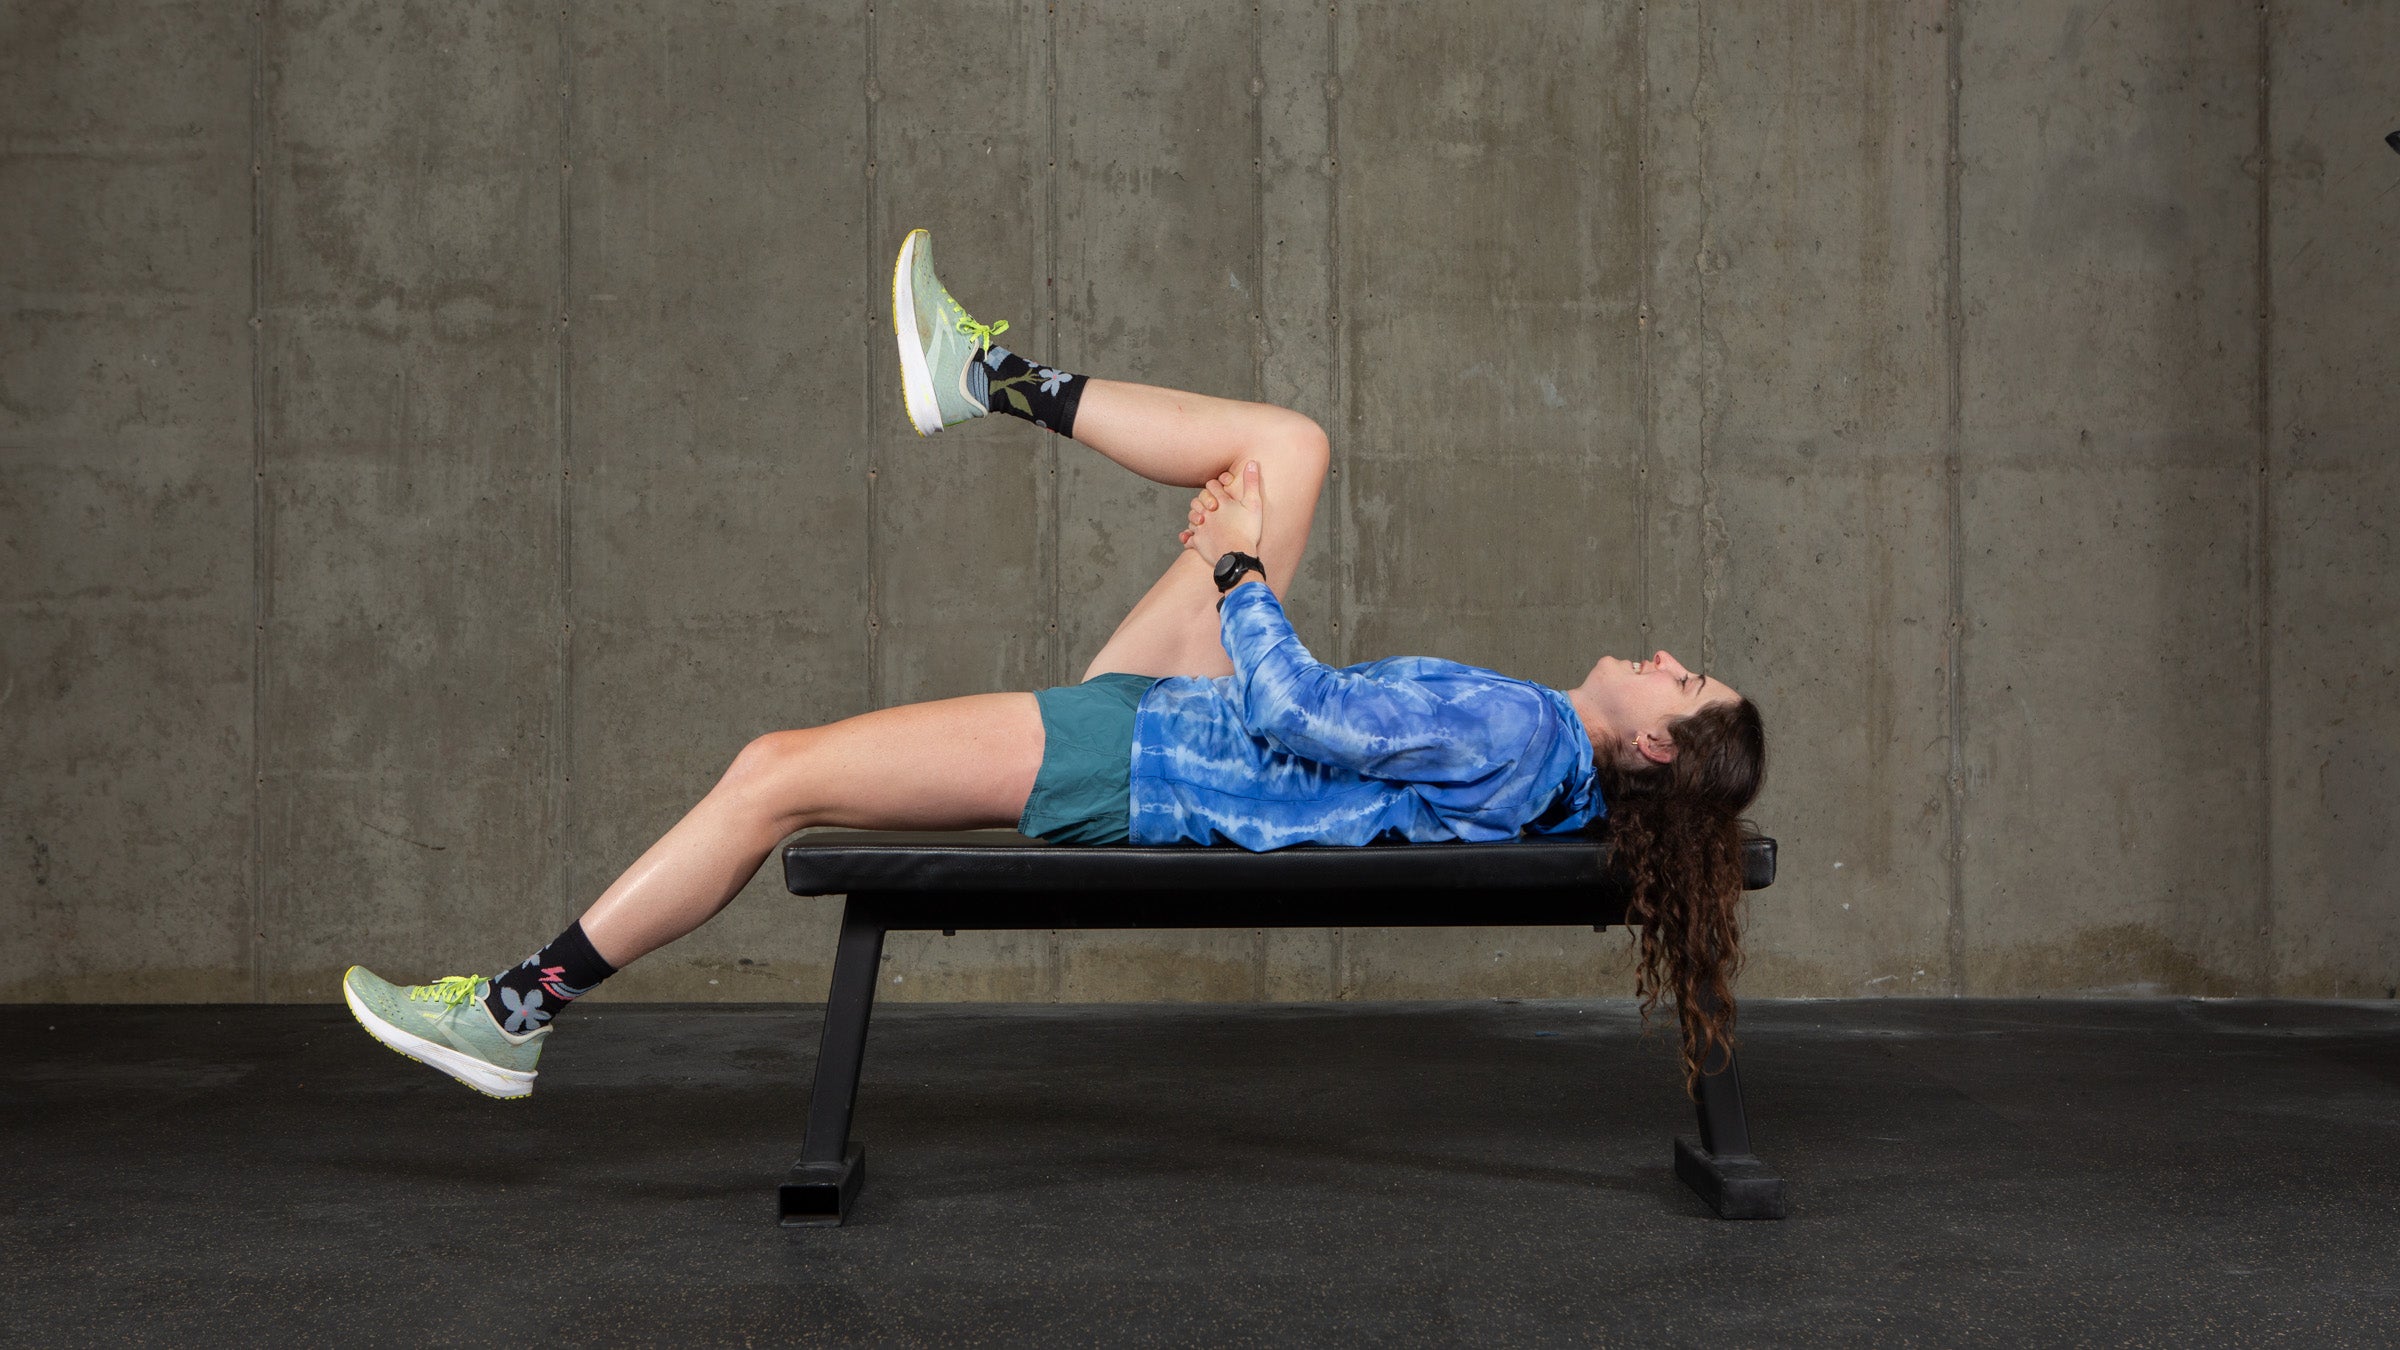
How: Sit towards the edge of a firm table or bed. Lay down, so your back is on the table, and your legs are hanging over the edge. Grab behind one knee and pull that leg towards your chest as far as you can (you should be able to pull this leg up to about 120 degrees of hip flexion without pinching or pain). Check what the extended leg is doing-the back of the thigh should maintain contact with the table. If it rises up, then the hip flexors are tight. If that leg has to rotate out towards the side to maintain contact with the table, then the muscles on the outside and front of the hip might be tight. Finally, try to flex the knee-if it cannot flex to 90 degrees with the thigh maintaining contact with the table, the quadriceps muscle that crosses the hip joint is tight. If this is an issue, you’ll want to begin with the kneeling hip flexor stretch with band mobilization mobility in the next section.
Straight Leg Raise
This test will evaluate hamstring flexibility.
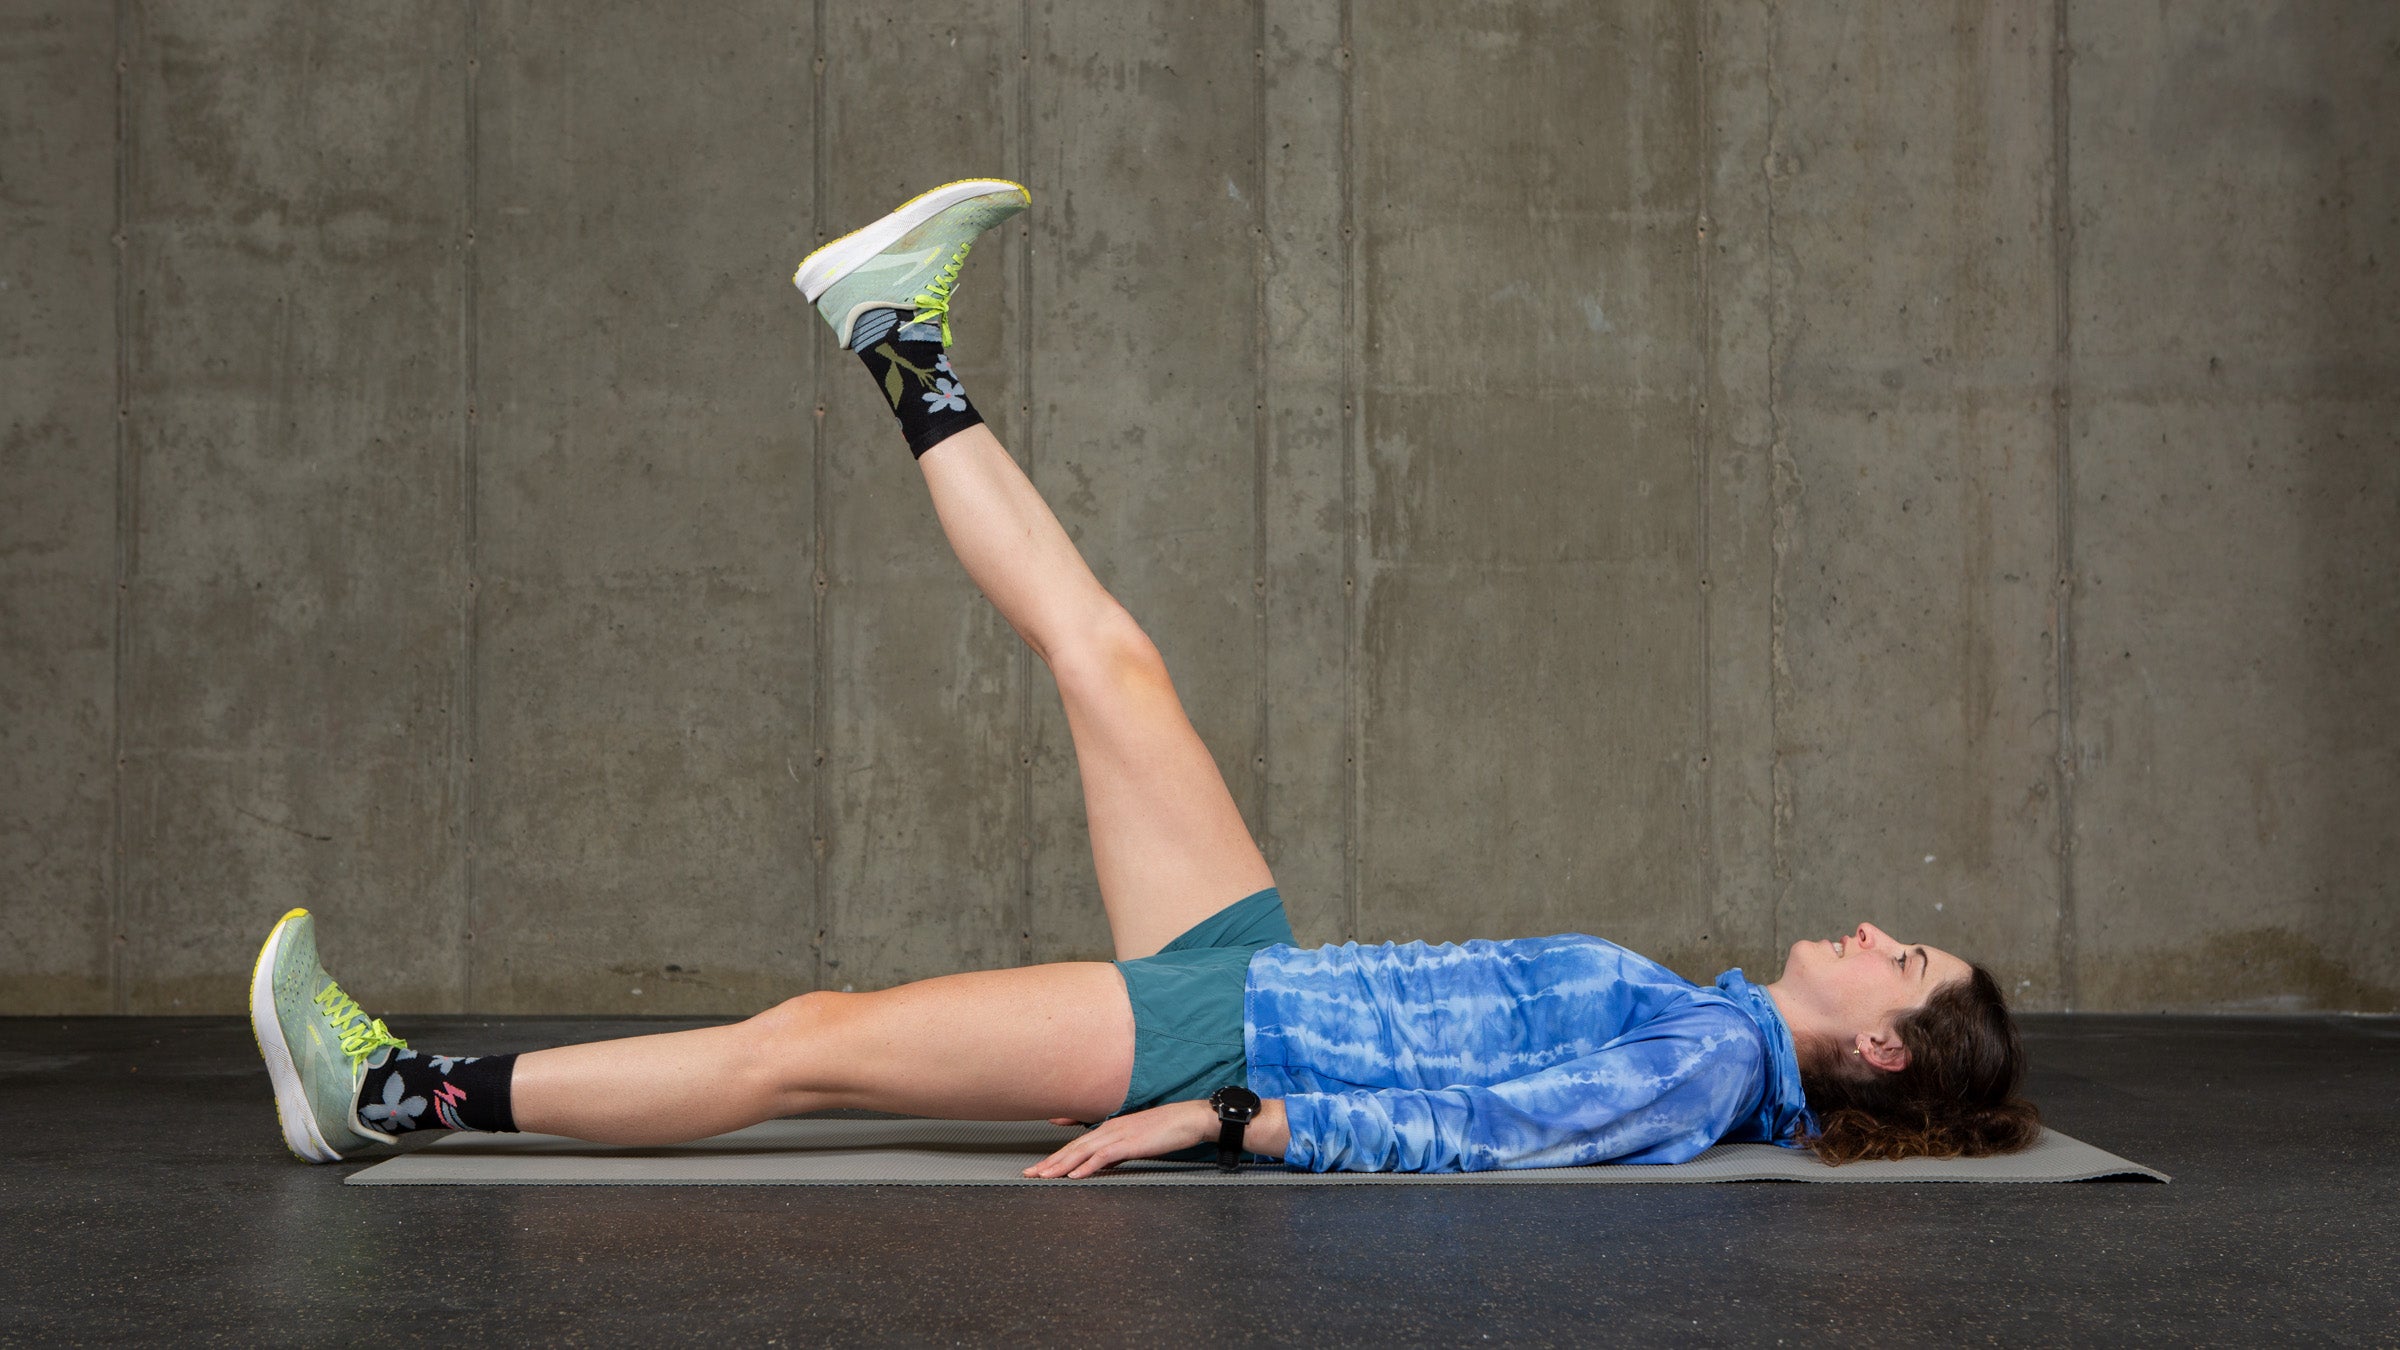
How: Lay on your back, with both legs extended. Keeping one leg flat on the ground, raise the other one up as high as you can while keeping the knee completely straight. If you can get the straight leg up to a 70 degree angle with the ground, you have adequate hamstring flexibility. If not, it’ll need some work!
Seated Hip Internal and External Rotation
This test evaluates hip range of motion into rotations.
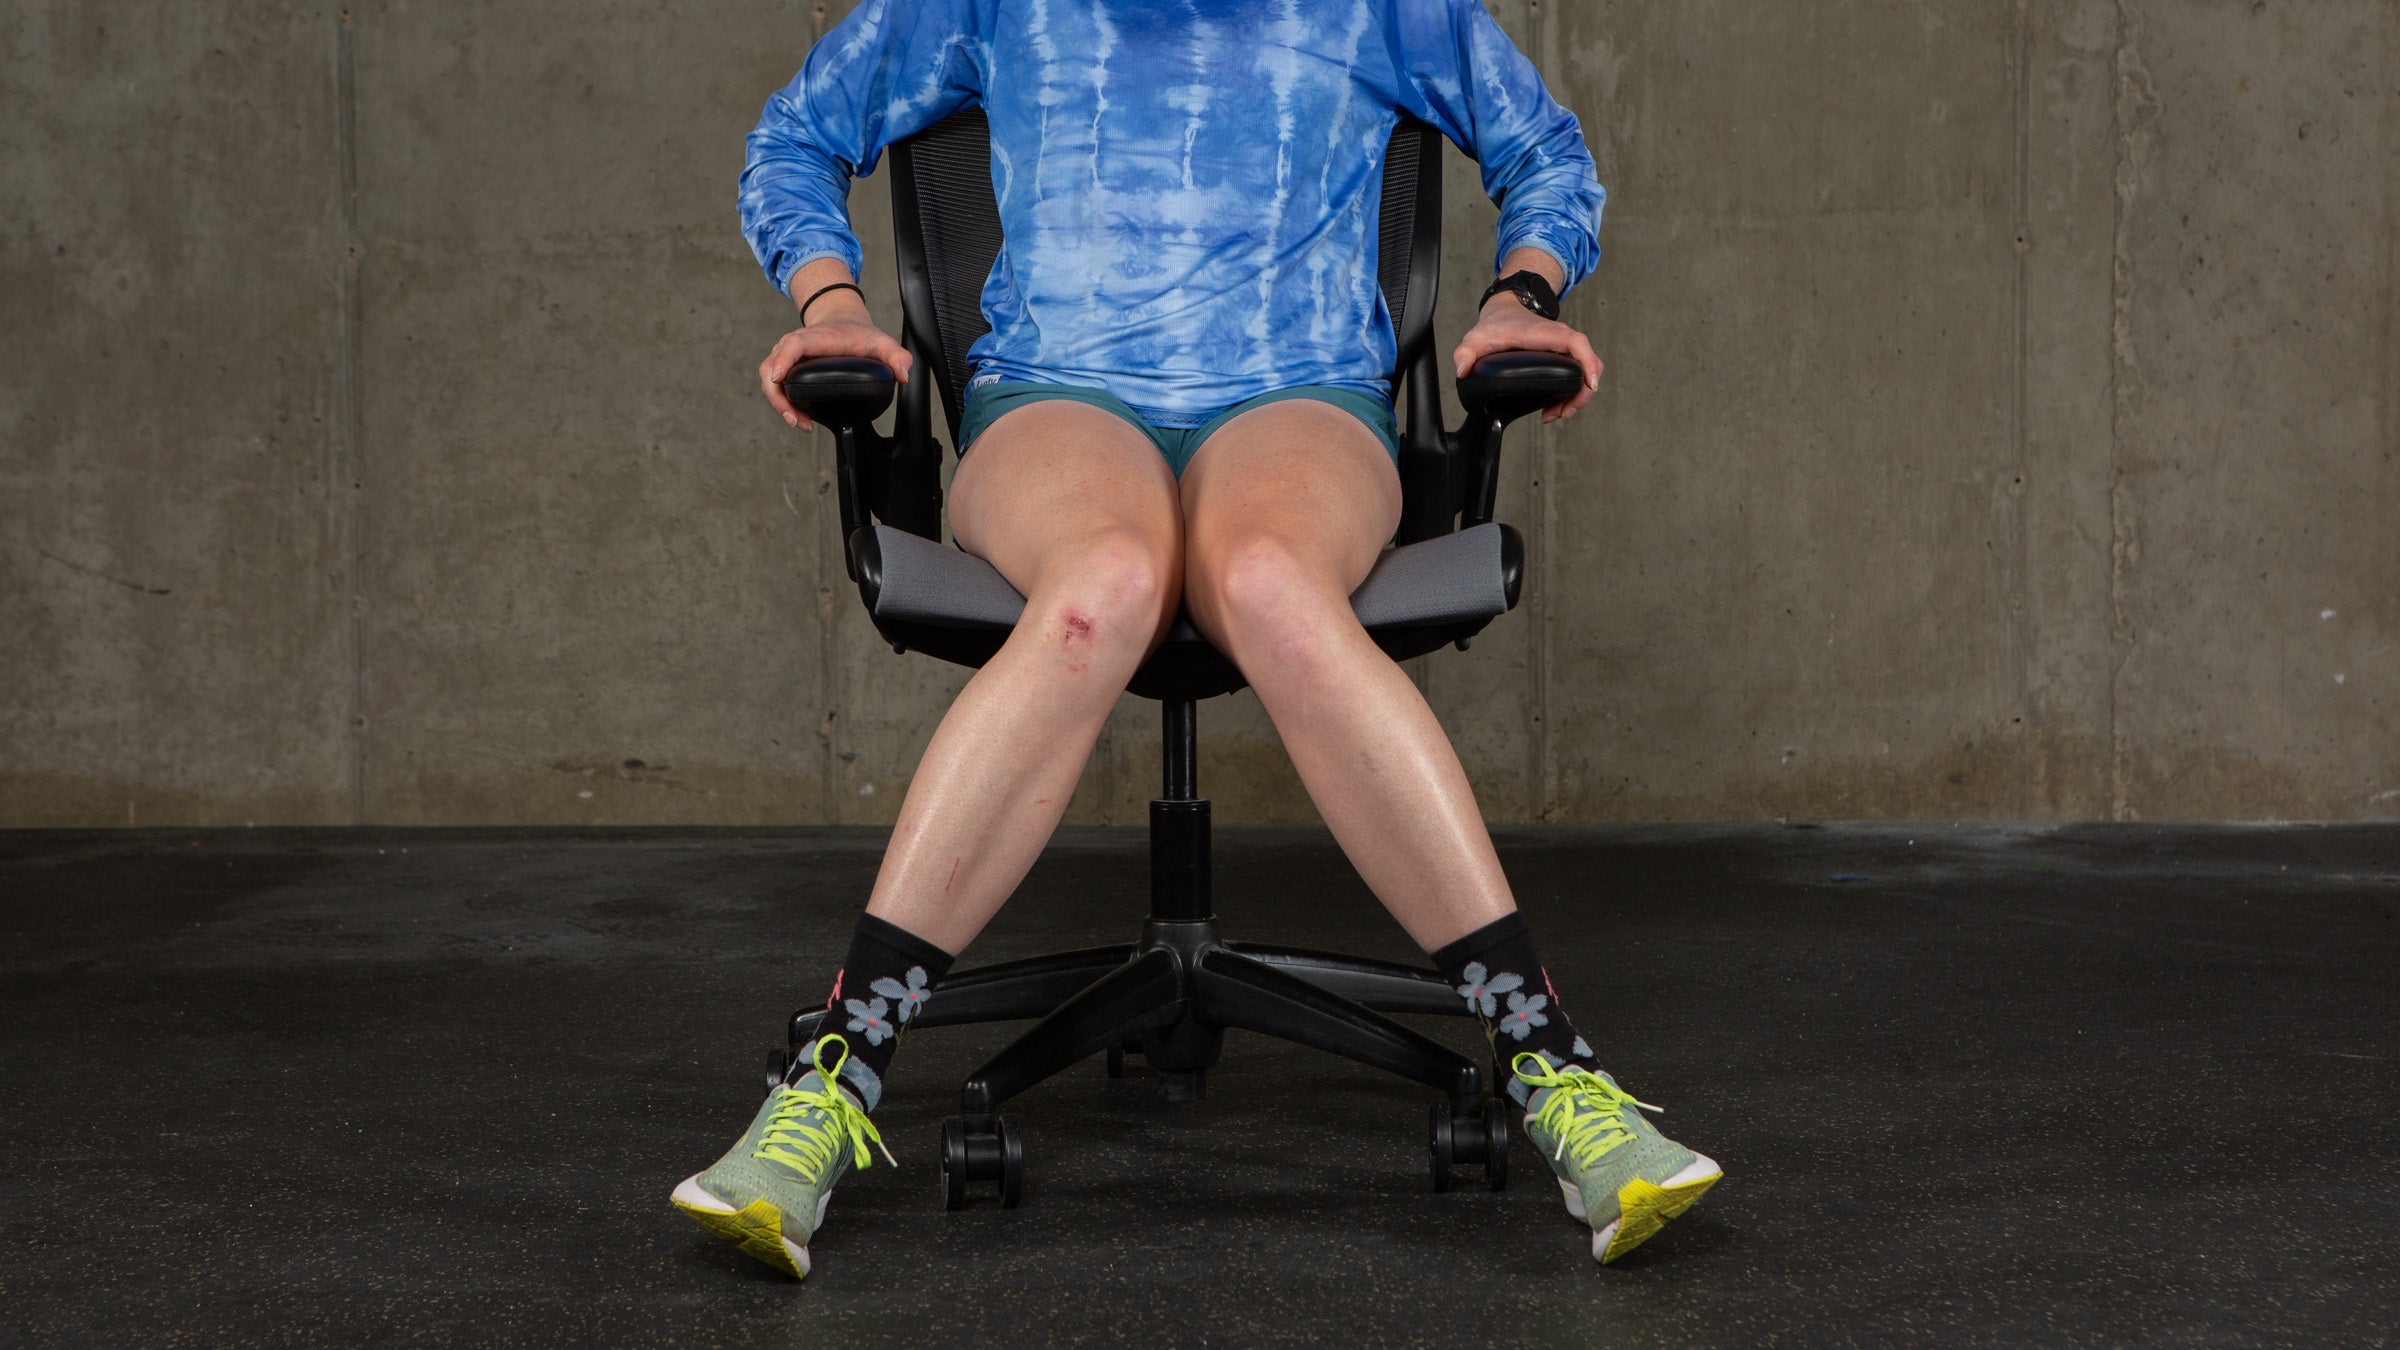
How: Begin sitting on a chair with your hips and knees flexed to 90 degrees. Keeping your knees together, rotate your feet apart, moving your hips into internal rotation. Normal range of motion is about 30 degrees (the angle between the shin bone and an imaginary line drawn down from the knee perpendicular to the ground) in each direction. Assess for symmetry, as well as how the hip feels at the end of the range of motion. If there’s pain, pinching, or feelings of being “stuck”, you might have some limitations at the bone or joint level. If you feel more muscle stretching, then your hip external rotator muscles might be tight. Next, move one leg out to the side of the chair, and rotate the other foot in (moving the hip into external rotation). Note the motion and feel and repeat on the other side. Normal range of motion in this direction is about 45 degrees. Again, assess how you feel at the end of the range of motion-as with internal rotation testing, if there’s more of a muscular stretch, your hip internal rotator muscles might be tight.
FABER Test
FABER stands for Flexion, ABduction, External Rotation, and it can be used to check the hip’s mobility into those positions.

How: Lay on your back, and cross one foot over the opposite knee. Allow that knee to fall out to the side into a figure 4 position and note how close to the ground that knee gets without rotating your pelvis. Repeat on the other side. There are no firmly established normals for this test, but if your knee cannot get within about 4-6 inches of the ground, your hip flexors and groin muscles are likely tight. Also, note any asymmetries and pain. Pain in the lower back or hip could indicate issues with your SI or hip joints that need further evaluation.
Ok, so you’ve identified some potential hip mobility issues, now what? You can approach problem areas by working on flexibility, strength, finding “hip mobility offenders,” and investing in some specialized tools of the hip mobility improvement trade. Read on for more.
Section dividerHow to work on hip mobility via flexibility
Hip mobility may be improved using various stretching and mobilization techniques. In some cases, muscle length is too short to move into functional positions. This is when static stretches, which use prolonged holds to create small tears in the muscle that increase length are useful. Static stretches need to be held for at least three minutes, nearly daily, for several months to create meaningful change. Other times, joint level tightness contributes to limited mobility. This may benefit from mobilization techniques that combine “distracting” (opening up) the hip joint with movement. Hip mobility often is temporarily limited by increased muscle tone or adhesions from overuse or lack of movement, in which case dynamic stretches that impact the nervous system and activate muscles can quickly improve mobility. Below are examples of each of these types of techniques:
Kneeling Hip Flexor Stretch With Band Mobilization
This exercise will apply a mobilization to the hip while stretching the hip flexors, and it is intended to improve hip extension (if your Thomas test revealed tightness, start here).
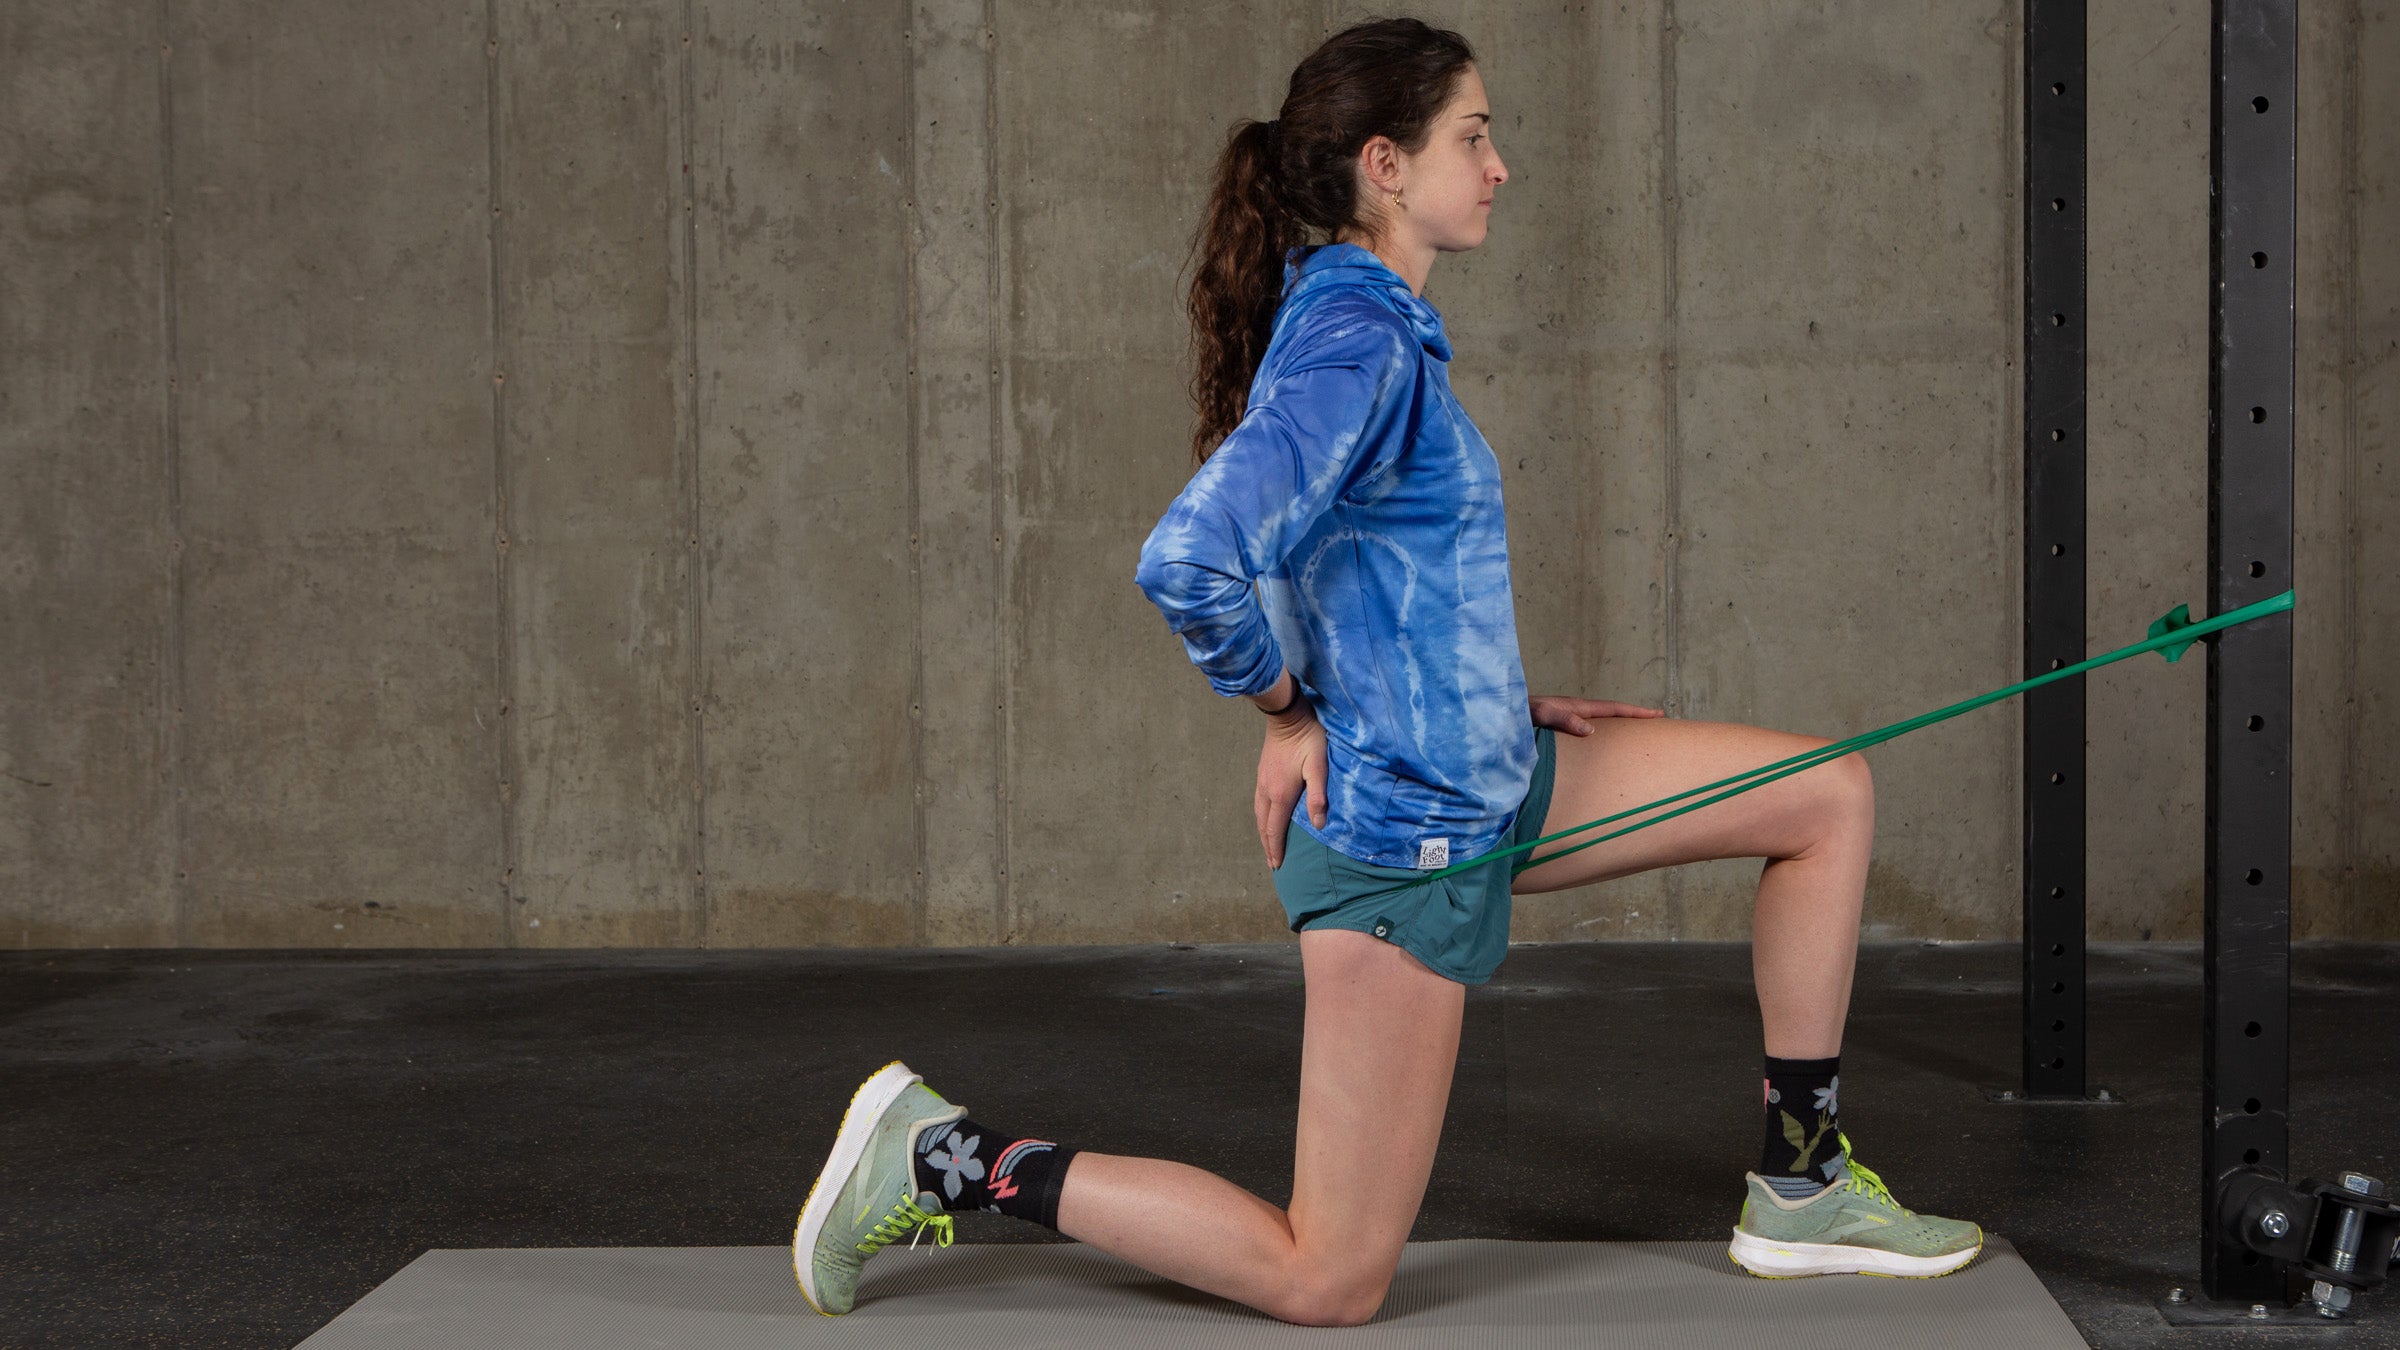
How: Anchor a long loop band (see “Tools of the Trade” below) to a sturdy, non-movable object. Facing towards the band’s anchor, loop the other end of the band around the back of the hip, just below the buttock. Half kneel with one leg forward and the banded leg back, and back up until there is strong tension in the band. Push the banded hip forward, allowing the band to assist by pulling, until a stretch is felt in the front of the hip. Hold 30 seconds-1 minute, and perform 3-4 repetitions.
Quadruped Band Mobilizations
This exercise utilizes band mobilization to gain more hip flexion or rotations as needed.
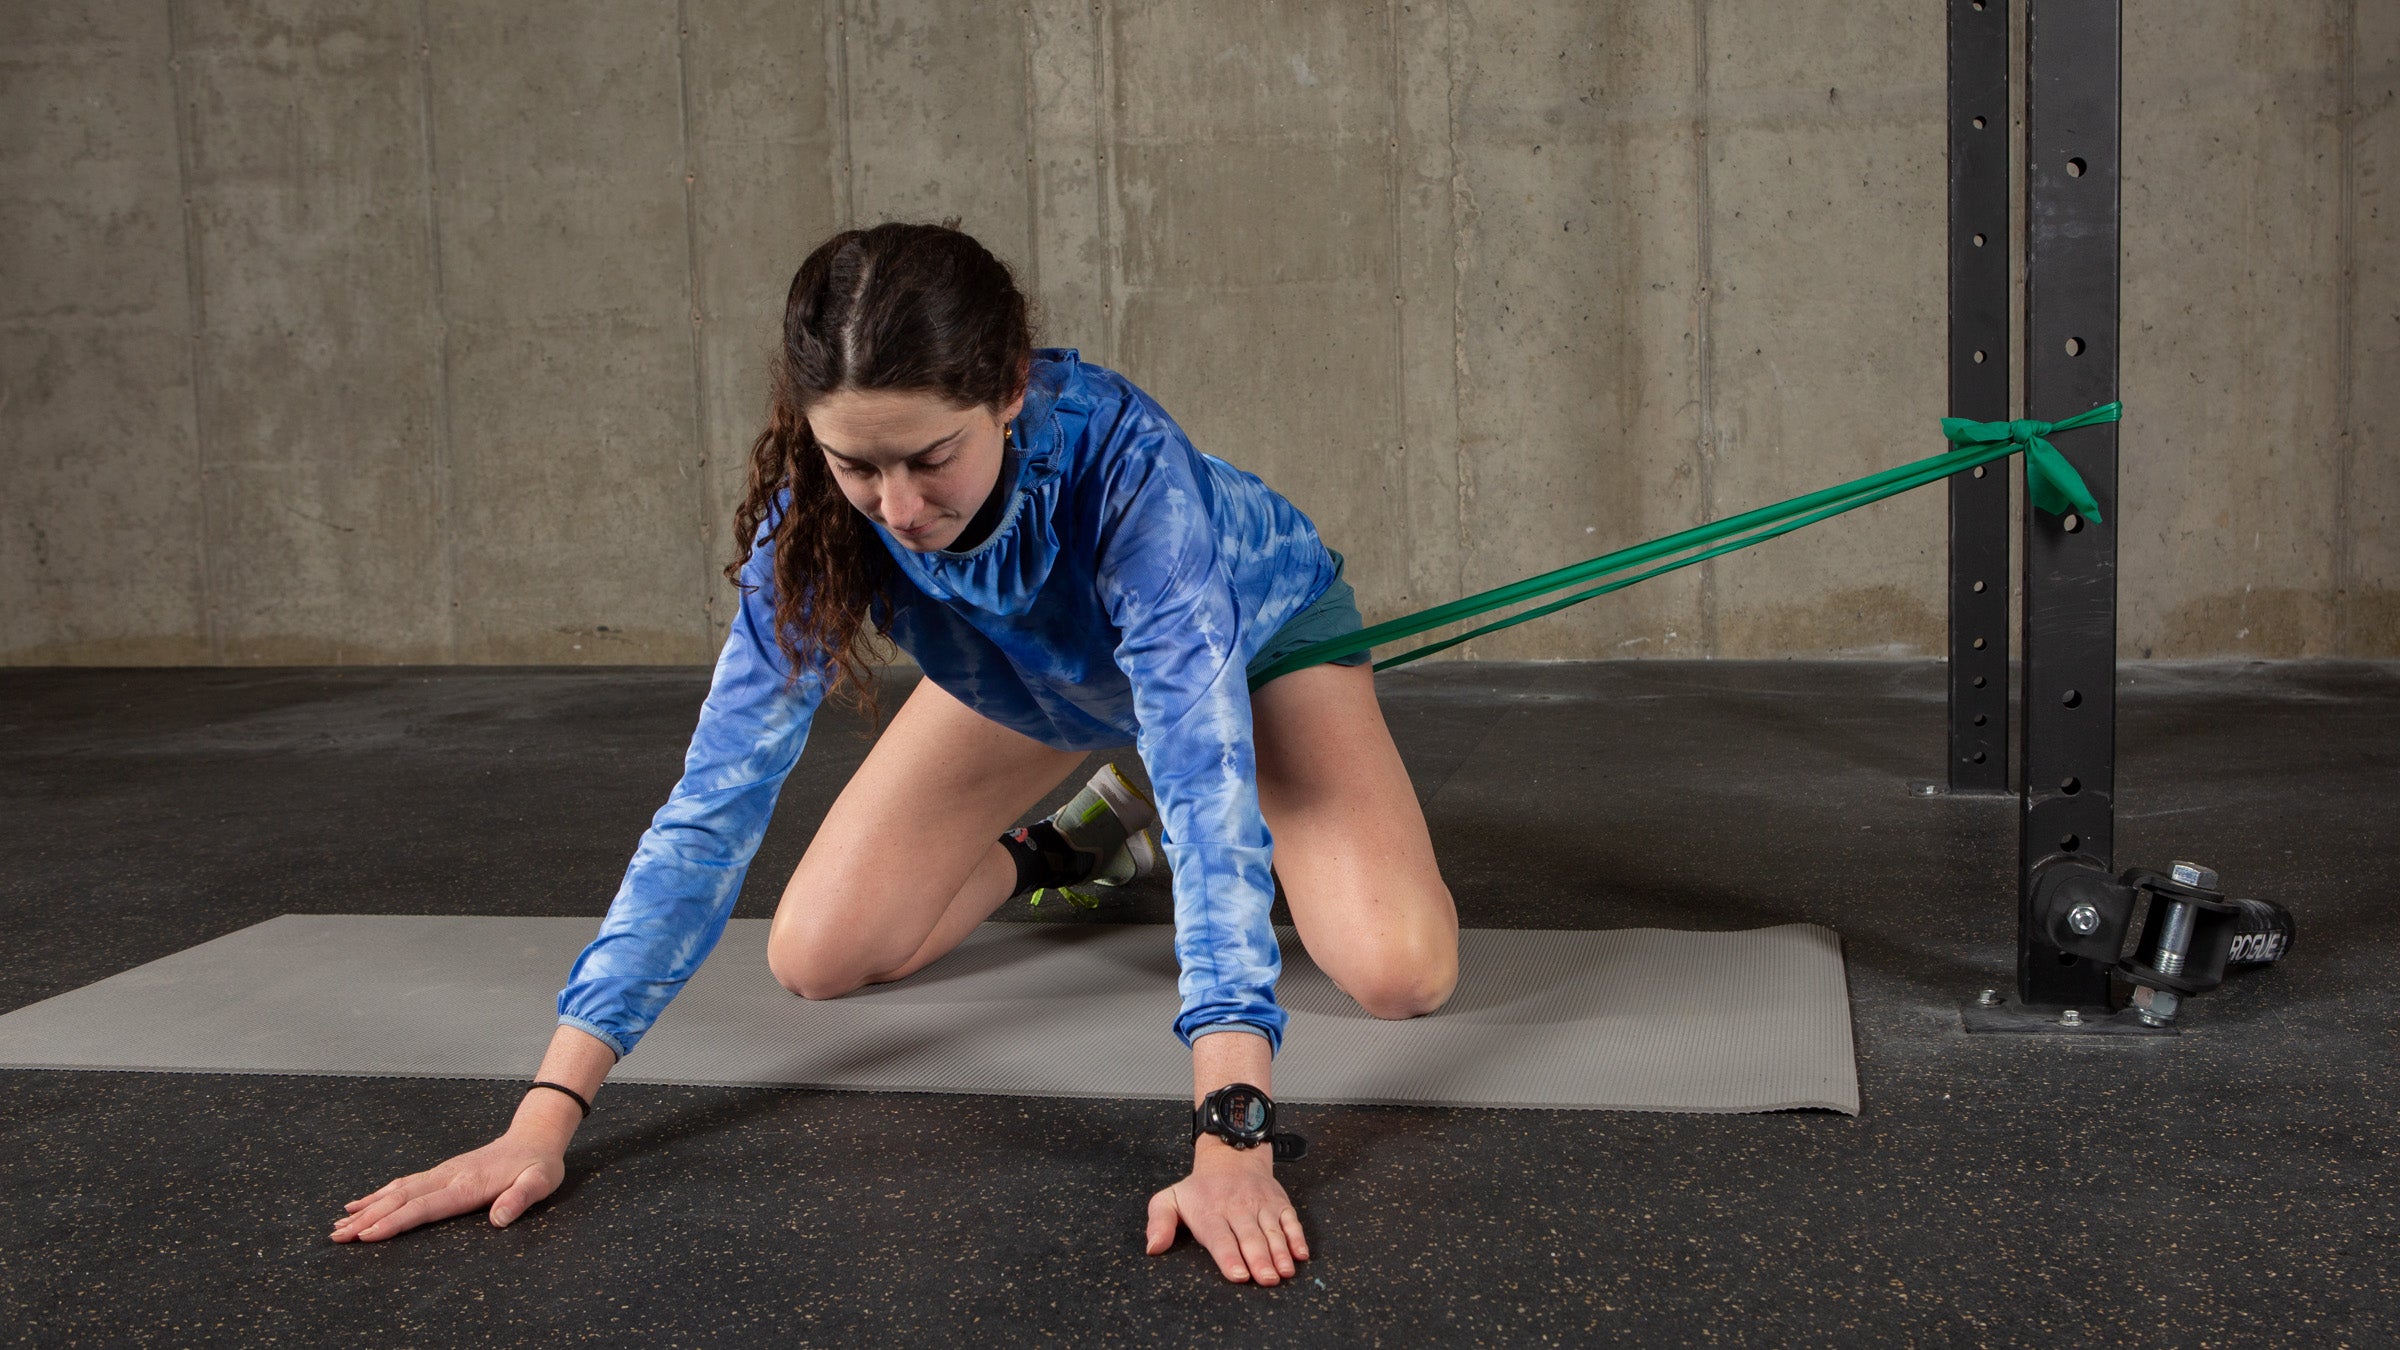
How: Begin on all fours. Anchor a long loop band directly out to one side, and loop the other end of the band around the inside of your thigh, up high near the hip joint. Move to the side until there is a strong lateral pull. If you had difficulty pulling the knee towards the chest during the Thomas test, rock directly back until a pull is felt in the back of the hip. Hold 5-10 seconds and repeat 10-15 times. If you were limited into hip internal rotation, then bias this motion by rotating the foot out slightly, and repeating the rock back. If you were limited into external rotation, bias this motion by rotating the foot in slightly, and repeating the rock back.
Pigeon Pose
The pigeon pose is a common stretch that improves the mobility of the hip flexors, gluteals, adductors, and rotators.
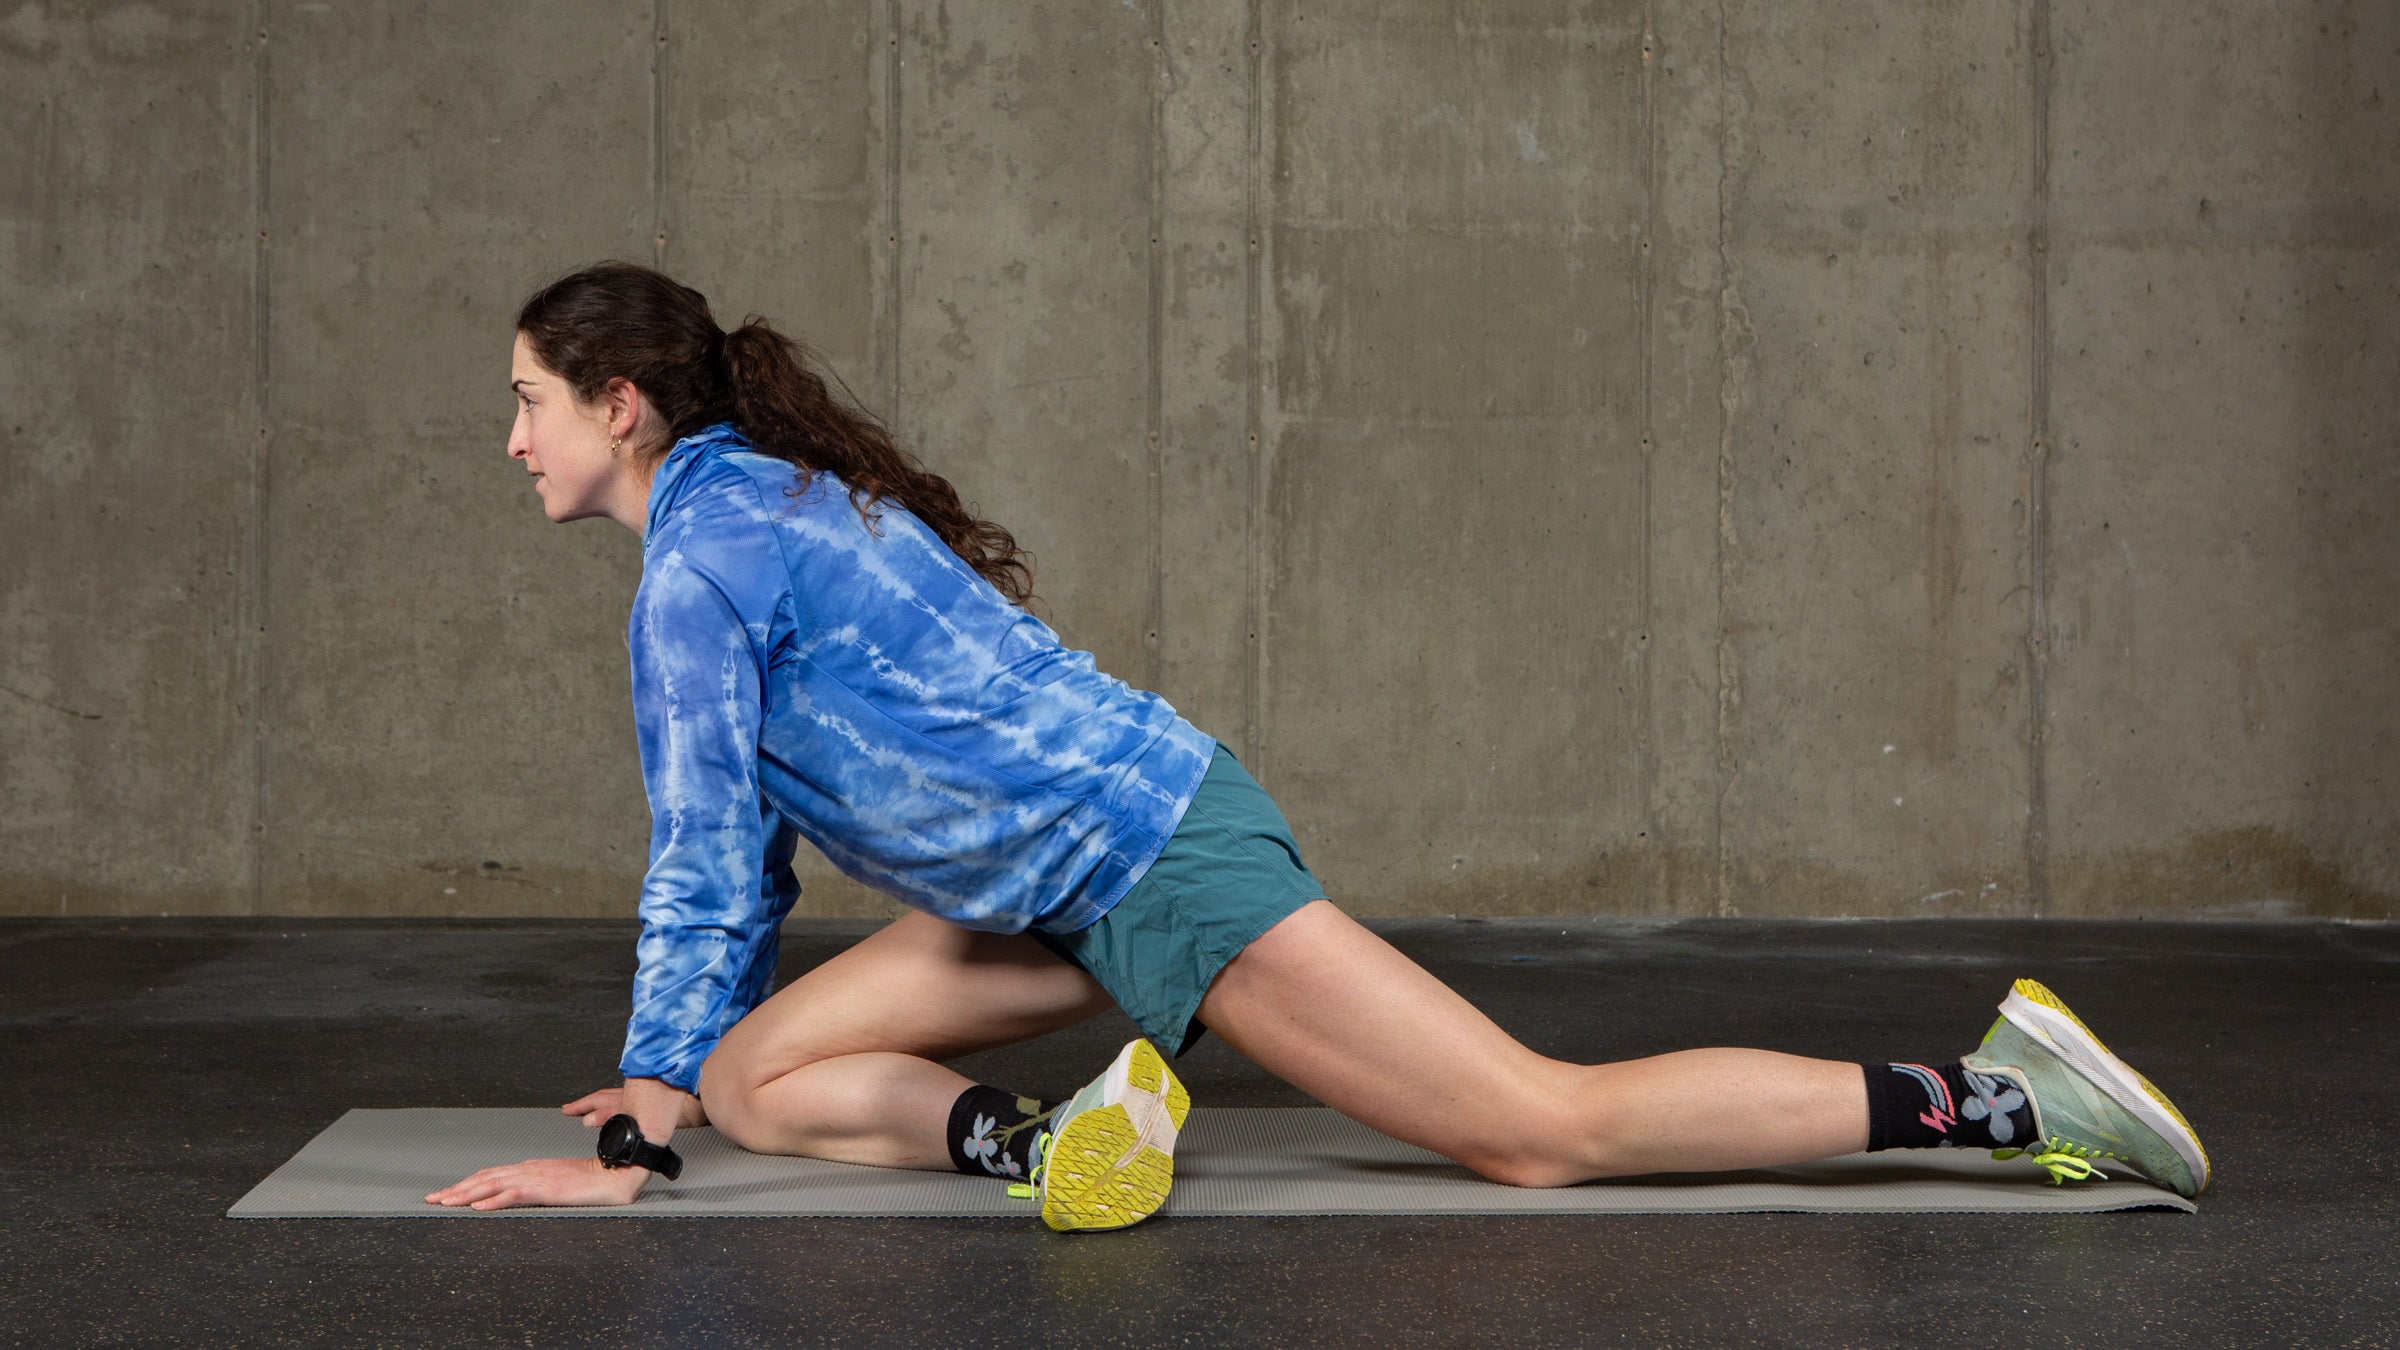
How: Those with tightness on the FABER test would benefit from this stretch. To perform, begin in a push-up position. Bring one leg forward and rotate the leg out to lower the shin towards the ground, attempting to get it close to perpendicular to the torso. Stretch the back leg out and attempt to lower the pelvis towards the ground until a stretch is felt in the buttock area of the front leg, and front of the rear leg. To increase the stretch, lean the torso forward as needed. Hold for about 3 minutes per side.
Hamstring PNF Hold/Relax Stretching
PNF stands for proprioceptive neuromuscular facilitation, which is a series of techniques that utilize muscle activations and the nervous system to improve motion, often of the hamstrings.
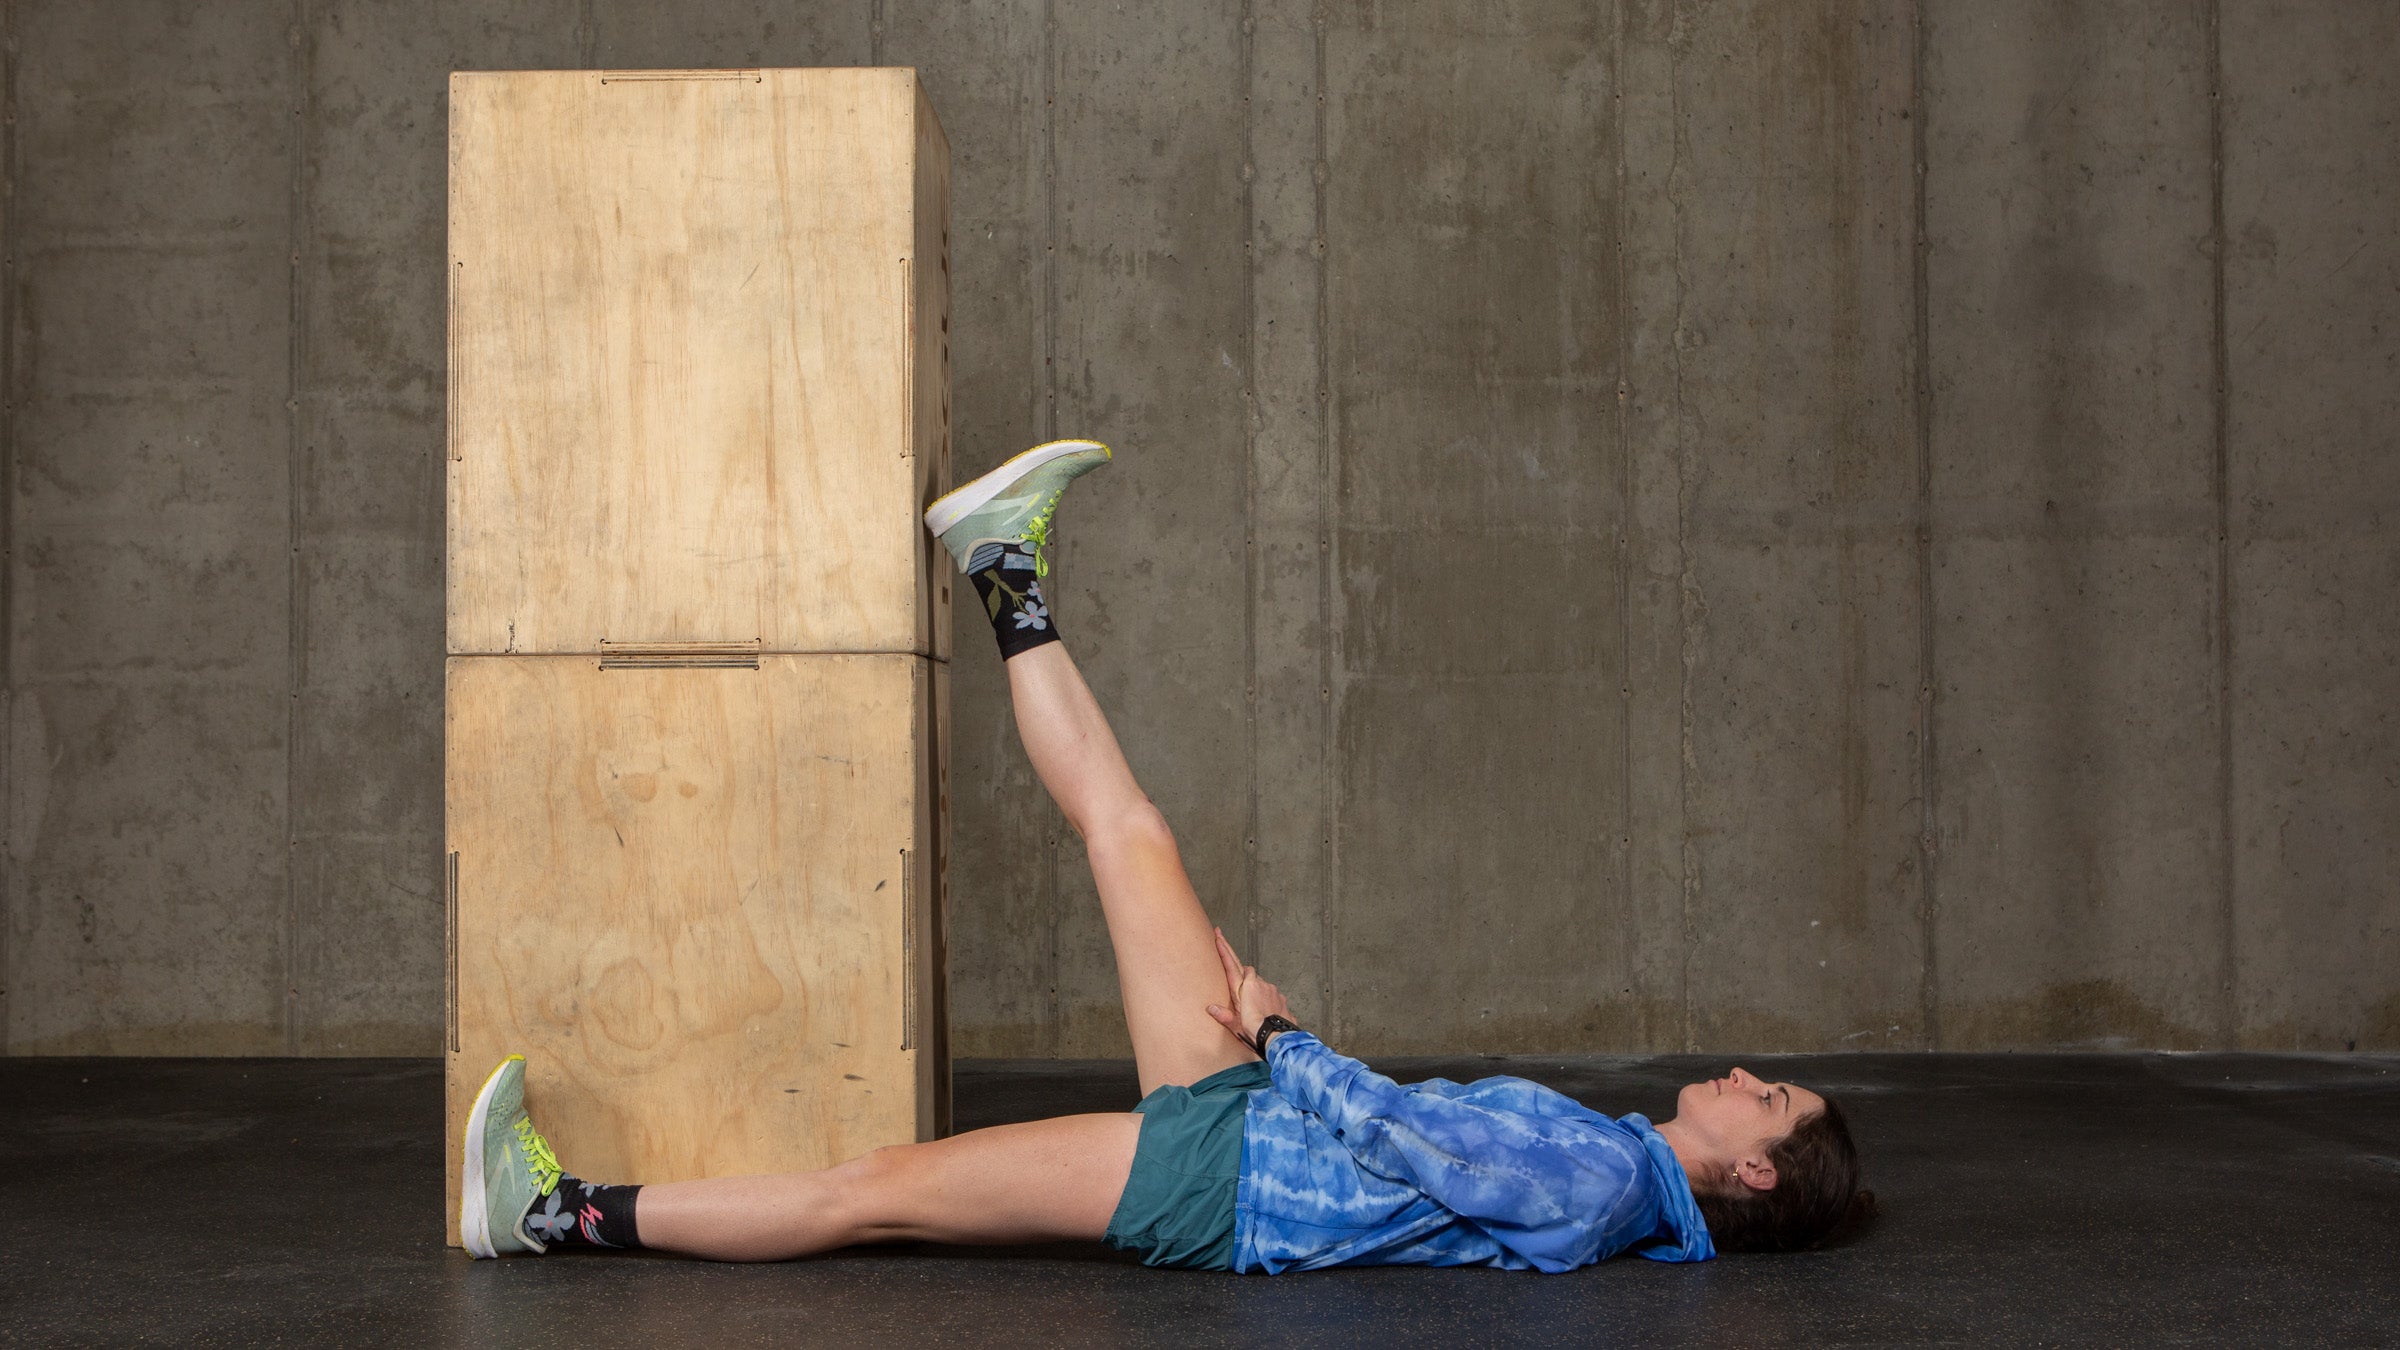
How: To perform a hold/relax hamstring stretch, lay on your back in a door frame, with one leg on the ground through the door frame, and the leg being stretched up against the wall with the knee straight. Slide towards the wall until you feel a stretch in the hamstring. Contract the hamstring by pushing the leg into the wall for 3-5 seconds. Relax, and then slide further towards the wall to increase the stretch. Hold for another 10-15 seconds and repeat 3-4 times.
Which hip mobility stretches should you avoid?
Hold off on any static stretching pre-workout-these can decrease subsequent muscle power. Be judicious after a particularly hard workout or race, too. Tough sessions will cause microtears within the muscle that might make it feel “tight”, but stretching damaged tissue can inhibit healing. Also, when trigger points, muscle spasm, or adhesions are present, using some sort of tool such as a foam roller or percussive or vibration agent (see below) to first reset the nervous system is more appropriate than moving straight into stretching-think of unkinking a hose before yanking on it further. Finally, be aware of orthopedic issues. Tendon issues often react poorly to end-range positions, so consult a qualified professional instead of yanking on your hamstring, gluteal, or hip flexor tendinopathy. Those more bony or joint-related causes of hip mobility limitations also need to be careful. No amount of trying to stretch a hip with certain bone structures into some motions will work, and forcing a torn labrum or arthritic joint into painful positions will just exacerbate issues. So, if you feel hip joint pinching or pain (vs pulling/stretching sensations) at the end of any ranges of motion, avoid those positions!
Section dividerHow to work on hip mobility via strengthening exercises
A muscle that lacks strength is prone to getting overworked and sore, causing adhesions, tightness, and movement deviations. Plus, athletes need to be able to control their motion. Exercises that actively open up the hip and load it throughout its ranges of motion while maintaining a stable base in the trunk and pelvis are key for usable hip mobility. Some exercise examples are below:
Rearfoot Elevated Split Squats
This exercise strengthens and loads the hip through a wide range of flexion and extension motion.
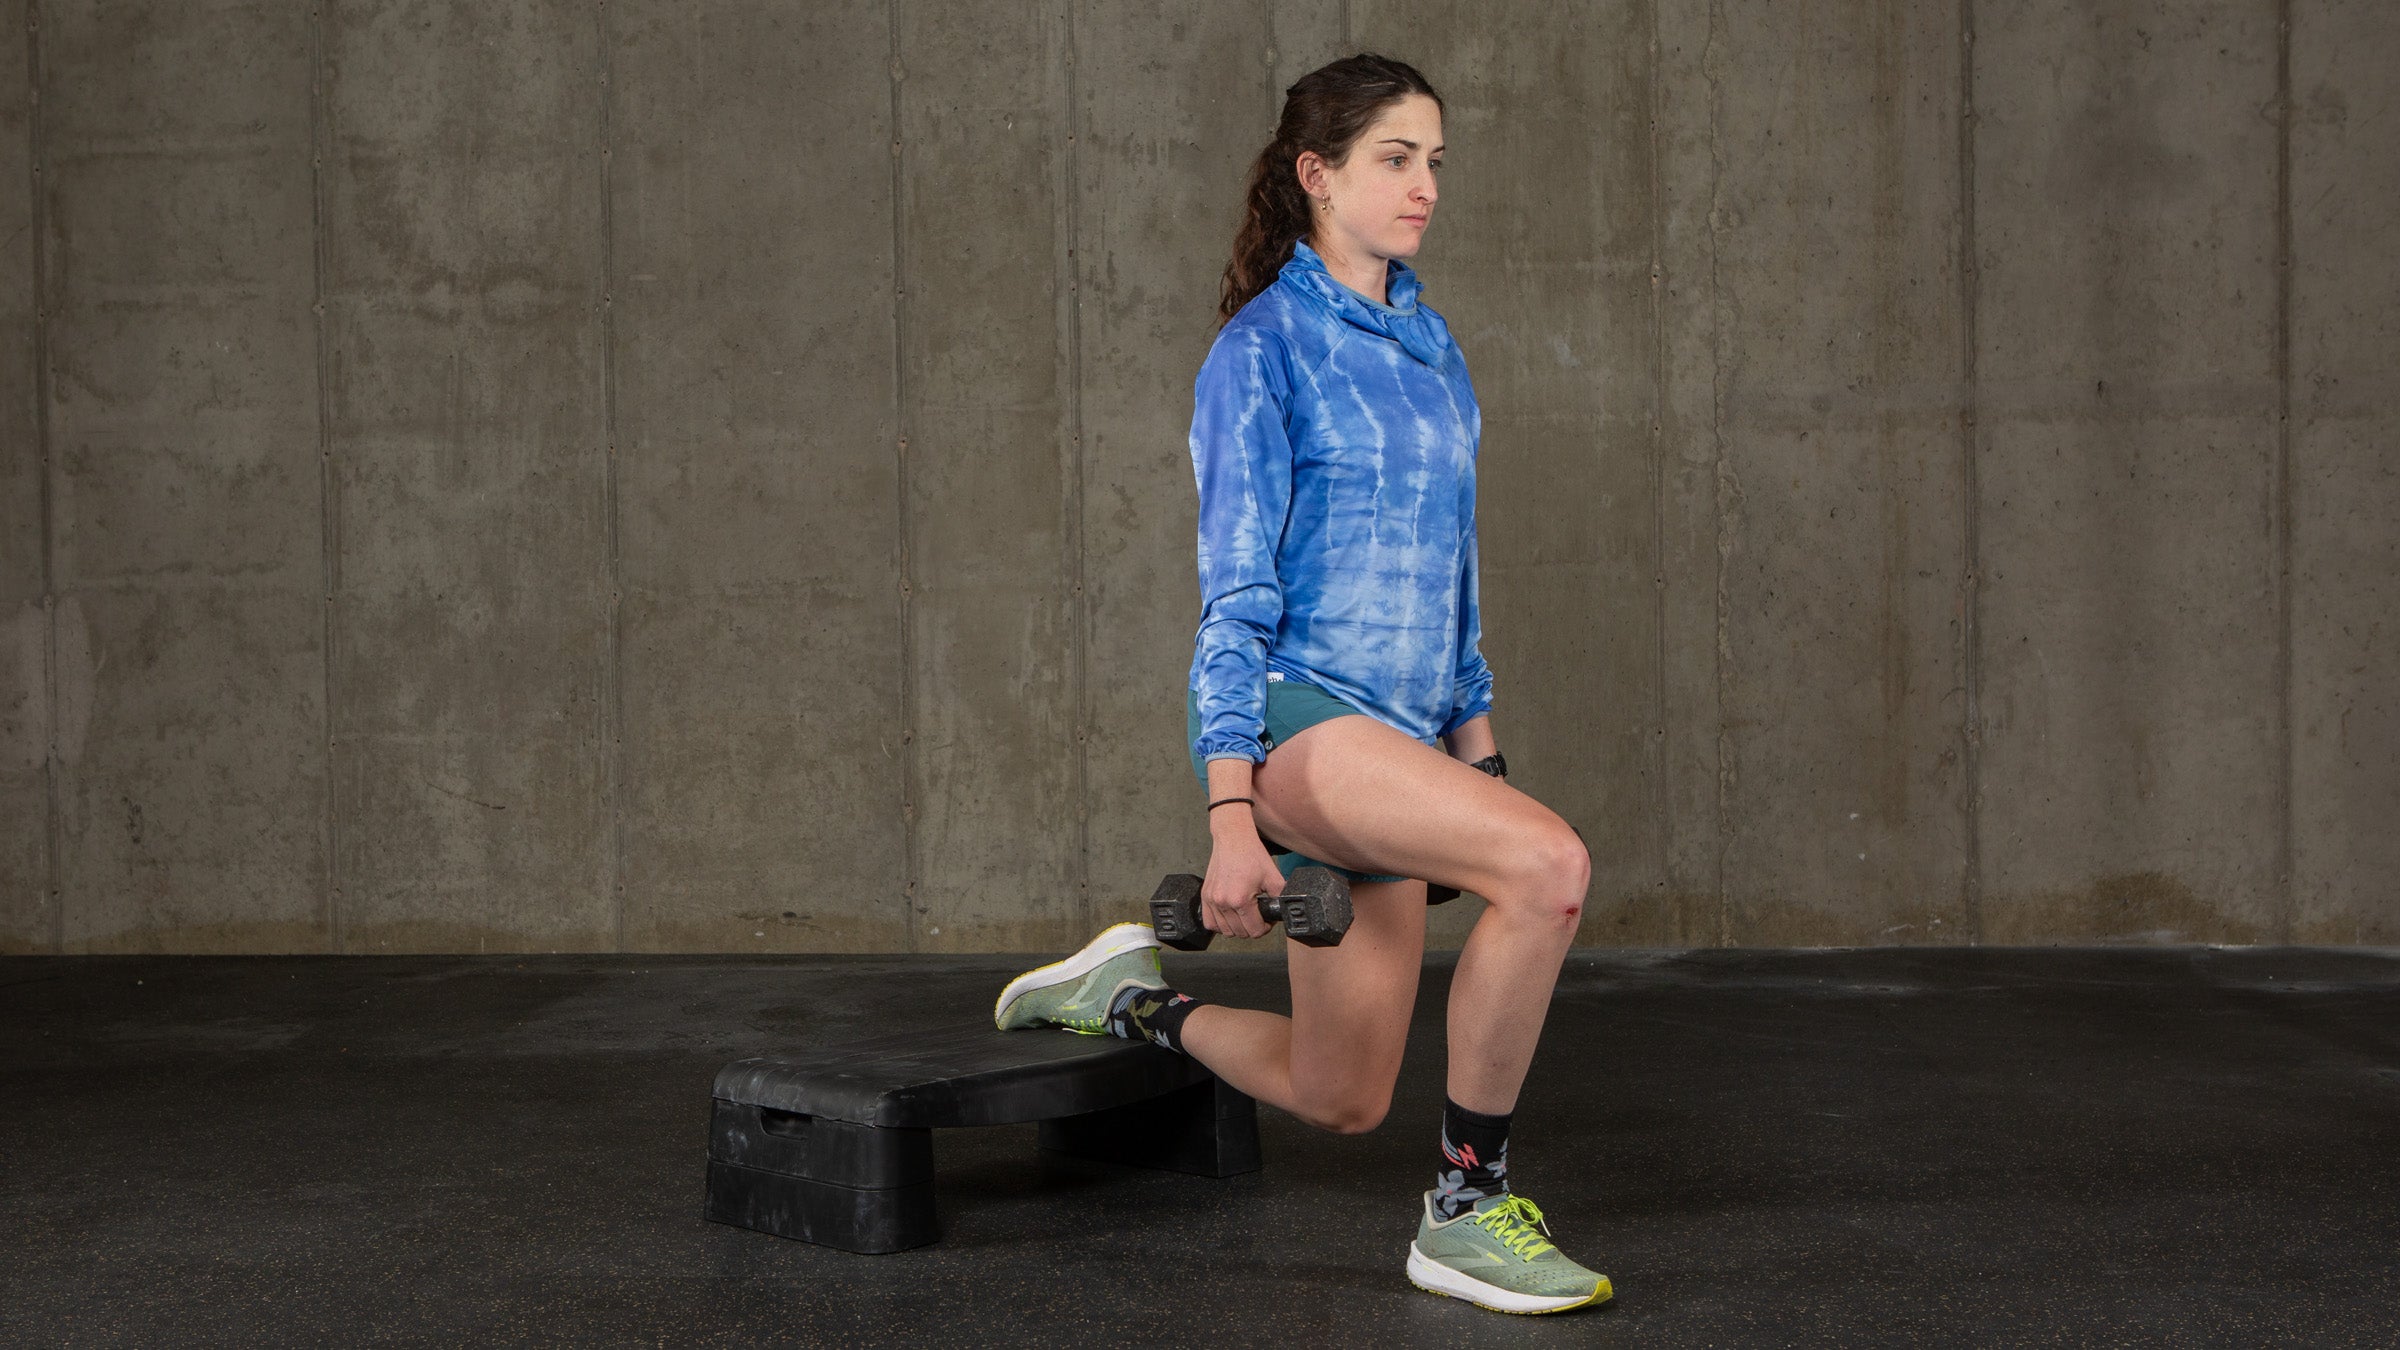
How: Begin standing in a staggered stance, with one foot forward and the other back. If stable enough, place your rear foot onto an elevated surface (step, chair, bench). Bend your front knee, and slowly lower yourself towards the ground as far as possible while maintaining good balance and control. You may feel pulling in the back of the front leg, or front of the rear leg. If your front knee comes forward of your toes, slide that foot further forward. Don’t let the knee collapse in, or trunk fold forward. Push up through the front foot and return to the starting position. To increase difficulty, hold a kettlebell or dumbbell either at your chest, or on the same side as the rear leg. Use a weight that reaches a perceived exertion level of 7-8/10 after 6-8 repetitions and perform 3 sets.
Lateral Lunge
Lateral lunges strengthen multiple hip muscle groups, including the hip adductors on the inside of the leg, through a wide range of abduction and adduction motion.
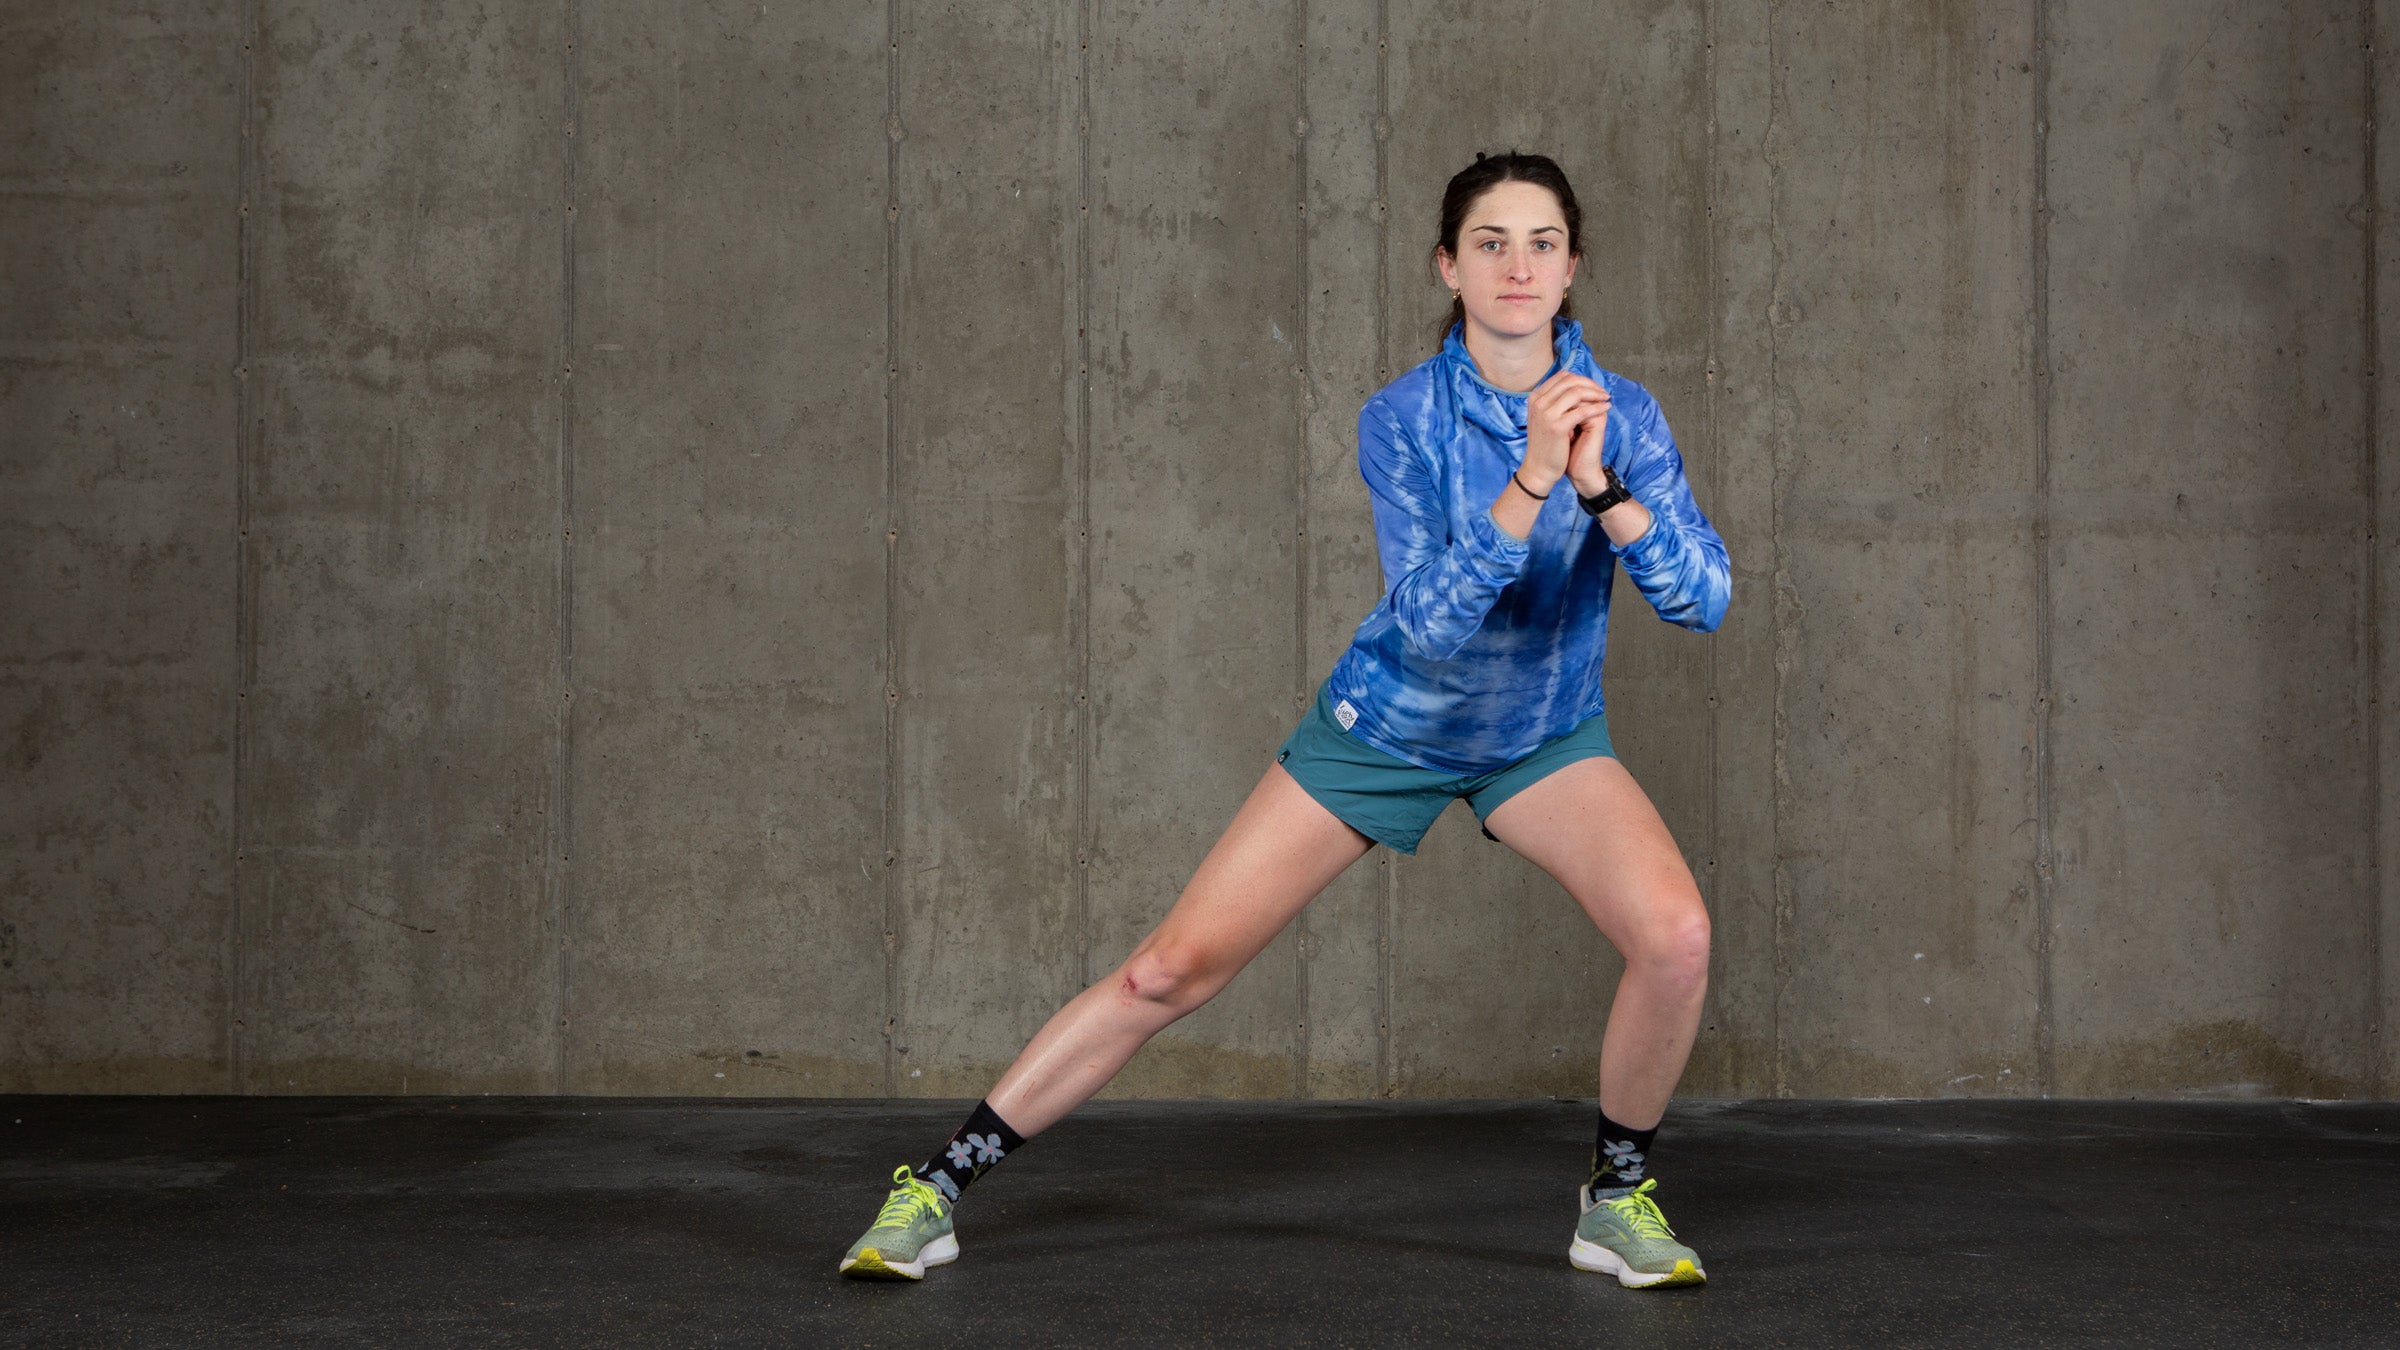
How: Begin standing with your feet shoulder width apart. Take a large step with one leg directly to the side. Keeping the opposite leg straight, push your hips back and bend your knee to lower your body weight over the leg that is out to the side. Your trunk may come forward some, but try to keep your back flat. Push through the foot to return to the starting position. To increase difficulty, hold a kettlebell or medicine ball in front of your chest. Use a weight that reaches a perceived exertion level of 7-8/10 after 6-8 repetitions and perform 3 sets.
Knee-To-Elbows Plank
Knee-to-elbows planks challenge trunk stability while moving the hip in multiple directions.
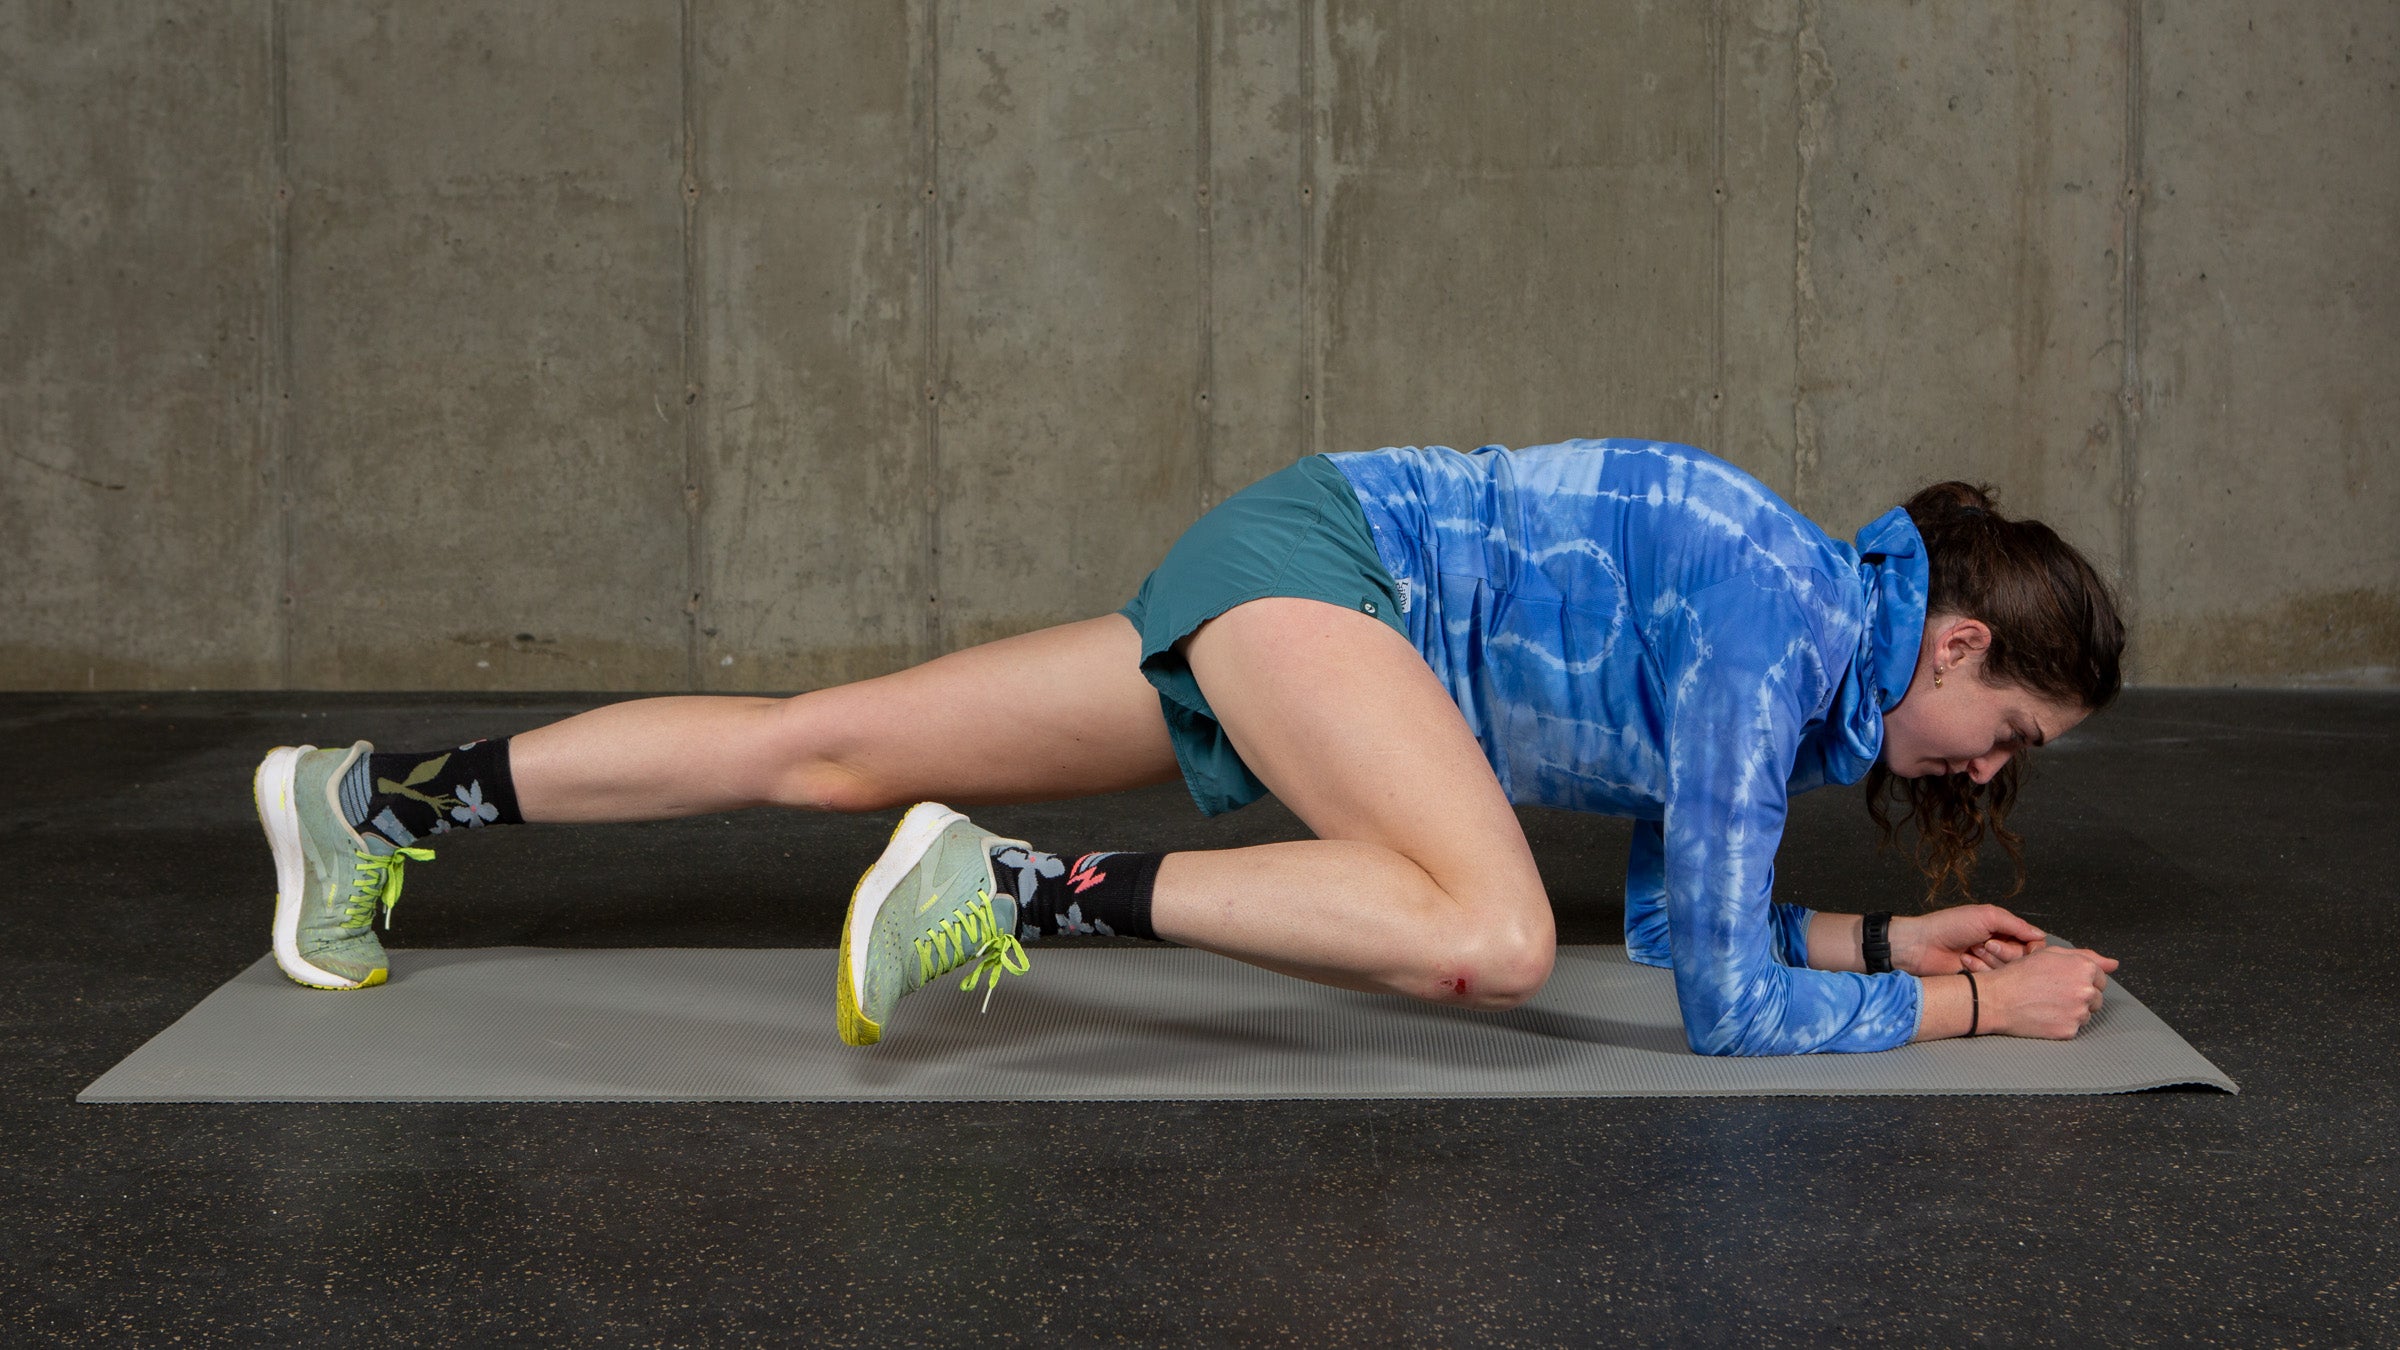
How: Begin in a full push-up position. Keeping your trunk as stable as possible, bend one knee and bring it towards your elbow on the same side, moving your leg up and out. Pause, then return to the starting position and repeat on the other side. Perform 10-15 repetitions per side. Then, bend one knee towards the opposite elbow, moving your leg in and across your body. Return to starting position and repeat on other side. Perform 10-15 repetitions per side.
Banded 3-Way Hip
This exercise efficiently works the hip and pelvis in several directions.
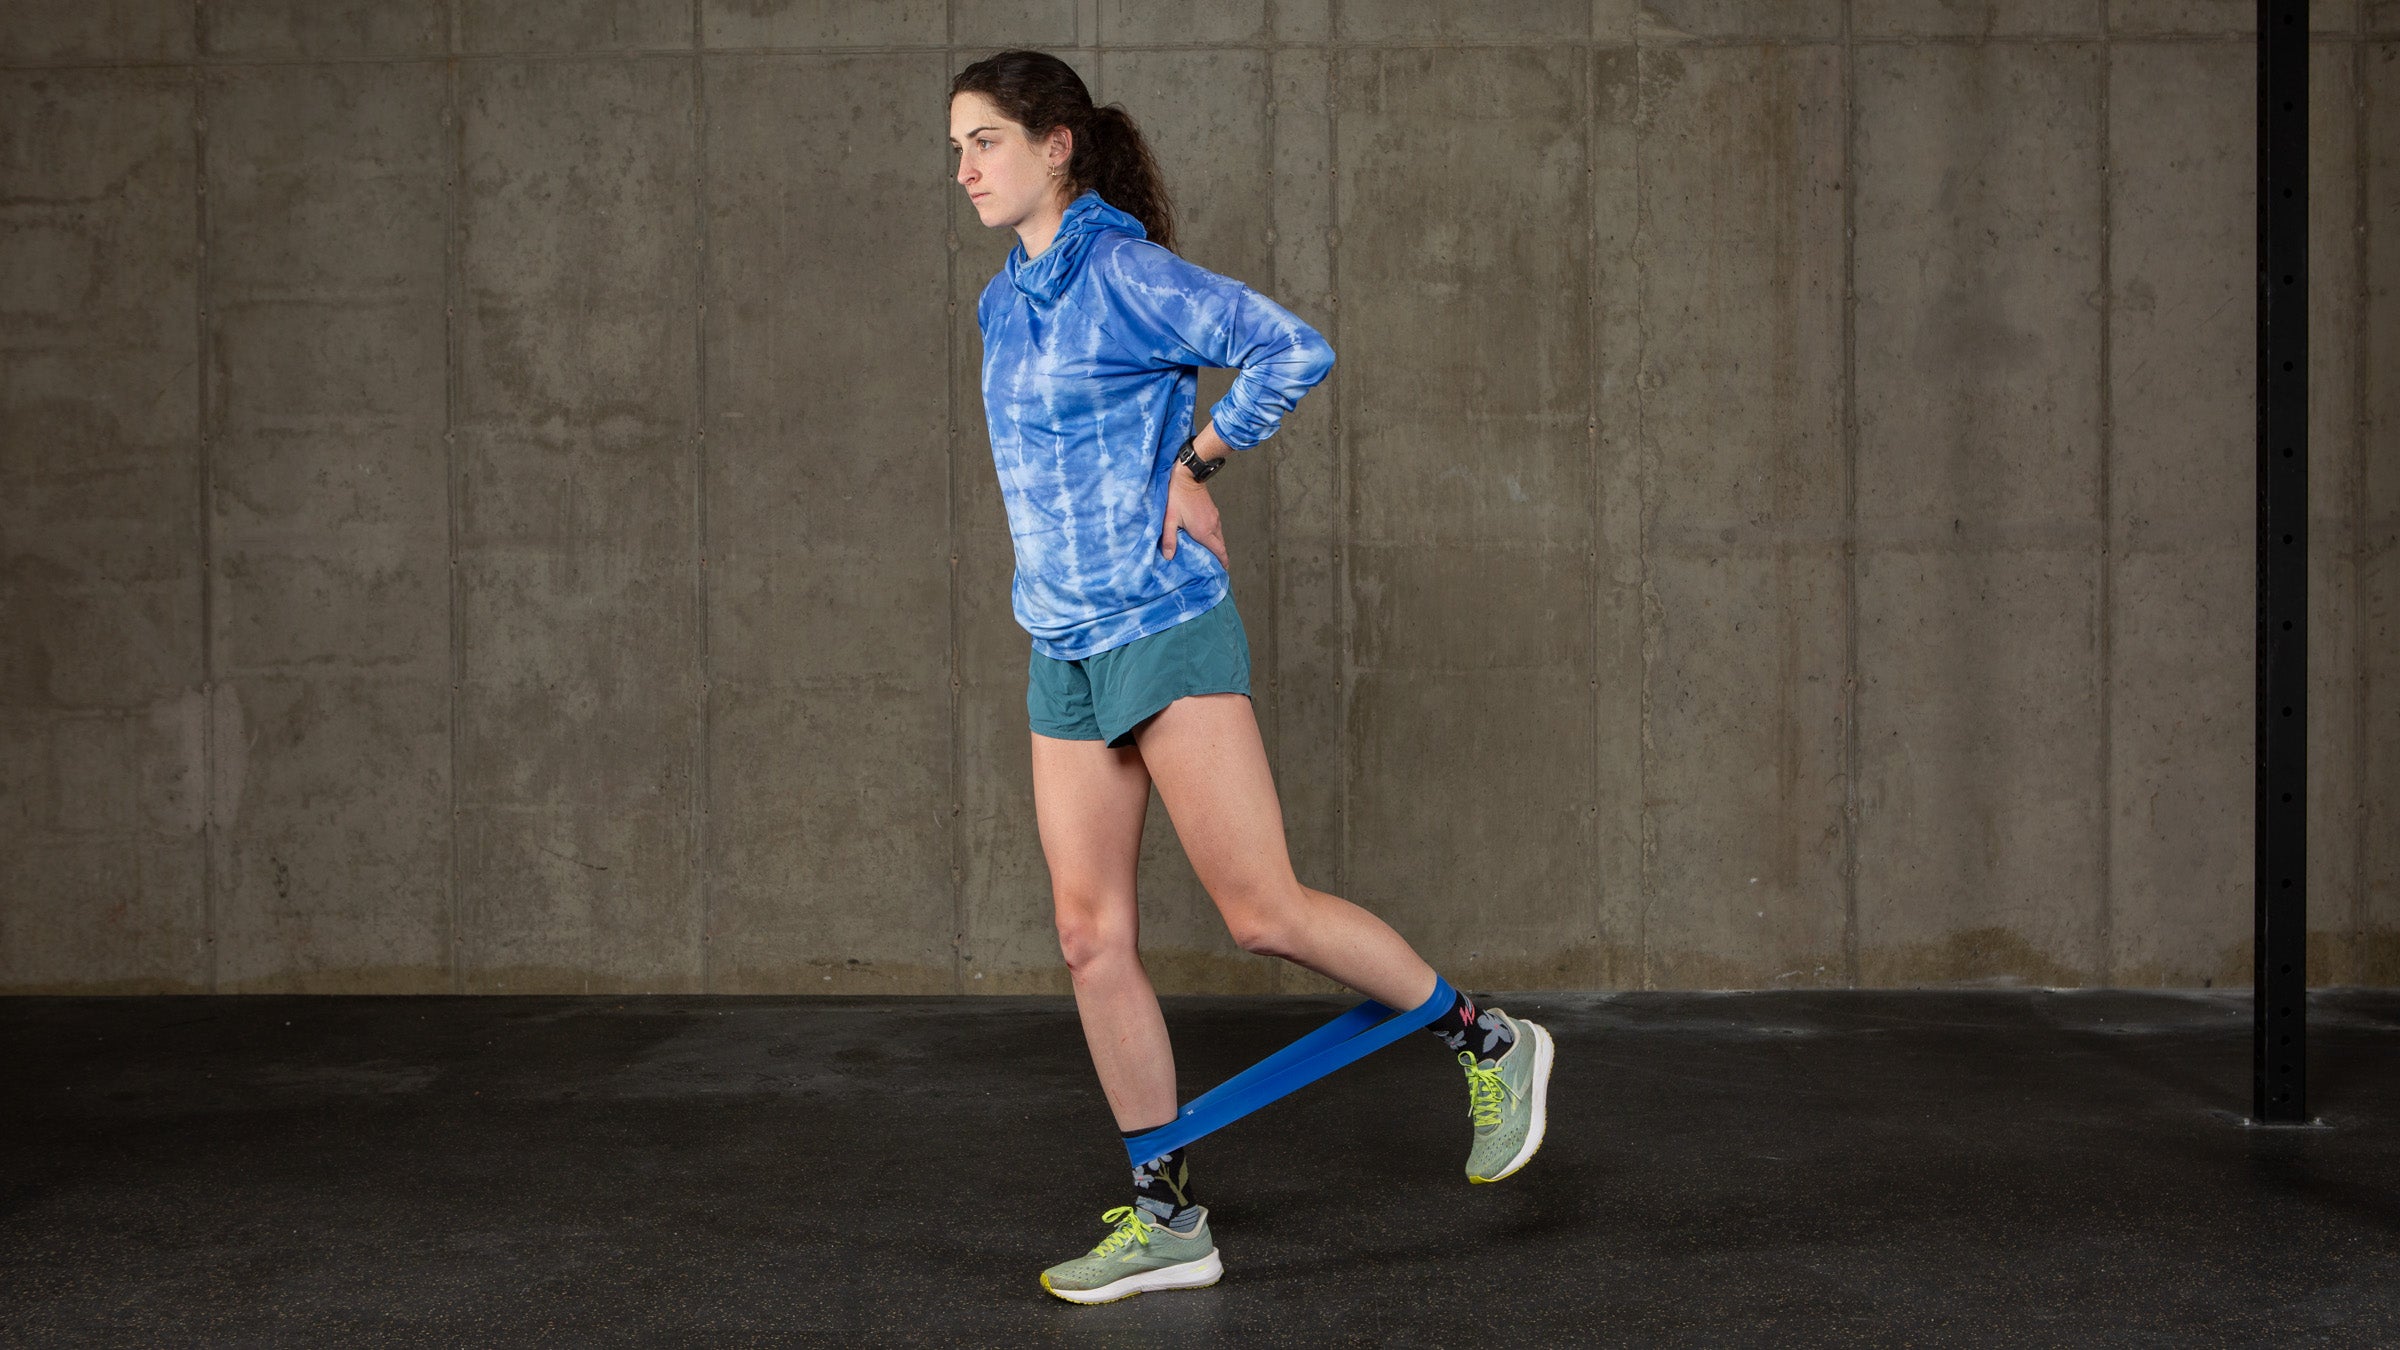
How: Stand on a step with one foot parallel to the edge and the other just off it, with a small resistance loop band around the middle of both feet. Keeping the trunk stable, flex the hip and march the free knee as high as possible against the resistance of the band. Return to the starting position. Then, keeping the knee straight, move the leg as far out to the side as you can, keeping the toe pointing forward and the leg in line with the body. Return to the starting position, and then keeping the leg straight, extend it behind you as far as you can, without arching the back. Return to the start. Perform 5-8 repetitions in each direction, or until you reach a perceived exertion level of 7-8/10. Repeat on the other side
If an exercise loads the hip through its range of motion or challenges pelvic and core stability, it will likely help. Just be cognizant of your own hip’s uniqueness. Although exercise instructions will often include cues such as “keep your toes pointing forward,” anatomical variations in bone structure can influence this. If you naturally toe out (or in) a bit when walking, recognize that you’ll also see this when squatting or lunging, and don’t rotate your leg in unnatural ways to try to “fix” it. Those with labral or arthritic pathologies will want to avoid heavy loading into painful, end-range positions. Also, athletes dealing with tendon issues at the hip will need to be more deliberate about loading them-if this applies to you, see a qualified rehab professional for better guidance.
Section dividerTop hip mobility offenders
Although training alone is often blamed for hurting hip mobility, what happens in the majority of remaining hours of the day is what typically plays an even larger role. These are four of the most common “daily life” hip mobility offenders to watch out for:
- Lots of chair time. Desk junkies, beware: Prolonged sitting in any chair can shorten the hip flexors (and, to a lesser degree, hamstrings). Low, saggy chairs, which further flex the hip and lumbar spine, can particularly exacerbate this, so try to get up and extend those hips regularly throughout the day!
- Awkward sitting or standing positions. Do you tend to sit with both legs swept to one side? Always cross the same leg over the other? Stand shifted to one side, with the other rotated out? These seemingly small, innocuous habits can lead to imbalances and restrictions, especially in the hip rotators, that negatively impact hip mobility.
- The wallet. Shoving a wallet into a back pocket and driving to the store may seem harmless, but this can dig into those deep gluteal muscles and create strain on the hip joint structures and muscles, leading to compression and pain.
- Sleeping position. Everyone is comfortable in their own way at night, but spending hours in certain positions can shorten up hip structures! Side sleepers might notice some tightening of the muscles on the inside of the top leg as it crosses over, while stomach sleepers who tend to “frog” a leg up might end up with some tightness in their deep gluteal muscles or hip flexors-so be aware.
Hip mobility tools of the trade
What, then, can assist hip mobility? Items that relax muscles, help to mobilize the joint, and create a working environment that gives breaks from sitting fall into this category: Some recommendations below:
Vibrating foam rollers
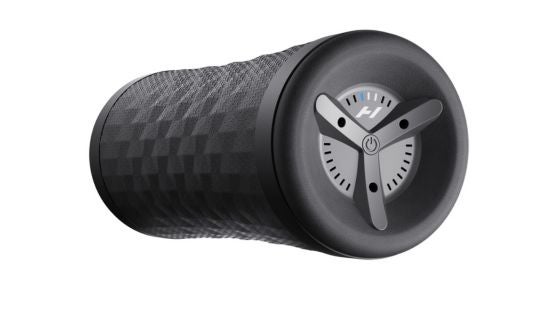
Foam rollers, percussion guns, and vibration therapy all can impact the nervous system to help release tight, spasmed muscles and increase range of motion. In many cases, especially when mobility limitations are related to trigger points or sore muscles, they’re more appropriate than static stretching. Vibrating foam rollers, such as the Vyper 3 from Hyperice, have been shown to increase hip range of motion more than regular foam rollers after heavy exercise, and are a great tool to add to your hip mobility arsenal.
Long loop bands
Long, heavy resistance loop bands are required for some of the mobilizations and strengthening exercises above, and can be incorporated into other exercises and stretches as well. Also often referred to as pull-up assist bands, models like these First Place Superbands from Perform Better work well, with widths in the 1-2.5” range generally providing needed resistances, depending on athlete size and strength.
Desktop riser
Prolonged sitting is an enemy of hip mobility, but a full sit-to-stand desk setup isn’t practical in all settings-and they can get expensive. Desktop risers such as this AlcoveRiser from FlexiSpot can more easily convert your existing desk into a sit-to-stand one, allowing for standing breaks throughout the day to keep those hips from tightening up!
Finally, be sure to evaluate your hip mobility in the offseason/preseason phase of your training to get an idea of your baseline and address any deficiencies before they cause training issues. Try to re-evaluate about every month. This way, you’ll be able to assess if any interventions are helping and identify if any restrictions are developing as training ramps up. The hip joint can be complex, and optimizing and maintaining mobility and control takes work. Strong, mobile hips are key to being a strong, healthy, coordinated triathlete, so keep at it.