Published March 27, 2018 03:01PM
How to Adjust Your Rear Derailleur
Knowing how to adjust your rear derailleur properly can make every ride feel like a million bucks.
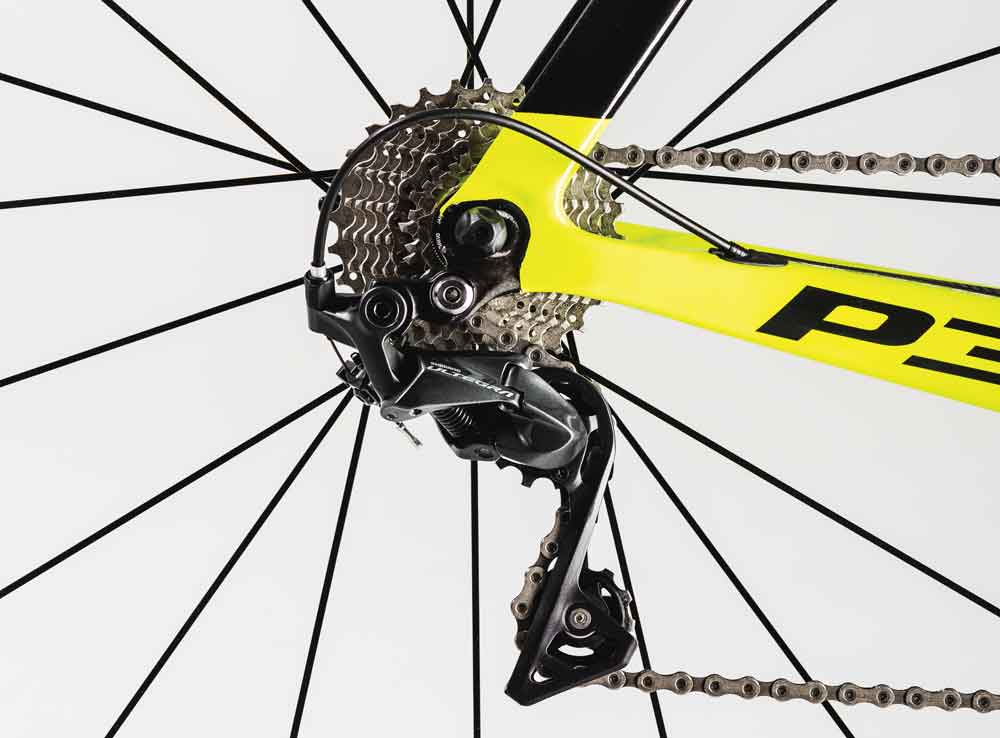
Photo: Oliver Baker
Your rear derailleur may look intimidating, but it’s actually quite simple. Keep it clean and adjusted so it can do its two jobs: moving the chain from cog to cog (what the upper section does) and taking up chain slack (the lower section’s purpose).
The upper parallelogram pivots at its four corners to move the lower section laterally. The lower section’s two jockey wheels roll on either side of the chain and are held within a spring-loaded cage.
Most important in the care of your rear derailleur is to not break it moving through your gears; you can break it by shifting into the spokes or by shifting to your big-to-big gear combination with a chain that is too short. Let’s look at a few crucial adjustments you can make while the bike is on a stand so your rear derailleur does not get ripped apart when you ride.
Limit Inward Movement
The inner-limit screw is one of two screws on the upper parallelogram that limit the range of the derailleur’s lateral movement; it generally has an “L” engraved next to it. On a bike stand, with the chain on the inner front chainring, shift to the largest rear cog. If the chain touches the spokes, stop rotating the crank immediately, and turn the inner-limit screw clockwise 1/8 turn. Repeat until it does not touch the spokes no matter how hard you pull on the cable.
ADVERTISEMENT
Ensure Proper Chain Length
Shift to the big chainring and the biggest rear cog (gently, in a bike stand!). Avoid riding in this combination, since crossing the chain like this wears it rapidly and creates speed-sapping friction, but make sure it can handle this range. While the jockey wheel cage will be stretched forward almost in line with the upper parallelogram, get a longer chain if it can’t reach around the largest cog or is rigidly tight when it does.
Check Lateral Adjustment
Downshift to the smallest (hardest) rear cog. If the chain does not climb to the second cog when you upshift, or if it does so slowly, increase the tension in the cable by unscrewing (counterclockwise when viewed from its end) the cable-tension barrel adjuster on the derailleur or one up higher on the frame or cable housing. If the chain instead overshifts past the second cog, decrease the cable tension by turning the barrel adjuster clockwise (i.e., screw it in). Shift the rear derailleur back and forth among the smallest six cogs, checking for precise movement of the chain from cog to cog and making small corrections with the cable-tension barrel adjuster if necessary. Loosen the “H” limit screw if the chain won’t drop down to the smallest cog.
ADVERTISEMENT
With an electronic rear derailleur, make these adjustments by going into adjustment mode (generally, by holding down a mode button), and tapping the shifters to place the upper jockey wheel directly under the cog; each tap of a shift button in adjustment mode moves the derailleur over about as much as one click of a barrel adjuster does. The other adjustments are the same as a cable-actuated derailleur.
Lennard Zinn is a longtime technical contributor for VeloNews, a frame builder, a former U.S. national cycling team rider, and the author of countless bike maintenance books including Zinn & the Art of Triathlon Bikes.